Pruning
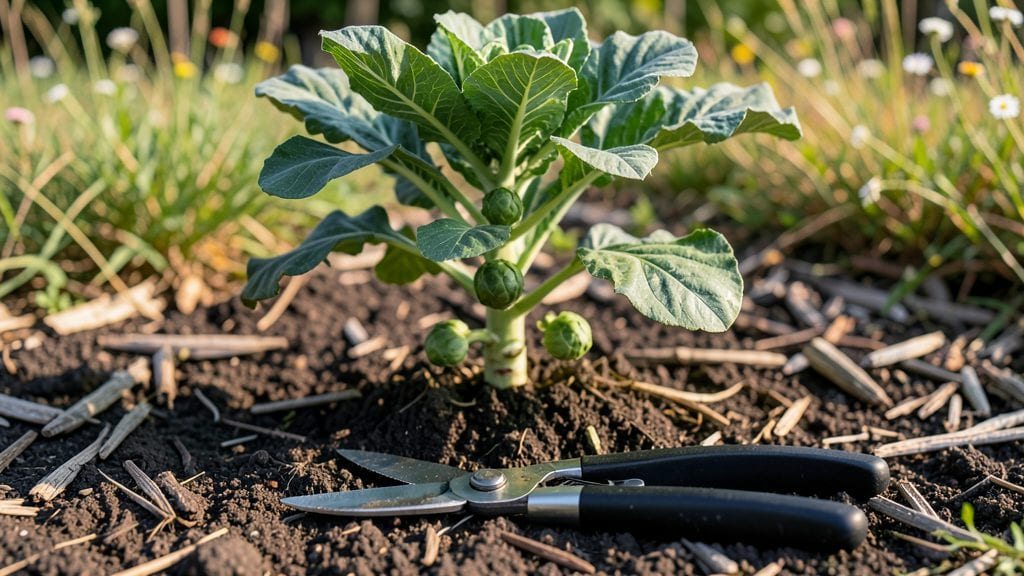
Trimming Brussel sprout plants isn't just about getting more harvests—it's about keeping your plants productive and healthy for months longer than most gardeners expect. 🌱 I learned the hard way that skipping this step means smaller sprouts and a plant that peters out by Thanksgiving.
The right cuts encourage the plant to focus energy on producing those tight, flavorful buds instead of just growing taller.
You only need three basic tools: sharp pruning shears, a clean knife for precise cuts, and a bucket to collect the trimmed foliage. Start trimming when the main stem reaches about 18 inches tall, and work your way up the plant every 2-3 weeks as new growth appears.
The key is cutting just above a leaf node—never tear the stem, and always leave at least 6-8 inches of growth below the last cut.
What you'll end up with is a plant that keeps producing tight, flavorful sprouts well into winter, even after the first frost. The plant stays compact, resists disease better, and gives you two to three harvests where others get just one.
Plus, those trimmed leaves make great compost or mulch—nothing goes to waste.
This method works for both fall-planted and spring-planted varieties, though timing shifts slightly depending on your first frost date. The same principles apply whether you're growing in the ground or containers. Once you master it, you'll wonder how you ever settled for store-bought sprouts.
📚 In This Guide
- What you need
- Instructions
- Tips and common mistakes
- Wrapping up and next steps
What you need
- ● Sharp pruning shears or secateurs – Choose bypass pruners (not anvil-type) for clean cuts. Size: 6-8 inches, with stainless steel or high-carbon blades for durability.
- ● Garden gloves – A pair of cut-resistant, breathable gloves (e.g., nitrile-coated) to protect your hands from thorns and dirt.
- ● Disinfectant (70% isopropyl alcohol or bleach solution) – 1 part bleach to 9 parts water to sterilize tools between cuts and prevent disease.
- ○ Sharp knife or razor blade – For trimming smaller stems or delicate leaves. Optional but handy!
- ● Bucket or container – A 5-gallon bucket with a lid to collect trimmed sprouts and debris.
- ● Pruning saw (if needed) – Only for thick, woody stems (rare in Brussels sprouts but useful for older plants).
- ● Plant marker or labels – To track trimmed sections if you’re experimenting with staggered harvesting.
- ● Hose with nozzle – For rinsing tools and hands post-trimming (or a small spray bottle for quick cleanups).
- ● Compost bin or bag – To repurpose trimmed leaves and small stems as nutrient-rich compost.
- ● Knee pads or stool – Because trimming 6-8 foot tall plants is easier on the joints!
Step-by-Step guide for trimming brussel sprout plants
Here's the method I use to keep my brussel sprout plants producing all season long.
✂️ Step 1: Identify Mature Sprouts Ready for Harvest
Brussel sprouts mature from the bottom up, so start checking the lowest buds first. Look for 1-1.5 inch diameter sprouts with tight, compact leaves—these are ready to pick. The key is firmness: press gently with your thumb; if it feels solid but still tender, it's perfect.
I always harvest on a dry morning after the dew has dried. Wet sprouts bruise easily when trimmed. Use sharp pruning shears or a knife to avoid crushing the stem. Cut cleanly about 1 inch above the sprout—this prevents rot from spreading to the plant.
✂️ Step 2: Trim to Encourage New Growth
After removing the bottom sprouts, you'll notice new buds forming higher up the stem. This is your plant's way of telling you it's ready for more! Trim the stem just above the lowest remaining sprout—this prevents the plant from putting energy into a bare stem.
Here's the thing—don't remove more than 1/3 of the plant at once. This keeps the plant healthy and productive. If you see yellowing leaves, it's a sign you've trimmed too aggressively. Those leaves are still photosynthesizing, so leave them until they're fully brown and crispy.
✂️ Step 3: Prune Side Shoots for Better Airflow
Brussel sprout plants develop side shoots that compete for energy. Use your fingers or small pruners to pinch off any shoots growing from the main stem below the sprouts. These shoots rarely produce quality sprouts and drain the plant's resources.
Focus on the lower half of the plant first, as these shoots grow faster there. You'll see a difference in just a few weeks—the main stem will thicken, and the remaining sprouts will grow larger and tighter. This step is especially important if your plants are crowded.
✂️ Step 4: Maintain the Plant Through the Season
Continue harvesting the lowest mature sprouts every 1-2 weeks as they form. The plant will keep producing upward as long as it has energy. In late summer, you might need to protect young sprouts from pests with row covers or netting.
When frost threatens in fall, leave the top 6-8 inches of stem with any remaining sprouts. These will often mature after a light frost, giving you an extended harvest. Once all sprouts are gone, cut the plant down to 2 inches above ground and compost the stalks.
⏰ Step 5: Prepare for Next Year's Harvest
After the first hard frost, when all sprouts are harvested, mark your calendar for next spring. Brussel sprouts are biennials—they'll regrow from the base in spring if you leave the roots intact. Cut back any dead foliage in early spring, and you'll often get a second harvest from the same plant!
This is where it gets fun—your plant becomes a perennial! Just keep trimming and harvesting the same way, and you'll have a productive brussel sprout patch for years. The key is patience; these plants reward consistent care with a steady supply of delicious sprouts.
Tips & tricks for perfect brussel sprout plant trimming
A few key tricks will help you maximize your harvest and keep your brussel sprout plants thriving all season.
Visual Cues for Step 1: When checking for mature sprouts in Step 1, look for a slight color change at the base of the sprout—it should turn from bright green to a pale yellow-green. This subtle shift indicates the sprout is ready to harvest. Also, the leaves should be tightly packed like a miniature cabbage; if they're loose or starting to spread, wait a few more days.
Pruning Precision in Step 3: For side shoots in Step 3, focus on removing any shoots that are growing directly from the main stem below your target sprouts. These side shoots often grow at sharp angles and can be easily pinched off with your fingers. Removing them early prevents the plant from wasting energy on low-quality sprouts. I've found that using small pruning shears for stubborn shoots makes this task much cleaner and faster.
Seasonal Maintenance Tip: In Step 4, when frost threatens, don't be afraid to leave those top 6-8 inches of stem with remaining sprouts. A light frost actually enhances the sweetness of brussel sprouts! Just make sure to harvest them within a week after the frost. I've harvested some of my best sprouts after a light freeze—just be prepared to work quickly before the weather turns too cold.
Equipment Upgrade: Invest in a pair of sharp, clean pruning shears for Step 1. Dull blades crush stems and create entry points for disease. I sterilize my shears with rubbing alcohol between uses, which helps prevent the spread of any potential plant pathogens. A small pair of kitchen scissors works in a pinch, but they won't last as long for this heavy-duty gardening task.
Pro Tips for Trim Brussel Sprout Plants
- A few key tricks will help you maximize your harvest and keep your brussel sprout plants thriving all season.
- Visual Cues for Step 1: When checking for mature sprouts in Step 1, look for a slight color change at the base of the sprout—it should turn from bright green to a pale yellow-green.
- Pruning Precision in Step 3: For side shoots in Step 3, focus on removing any shoots that are growing directly from the main stem below your target sprouts.
Frequently asked questions
Got questions about trimming your Brussels sprout plants? You’re not alone!
Here are some of the most common concerns—and straightforward answers—to help you master the harvest like a pro.
When is the best time to start trimming Brussels sprout plants?
Begin trimming when the plants are about 6–8 weeks old and the first buds form near the base of the stem. This encourages more sprouts to develop higher up. For a year-round harvest, trim every 2–3 weeks once the plant matures (around 90–120 days after planting). Always leave at least 6–8 inches of stem to avoid damaging the plant.
How do I know if I’m trimming too much or too little?
If you’re trimming too much, the plant may struggle to produce new sprouts or wilt. Aim to remove only the largest, mature buds (about the size of a golf ball) while leaving smaller ones to grow. If you’re trimming too little, the plant may become overcrowded, leading to smaller sprouts. A good rule: Never cut more than 1/3 of the plant’s foliage at once.
Can I still harvest Brussels sprouts after the first frost?
Frost actually sweetens the flavor
of Brussels sprouts, making them even tastier. Keep trimming until the plant bolts (sends up a tall flower stem) or the sprouts turn yellow and mushy. For late-season harvests, trim only the lower sprouts and leave the upper ones for a final pick after a light frost.
What should I do if my Brussels sprout plant stops producing after trimming?
If your plant seems exhausted, it might be due to over-trimming, poor soil nutrients, or pest damage. Try these fixes:
- Fertilize with a balanced, nitrogen-rich feed to encourage regrowth.
- Water deeply (1–2 inches per week) to prevent stress.
- Prune back any yellowing or damaged leaves to redirect energy.
- Check for pests like aphids or cabbage worms—treat with neem oil if needed.
Can I grow Brussels sprouts indoors or in containers?
Yes! Brussels sprouts thrive in large containers (at least 12–18 inches deep) with well-draining soil. Place them in full sun (6+ hours/day) or under grow lights. Trim indoors the same way, but expect smaller yields than outdoor plants. Use a balanced fertilizer every 4–6 weeks to support growth.
Wrapping up and next steps
Trimming your Brussels sprout plants is a rewarding way to boost yield, improve plant health, and enjoy fresh harvests all season long! 🌱 By following the right techniques—like pruning side shoots, removing yellowing leaves, and harvesting sprouts strategically—you’ll keep your plants productive and happy.
With patience and care, you’ll be feasting on homegrown, crispy Brussels sprouts for months.
Ready to take the next step? Start small—try trimming just one plant this week and observe the results. Soon, you’ll be a Brussels sprout pruning pro, sharing your harvest with friends or even expanding your garden! 🎉