Pruning
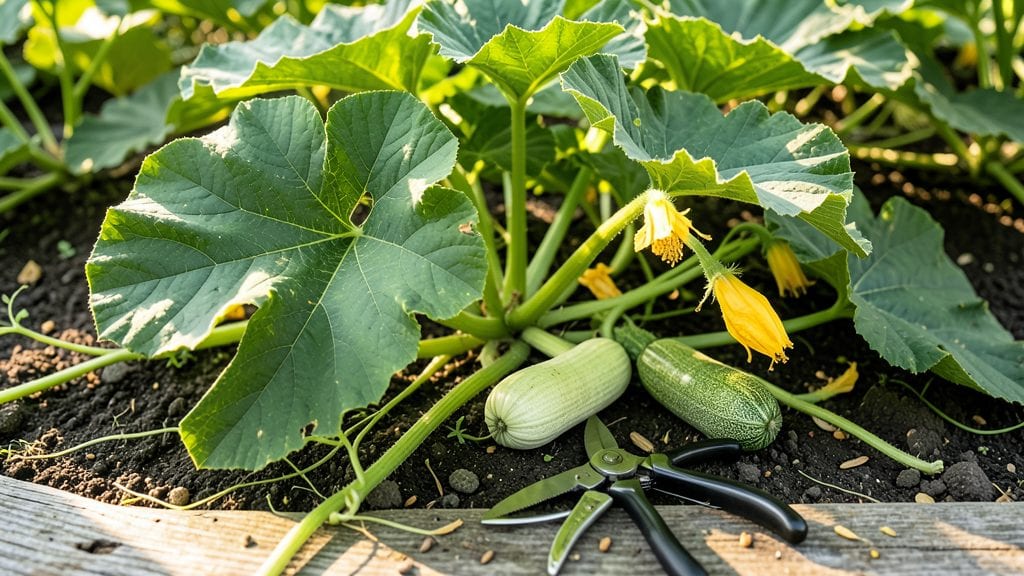
Pruning summer squash plants might sound tricky, but it’s the secret to doubling your harvest this season. 🌱 I used to let my vines sprawl wild, only to end up with a few oversized fruits and half the yield I could’ve had.
The right cuts redirect energy to more flowers—and more squash—while keeping pests and disease at bay.
You’ll need just a few tools: sharp pruners, a small pair of shears for finer cuts, and a clean towel to wipe down tools between plants. The key is working early in the morning when plants are turgid, and always cutting just above a leaf node.
This simple technique ensures new growth starts exactly where you want it.
Within 10 days, you’ll see the difference—more compact vines, better air flow, and a steady stream of 1-2 pound squash instead of a few monsters.
The plants stay healthier too, with fewer yellowing leaves or powdery mildew spots. Think of it as giving your squash a haircut for maximum productivity.
Even if you’ve never pruned before, these three proven cuts are impossible to mess up. We’ll cover exactly where to trim—no guesswork—and how to tell when you’ve done enough.
By the end, your plants will look like they’ve been professionally groomed, and your kitchen will be stocked with fresh squash all season long.
📚 In This Guide
- What you need
- Instructions
- Tips and common mistakes
- Wrapping up and next steps
What you need
- ● Pruning shears or sharp garden scissors – Choose bypass pruners (not anvil-type) to avoid crushing stems. A 5-inch blade works best for squash vines.
- ○ Clean, sharp knife or razor blade – For sterile cuts on larger stems (optional but recommended to prevent disease).
- ● Disinfectant (70% isopropyl alcohol or bleach solution) – Wipe tools before and after each plant to avoid spreading bacteria or fungus.
- ● Garden gloves – Protect your hands from thorns (on some varieties) and blisters. Nitrile-coated gloves offer extra grip.
- ● Compost bin or trash bag – For removing pruned material. Avoid composting diseased leaves.
- ● Plant marker or label – If you’re experimenting with pruning techniques, label different plants to track results.
- ● Hose with nozzle – A gentle spray to clean tools and rinse off sap after pruning.
- ● Mulch (straw or grass clippings) – Apply around the base post-pruning to retain moisture and reduce weeds.
- ○ Plant growth regulator (optional) – If your squash is overly vigorous, a 1% seaweed extract solution can help balance growth.
Step-by-Step guide to pruning summer squash for bigger harvests
Here's the method I use to keep my summer squash plants producing like crazy all season long.
🌿 Step 1: Identify and Remove Suckers Early
Squash plants develop unwanted side shoots called suckers between the main stem and branches. These compete for energy with your fruit. I check plants weekly starting when they're about 12 inches tall—that's when suckers first appear. Look for small shoots growing from leaf axils (where leaves meet stems).
Use clean, sharp pruning shears to snip suckers at their base. Don't leave stubs—this prevents disease entry. I do this first thing in the morning when plants are dry, so cuts heal faster. Real talk: if you miss a sucker, it'll grow into a competing vine that steals nutrients from your main harvest.
✂️ Step 2: Thin Overcrowded Vines for Airflow
Once your main vines reach 3-4 feet long, they'll start producing clusters of flowers and baby squash. Too many fruits mean small harvests and stressed plants. I remove all but 3-4 healthy fruits per vine, keeping only the largest, straightest ones. Use your fingers to gently twist off unwanted squash—no cutting needed.
While you're at it, check for crowded foliage. Squash plants need good airflow to prevent mildew. If leaves touch, snip the weakest stems at their base. I aim for a 12-inch gap between plants in the row. This might seem harsh, but I've seen plants double their yield after this step.
☀️ Step 3: Prune Damaged or Diseased Growth Immediately
Summer squash is prone to powdery mildew and bacterial wilt. I inspect plants every 3-4 days during humid weather. Look for yellowing leaves, white powdery spots, or wilting vines. Remove any affected growth immediately—don't wait for it to spread. Cut back to healthy tissue about ½ inch below visible damage.
Sterilize your pruners between cuts by wiping with rubbing alcohol. I also remove any leaves shading the main stem, especially near the base. This might seem counterintuitive, but it prevents moisture buildup that invites rot. Healthy plants will compensate by growing new leaves quickly.
💧 Step 4: Maintain Plant Energy for Continuous Production
After each pruning, give your plants a boost by watering at the base deeply but infrequently—about 1 inch of water every 5-7 days. I avoid wetting leaves to prevent disease. The goal is to keep soil consistently moist but not soggy. You'll know you're doing it right when the soil feels damp 2-3 inches down.
Feed plants with a balanced fertilizer (10-10-10) every 3-4 weeks after pruning. I mix it into the soil around the base, not on leaves. This encourages new growth while your plant recovers from cuts. Watch for new flowers forming within 7-10 days—that's your sign the pruning worked.
Tips & tricks for pruning summer squash plants
Pruning summer squash might seem counterintuitive at first, but these small adjustments make a world of difference in your harvest. Here's what I've learned from years of trial and error—and what nobody tells you about keeping those plants productive.
Timing is Everything: In Step 1, when you're checking for suckers at the 12-inch mark, I can't stress enough how important it is to act fast. Suckers grow quickly, and once they're established, they'll siphon nutrients from your main harvest. I've seen plants go from thriving to struggling in just a few days when suckers were left unchecked. Make pruning part of your weekly garden routine—it only takes 10 minutes per plant and pays off big time.
Visual Cues Over Guessing: During Step 2, when thinning to 3-4 healthy fruits per vine, look for these signs: the squash should be straight (not curved), free of bumps or bruises, and about the size of a golf ball when you first see them forming. The largest, straightest ones are your winners—they'll grow bigger and more uniform. I always keep one extra just in case, but I've never needed it. The key is removing the competition early so your plant focuses energy on fewer, better-quality fruits.
Disease Prevention Strategy: In Step 3, when dealing with powdery mildew or bacterial wilt, I've found that sterilizing pruners with rubbing alcohol between cuts is non-negotiable. But here's what I learned the hard way: don't just remove the obvious damage—look for hidden signs. Check the undersides of leaves and the stems where leaves attach. I once missed a tiny mildew spot that turned into a full-blown infection because I only looked at the tops. That plant never recovered, and I lost all its fruit.
Post-Pruning Care: After you've done all the cutting in Step 4, the real work begins. That's when you need to give your plants the extra TLC they deserve. I've seen plants bounce back spectacularly when given proper care after pruning, but I've also seen them struggle when neglected. The 1 inch of water every 5-7 days is crucial—it's not about frequency, it's about depth. Use a moisture meter to check that 2-3 inches down is consistently damp, not just the surface. This encourages deep root growth, which helps the plant recover faster from pruning.
Pro Tips for Prune Summer Squash Plants
- Pruning summer squash might seem counterintuitive at first, but these small adjustments make a world of difference in your harvest.
- Timing is Everything: In Step 1, when you're checking for suckers at the 12-inch mark, I can't stress enough how important it is to act fast.
- The largest, straightest ones are your winners—they'll grow bigger and more uniform.
Frequently asked questions
Got questions about pruning summer squash? You’re not alone! Here are answers to the most common concerns—so you can prune like a pro and harvest a bounty.
When is the best time to prune summer squash plants?
Prune early and often—start when plants are 12–18 inches tall and continue throughout the growing season. Focus on removing suckers (side shoots) in the morning when the plant is dry, reducing stress. Avoid heavy pruning during extreme heat or drought.
Will pruning summer squash increase my yield?
Pruning directs energy to fruit production instead of excessive vines or flowers. Studies show pruned plants can yield 20–30% more high-quality squash. Just avoid over-pruning—leave 3–5 main vines to support growth.
What if I don’t prune my summer squash?
Unpruned plants may produce smaller, lower-quality fruit and become overrun with pests or disease. While they’ll still grow, pruning ensures better airflow, fewer bugs, and a cleaner harvest. Think of it as giving your plants a spa day!
Can I prune summer squash the same way as zucchini?
Yes! Summer squash (like zucchini) and winter squash share similar pruning needs, but avoid heavy pruning on winter squash—they rely on vines for fruit development. For summer squash, stick to the 3 main vines + sucker removal rule.
What do I do if my squash plants look stressed after pruning?
If leaves wilt or growth slows, you’ve likely pruned too much. Stop immediately and focus on watering deeply (1–2 inches per week) and mulching to retain moisture. Stress is normal for a day or two—just monitor for pests or disease signs.
Pro Tip:
Use clean, sharp pruners to avoid damaging stems. Disinfect tools with rubbing alcohol between plants to prevent spreading disease. Happy pruning—and happy harvesting!
Wrapping up and next steps
Pruning your summer squash plants might seem intimidating, but with the right techniques—like focusing on three key cuts—you’ll boost yield, improve airflow, and keep your garden thriving! 🌱 Whether you’re a beginner or a seasoned gardener, a little strategic trimming goes a long way in ensuring healthier plants and a bountiful harvest.
Now that you’re armed with the know-how, grab those shears and get pruning! Start small, observe your plants’ response, and adjust as needed. Happy gardening—and enjoy those delicious, homegrown squashes! 🍆😊