
Vegetables
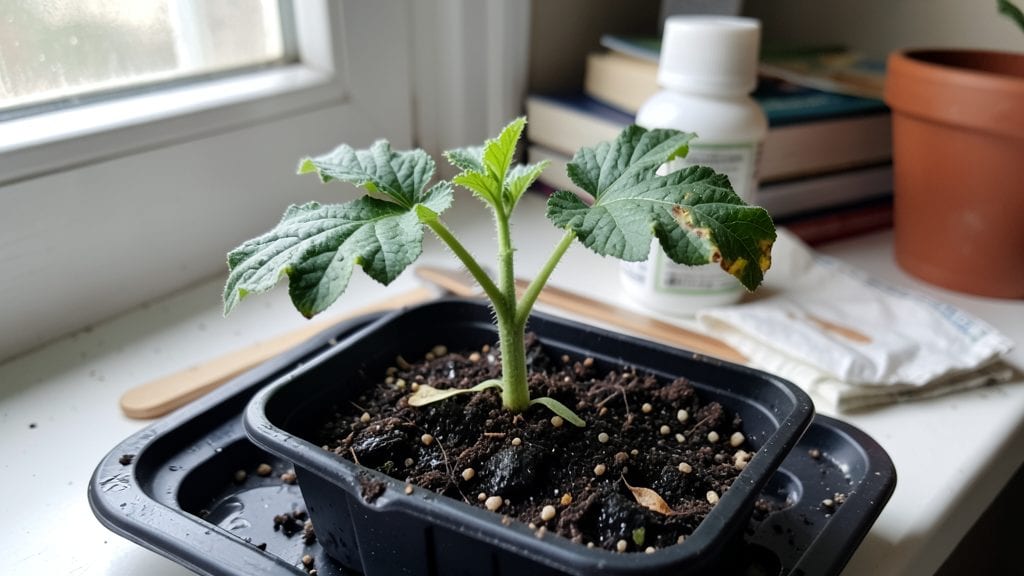
Planting watermelon seeds indoors in early March gives your vines a head start that beats the heat and pests waiting outside. I’ve watched my seedlings go from tiny sprouts to foot-long vines ready for transplanting—all by moving them outdoors in late May, just as the soil warms.
The trick isn’t fancy; it’s timing, light, and a little patience.
You’ll need just three simple supplies: biodegradable pots (so you can plant them directly outside), a mix of potting soil and compost, and a sunny windowsill or grow light. Watermelons love warmth, so keep the soil at 80-85°F for germination—sometimes I use a seedling heat mat the first week.
No fancy equipment, just a way to mimic summer conditions early.
By the time your seedlings hit 4-6 inches tall, they’ll be stocky and ready to handle outdoor life. The first true leaves (not the initial seed leaves) signal it’s time to harden them off—gradually exposing them to outdoor conditions over 7-10 days.
That’s when the real magic happens: those vines take off, and by July, you’re harvesting fruit from plants you nurtured from seed.
This method works for any watermelon variety, from small sugar babies to giant seedless types. The key is consistency—don’t skip the hardening off, or your plants will shock when moved outside. Trust the process, and you’ll be feasting on homegrown melons before your neighbors even think to plant theirs.
📚 In This Guide
- What you need
- Instructions
- Tips and common mistakes
- Wrapping up and next steps
What you need
- ● Watermelon seeds: 3–5 seeds per container (choose heirloom or hybrid varieties like 'Sugar Baby' or 'Crimson Sweet' for indoor success).
- ● Seed-starting containers: 4–6 inch pots with drainage holes (biodegradable peat pots work great!).
- ● High-quality seed-starting mix: Lightweight, sterile potting mix (avoid garden soil—it’s too dense!).
- ● Grow lights or sunny windowsill: A south-facing window with at least 6–8 hours of sunlight daily, or a full-spectrum LED grow light (12–16 hours/day).
- ● Watering can or spray bottle: For gentle hydration (overwatering is a seedling’s worst enemy!).
- ○ Fertilizer (optional but helpful): A balanced, water-soluble fertilizer (like 10-10-10) diluted to half-strength for young plants.
- ○ Heat mat (optional): Keeps soil warm (70–90°F) for faster germination—watermelons love warmth! 🌡️
- ● Humidity dome or plastic wrap: Creates a cozy, moist environment for sprouting seeds.
- ● Plant labels: Mark pots with seed variety and date planted (trust us, you’ll forget!).
- ● Trowel or small spoon: For gently transplanting seedlings later.
- ● Spray bottle with water: Keeps humidity up without drowning delicate seedlings.
Step-by-step instructions for starting watermelon seeds indoors
Here’s how to get your watermelon seeds sprouting strong and ready for transplanting—no guesswork involved.
Prepare Containers and Seed Starting Mix
Watermelon seeds need warmth and room to stretch, so I use 4 individual 4-inch pots filled with 2 gallons of sterile seed-starting mix. Avoid garden soil—it’s too dense and can harbor diseases that stunt young seedlings. Moisten the mix until it’s damp like a wrung-out sponge, but not soggy. Press it down gently to remove air pockets, then tap the pots on the counter to settle the soil evenly.
This ensures roots won’t struggle to penetrate compacted soil later. I always label the pots with the variety and date—watermelons mature quickly, and you’ll want to track when to transplant outdoors. The key here is consistency: watermelon seedlings are sensitive to temperature fluctuations, so keeping conditions stable from the start pays off.
Sow Seeds at the Right Depth and Temperature
Plant 2 seeds per pot at a depth of ½ inch, which is just enough to protect them from drying out but shallow enough to avoid delaying germination. Watermelon seeds are large, so I use my finger to make a small hole and drop them in gently. Cover lightly with additional mix, then mist the surface with water until it’s evenly moist—not drenched.
Here’s the thing—watermelon seeds won’t germinate well below 75°F. I place the pots on a seedling heat mat set to 80-85°F to speed up germination, which typically takes 5-10 days. If your home runs cooler, consider a germination chamber or a sunny windowsill with a clear plastic dome to trap heat. Watch for the first signs of sprouts—tiny white roots breaking through the soil surface.
Provide Optimal Light and Prevent Legginess
Once seedlings emerge, move them immediately under a full-spectrum grow light positioned 2-3 inches above the pots. Watermelons need 14-16 hours of light daily to develop strong, stocky stems. Without enough light, they’ll stretch toward the source, creating weak, spindly plants that flop when transplanted. You’ll know your setup is right when the seedlings grow thick stems and dark green leaves within 7-10 days.
Rotate the pots quarter-turn daily so they don’t lean toward the light. I also keep the soil consistently moist—not soggy, but never drying out. Stick your finger ½ inch into the soil; if it feels dry, water gently at the base. Overhead watering can spread disease, so I use a small watering can with a narrow spout to target the soil directly.
Harden Off Seedlings Before Transplanting
About 2 weeks before your last frost date, start hardening off your watermelon seedlings. Begin by placing them in a sheltered, shaded outdoor spot for 1-2 hours the first day. Gradually increase their time outside by 1 hour daily, eventually leaving them out 24 hours before transplanting. This process teaches them to tolerate wind, sun, and temperature swings without shock.
Watermelons are heat-loving annuals, so they need to be fully acclimated before going into the ground. Look for 4-6 true leaves and stems that are ½ inch thick before transplanting. Choose a sunny, warm spot in your garden with well-draining soil, and space plants 3-4 feet apart to give vines room to sprawl. Planting too early in cool soil will stunt growth, so wait until the soil temperature reaches at least 70°F.
Tips & tricks for starting watermelon seeds indoors
A few strategic adjustments can make all the difference between weak seedlings and robust plants ready for transplanting.
Soil Preparation Matters: When mixing your 2 gallons of sterile seed-starting mix, incorporate a handful of perlite or vermiculite to improve drainage and aeration. Watermelon roots need oxygen to develop properly, and compacted soil can lead to rot. I also recommend sterilizing your 4-inch pots with a 10% bleach solution (1 part bleach to 9 parts water) before filling them to eliminate any potential pathogens that could harm your seedlings.
Germination Temperature Control: Maintaining that 80-85°F range on your seedling heat mat is critical, but consistency matters just as much as the temperature itself. I’ve found that placing a small thermometer directly on the heat mat gives you real-time accuracy. If your home fluctuates below 75°F, consider using a clear plastic dome over each pot to create a mini greenhouse effect—just remember to remove it once sprouts appear to prevent mold.
Light Management for Strong Stems: The 14-16 hours of light daily is non-negotiable, but how you position those grow lights makes all the difference. I adjust the height every 3-4 days as the seedlings grow, keeping them just 2-3 inches above the pots. Watch for stems that are thick and dark green—this indicates proper light exposure. If you notice seedlings stretching toward the light source, they’re not getting enough intensity, and you may need to move them closer or increase the light duration slightly.
Harden Off Gradually: The 2-week hardening process before transplanting is where many gardeners rush and end up with shocked plants. I recommend starting with just 1 hour on the first day in partial shade, then increasing by 30 minutes each subsequent day. This slow acclimation helps prevent transplant shock. Also, avoid hardening off during extreme temperature swings—choose calm, mild days for best results.
Pro Tips for Plant Watermelon Seeds Indoors
- A few strategic adjustments can make all the difference between weak seedlings and robust plants ready for transplanting.
- Soil Preparation Matters: When mixing your 2 gallons of sterile seed-starting mix, incorporate a handful of perlite or vermiculite to improve drainage and aeration.
- Germination Temperature Control: Maintaining that 80-85°F range on your seedling heat mat is critical, but consistency matters just as much as the temperature itself.
Frequently asked questions
about planting watermelon seeds indoors—here’s what you need to know before diving in!When is the best time to start watermelon seeds indoors?
Start seeds 8–10 weeks before your last frost date—typically late winter or early spring. Watermelons need warmth to germinate, so wait until soil temps reach 70–90°F (21–32°C). If your climate is hot early, you can plant slightly later, but indoor starts give vines a head start!
What if I don’t have a heat mat—can I still germinate seeds?
Yes! Place seeds in a warm, sunny spot like near a south-facing window or under grow lights. A DIY solution? Fill a plastic bag with warm water, seal it, and nestle it near the seed tray. Check temps daily—consistency is key for germination!
How do I know if my indoor watermelon seedlings are healthy?
Healthy seedlings have bold green leaves, sturdy stems, and no yellowing. Watch for leggy (tall, weak) growth—this means they need more light. Overcrowding? Thin to 1–2 inches apart to prevent competition. Pests like aphids? Spray with soapy water!
What’s the ideal temperature for indoor watermelon growth?
Keep daytime temps between 75–85°F (24–29°C) and nights slightly cooler (65–70°F / 18–21°C). Avoid drafts (like AC vents) or sudden temp drops—watermelons are tropical and sensitive! A thermometer helps monitor conditions.
Can I use regular potting soil for watermelon seeds?
Not ideal! Watermelons thrive in well-draining, fertile soil. Mix 50% potting soil + 50% perlite or coconut coir for aeration. Add a slow-release fertilizer (like 5-10-10) at planting. Avoid garden soil—it’s too dense and may harbor diseases.
What do I do if my seeds rot or mold?
Overwatering or cold soil causes rot. Troubleshoot:
- Use sterilized trays and fresh, moist (not soggy) soil.
- Ensure pots have drainage holes.
- If mold appears, remove affected seedlings and repot healthy ones in fresh soil.
Wrapping up and next steps
Planting watermelon seeds indoors is a rewarding way to jumpstart your growing season and enjoy homegrown fruit with big flavor!
With the right setup—like proper soil, warmth, and patience—you’ll be ready to transplant sturdy seedlings into your garden. Now’s your chance to turn those tiny seeds into a sweet, sprawling harvest!
Ready to take the next step? Once your seedlings sprout and grow their first true leaves, it’s time to harden them off before moving them outdoors. Check out our guide on transplanting to ensure your watermelons thrive in the sun!