Flowers
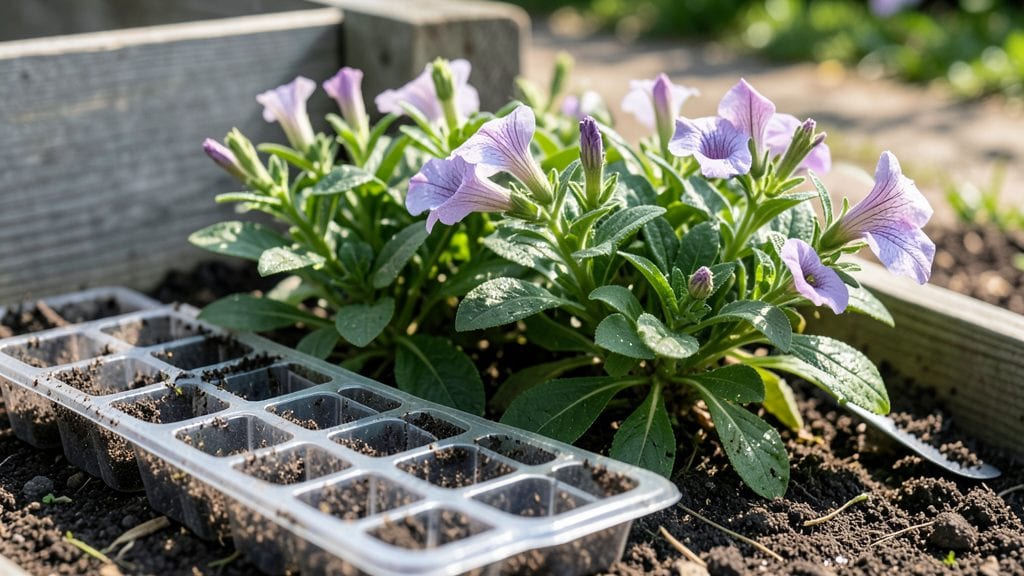
Freshly planted flowers need the right care to take root and thrive—those first seven days decide whether they'll grow into lush blooms or wilt away. 🌱 I learned this the hard way after losing a dozen daylilies to dry soil and inconsistent watering, but now I've got a foolproof system that works for annuals and perennials alike.
The secret isn't complicated: keep soil consistently moist (not soggy), protect roots from harsh sun, and avoid fertilizing until new growth appears. Most gardeners overwater or underwater—both kill roots faster than you'd think. A simple drip irrigation setup or soaker hose keeps moisture steady without drowning tender stems.
By day 7, you'll see the first signs of success—firm stems, vibrant leaves, and roots starting to spread. That's when you can ease up on watering and introduce a light fertilizer. The payoff? Flowers that establish strong enough to handle heat waves and droughts later in the season.
Works for everything from delicate petunias to hardy peonies—just adjust watering based on your climate. Let's get those roots growing the right way!
📚 In This Guide
- What you need
- Instructions
- Tips and common mistakes
- Wrapping up and next steps
What you need
- ● Freshly planted flowers: Choose healthy, disease-free plants (1–5, depending on your space). Opt for season-appropriate varieties (e.g., annuals for summer, perennials for spring/fall).
- ● Well-draining potting mix: 1–2 bags (10–20 lbs each), sterilized and amended with perlite or sand (20–30% mix) for aeration.
- ● Watering can or hose with a gentle spray nozzle: 1 (preferably with a rose attachment for precision).
- ● Organic mulch: 1–2 bags (e.g., shredded bark, straw, or coconut coir) to retain moisture and suppress weeds.
- ● Pruning shears: 1 pair (sterilized with rubbing alcohol) for trimming dead/damaged foliage.
- ○ pH testing kit (optional but helpful): 1 to check soil acidity (ideal range: 6.0–7.0 for most flowers).
- ● Slow-release fertilizer: 1–2 packets (e.g., 10-10-10 or bloom-specific formula) to mix into soil.
- ● Epsom salt (magnesium sulfate): 1 small bag for nutrient boost (1 tbsp per gallon of water, used sparingly).
- ● Shade cloth: 1–2 pieces (30–50% coverage) if planting in hot climates.
- ● Plant stakes or cages: 1–5 (depending on plant height) for support.
- ● Compost tea or seaweed extract: 1 bottle (1–2 tbsp per gallon of water) for a natural growth kick.
Step-by-step guide to helping freshly planted flowers thrive
Your flowers just found their new home—now let's give them the perfect first-week care.
💧 Step 1: Water Deeply but Gently After Planting
Give your newly planted flowers a thorough watering right after transplanting to settle the soil around the roots. Use the 1 gallon of water per plant to ensure roots make contact with moist soil. Water slowly at the base, avoiding the foliage, to prevent fungal diseases. You'll know you've done it right when the soil feels damp 2-3 inches down—stick your finger in to check.
Don’t let water pool around the stems. Overwatering at this stage can suffocate roots still adjusting to their new home. Instead, water deeply once, then let the top inch of soil dry out before watering again. This encourages roots to grow deeper in search of moisture.
☀️ Step 2: Shield from Harsh Sun and Wind for 3-5 Days
Freshly planted flowers are sensitive to stress, and the first few days are critical. Shield them from direct afternoon sun and strong winds, which can dry out the soil and leaves too quickly. If planting in a sunny spot, use a light shade cloth or move plants to a partially shaded area until they establish roots.
You’ll notice healthier growth if leaves stay a vibrant green rather than wilting or turning yellow. Check daily for signs of stress—if leaves droop even slightly, it’s a sign they need more protection or water. After 5 days, gradually reintroduce them to full sun conditions.
🪴 Step 3: Mulch to Retain Moisture and Regulate Soil Temperature
Spread 2-3 inches of mulch around the base of each plant, keeping it 2 inches away from the stem to prevent rot. Use organic mulch like shredded bark or straw to retain moisture and keep soil temperatures stable. This layer acts like a blanket, protecting roots from temperature swings and reducing evaporation.
Mulch also suppresses weeds, which compete for water and nutrients. Keep the mulch layer even and avoid piling it against the stems. Over time, the mulch will break down, enriching the soil naturally—just refresh it as needed to maintain coverage.
⏰ Step 4: Monitor Soil Moisture and Adjust Care
Check the soil moisture every 2-3 days by sticking your finger 1 inch deep. If it feels dry, water deeply again. Avoid a strict schedule—let the soil guide you. Overwatering is a common mistake that can lead to root rot, while underwatering causes stress and stunted growth.
Watch for signs of overwatering, like yellowing leaves or wilting despite moist soil. If you see these, reduce watering and improve drainage if needed. Healthy roots will show signs of recovery within 3-5 days of adjusting your watering routine.
🌿 Step 5: Fertilize Lightly After 7-10 Days
After the first week, when roots have had time to establish, apply a balanced, water-soluble fertilizer at half strength. This gives your flowers a gentle nutrient boost without overwhelming them. Follow the package instructions, but remember—less is more at this stage.
Look for new growth as a sign that your flowers are adjusting well. Avoid heavy fertilizers or compost right after planting, as they can burn tender roots. Stick to a light feeding to encourage steady, healthy development.
Tips & tricks for perfectly settled flowers
Here's what I've learned from helping flowers take root—these little tricks make all the difference in their first critical week.
The Right Watering Technique: When you give that initial 1 gallon per plant, use a slow watering can or hose attachment to avoid disturbing the soil. I like to water in the morning so any excess moisture has time to evaporate before nightfall. The key is getting that moisture down to 2-3 inches—if you're using a trowel, gently scrape back a small section of soil to check.
Stress Protection Beyond Shade: I've found that moving plants to a sheltered spot during the hottest part of the day (11 AM to 3 PM) makes a huge difference. If you don't have shade cloth, even a simple white sheet draped over a frame works. The goal is to keep leaves cool and prevent that rapid moisture loss that causes wilting. I check leaves daily—if they start curling, it's time to move them back into shade.
Mulch Layering Secrets: For that 2-3 inch mulch layer, I recommend using a mix of straw and shredded bark—it breaks down at different rates, giving you longer moisture retention. The critical part is keeping it 2 inches away from stems to prevent rot. I also like to refresh the mulch after about 2 weeks when it starts breaking down, adding another thin layer to maintain that protective blanket effect.
Soil Moisture Monitoring: When checking soil moisture every 2-3 days, I've learned to look for two things: the color of the soil (darker means wetter) and the texture (should be slightly crumbly, not clumpy). If you're unsure, stick your finger in—if it comes out clean, it's dry enough. I've seen many gardeners overwater because they're following a schedule rather than checking the soil itself. Let the soil be your guide!
Pro Tips for Freshly Planted Flowers
- Here's what I've learned from helping flowers take root—these little tricks make all the difference in their first critical week.
- The Right Watering Technique: When you give that initial 1 gallon per plant, use a slow watering can or hose attachment to avoid disturbing the soil.
- Stress Protection Beyond Shade: I've found that moving plants to a sheltered spot during the hottest part of the day (11 AM to 3 PM) makes a huge difference.
Frequently asked questions
Got questions about keeping your freshly planted flowers thriving in their first week? You’re not alone! Here are answers to the most common concerns—so you can relax and enjoy the process.
How often should I water freshly planted flowers?
Water deeply every 2–3 days for the first week, ensuring the soil is moist (not soggy) 2–3 inches down. Overwatering can suffocate roots, while underwatering stresses them. Check soil moisture with your finger—if it’s dry, it’s time to hydrate!
Can I fertilize flowers right after planting?
Wait 4–6 weeks before fertilizing to avoid burning tender roots. Instead, use a balanced, water-soluble fertilizer at half-strength when you do apply it. Organic options like compost tea are gentler for new plants.
What if my flowers wilt immediately after planting?
Wilting is normal! It’s often due to transplant shock. Trim any damaged leaves, water thoroughly, and provide light shade for 2–3 days. Avoid direct sun until they recover. If wilting persists, check for root rot or pests.
Should I mulch freshly planted flowers?
Yes! Apply 1–2 inches of mulch (like straw or shredded bark) to retain moisture, regulate soil temperature, and suppress weeds. Keep mulch away from the stem to prevent rot. Replenish as needed.
Can I move freshly planted flowers if they’re not thriving?
Wait at least 2–3 weeks to let roots establish. If you must relocate, do it on a cloudy day, keep the root ball intact, and water immediately after. Stress from moving can set back growth, so plan carefully!
What’s the best time of day to plant flowers?
Plant in the early morning or late afternoon to avoid midday heat stress. Cooler temps help roots settle faster. If planting in extreme heat, provide shade cloth until evening.
Wrapping up and next steps
Your freshly planted flowers deserve the best start—and with these root-boosting tips, they’re already on their way to thriving! 🌱 Remember, the first week sets the foundation for long-term growth, so stay consistent with watering, mulching, and gentle care. Now’s the time to celebrate your green thumb!
Ready to watch your garden bloom? Plan your next steps:
- Mark your calendar for follow-up checks in 2 weeks.
- Jot down what worked (or didn’t) to refine your technique.
- Share your progress with fellow plant lovers—inspiration spreads!