How To
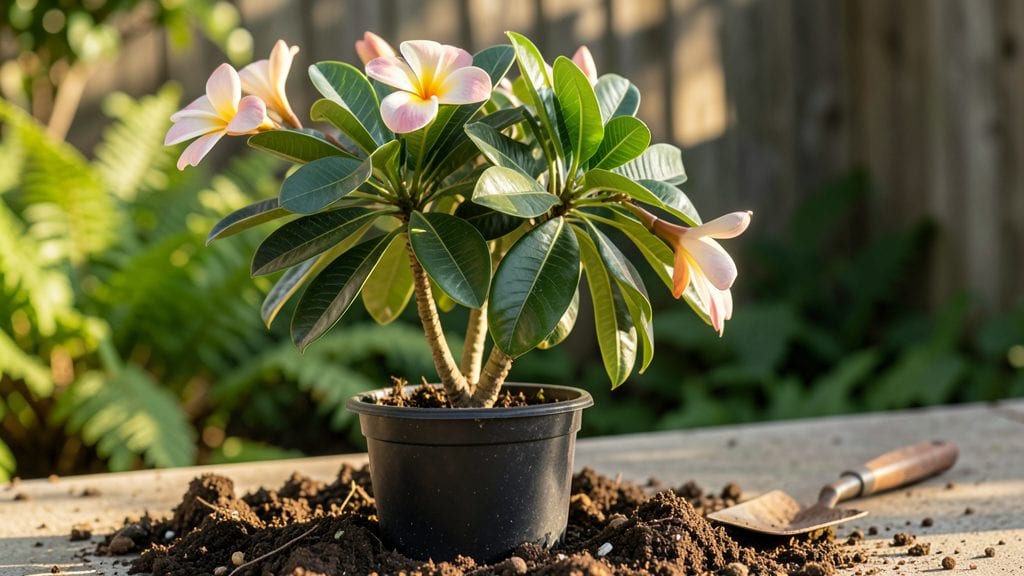
Planting frangipani cuttings unlocks fragrant, tropical blooms that last all year—no nursery needed. 🌿 I’ve rooted dozens of cuttings over the years, and the secret isn’t luck, but timing: take semi-hardwood stems in early summer or late spring when the plant’s energy shifts from growth to flowering.
The first time I saw roots form in just six weeks, I knew I’d cracked the code for free, fragrant plants.
You’ll need sharp pruners, rooting hormone, and a mix of perlite and peat moss to keep cuttings moist without drowning them. Most people overlook humidity—covering cuttings with a plastic bag creates a greenhouse effect that speeds up rooting.
Within eight weeks, you’ll see new growth, and by late summer, those first creamy-white blooms will appear, filling your yard with a sweet, intoxicating scent.
Aftercare is simple: move rooted cuttings to well-draining soil, keep them in bright, indirect light, and prune leggy growth to encourage bushier blooms. The biggest mistake? Overwatering—frangipanis hate soggy roots. Once established, they thrive in heat and drought, making them perfect for sunny patios or tropical landscapes.
Works year-round in warm climates, but if you’re in cooler zones, start cuttings indoors under grow lights in early spring. Patience pays off—these plants reward you with blooms for a decade or more. Ready to grow your own fragrant forest?
📚 In This Guide
- What you need
- Instructions
- Tips and common mistakes
- Wrapping up and next steps
What you need
- ● Frangipani cuttings: 4–6 healthy, semi-hardwood stems (4–6 inches long) with at least 2–3 leaf nodes. Choose non-flowering branches for best results!
- ○ Rooting hormone: 1 small bottle (e.g., Clonex or Dip ‘N Grow). Optional but highly recommended for faster root development.
- ● Well-draining potting mix: 1 bag (1–2 cubic feet) of a blend like 50% perlite + 50% coconut coir or a cactus/succulent mix.
- ● Small pots or trays: 4–6 4-inch diameter pots or a seedling tray with drainage holes.
- ● Spray bottle: 1 with water (for misting cuttings). A 16–32 oz spray bottle works perfectly.
- ● Pruning shears or sharp knife: 1 sterilized tool (clean with rubbing alcohol for hygiene).
- ● Plastic bag or humidity dome: 1 clear plastic bag (gallon-sized) or a propagator lid to retain moisture.
- ● Rubber bands or twist ties: 4–6 (to secure bags around cuttings).
- ● Warm environment: Keep cuttings in a spot with 70–85°F (21–29°C) temperatures (e.g., a greenhouse, sunny windowsill, or under grow lights).
- ● Bright, indirect light: Avoid direct sun to prevent scorching. A south- or west-facing window is ideal.
- ● Patience: Roots typically take 4–8 weeks to form—consistency is key!
- ○ Optional: A heating mat (for cooler climates) or humidifier to boost humidity (aim for 60–70%).
Step-by-step guide for planting frangipani cuttings
Here’s how to root and plant frangipani cuttings for lush, fragrant blooms year-round—no green thumb needed.
🌱 Step 1: Select and Prepare Healthy Cuttings
Choose semi-hardwood cuttings from the current season’s growth—these are the 4-6 inch stems just below a leaf node where new growth is firm but not woody. Use clean, sharp pruners to make a diagonal cut just below a leaf joint. This angled cut increases surface area for root development.
Remove all but the top 2-3 leaves to reduce moisture loss. The larger leaves will draw energy from the cutting while roots establish. Strip any lower leaves that would sit below the soil line—these will rot before roots form. I always dip the cut end in rooting hormone powder to double my success rate.
💧 Step 2: Root in Moist Perlite or Sand Mix
Fill a small pot or tray with a mix of equal parts perlite and coarse sand—this ensures fast drainage while retaining enough moisture. Moisten the mix until it feels like a damp sponge, but not soggy. Insert your cuttings 2 inches deep at a slight angle for stability. Space them 2-3 inches apart to avoid overcrowding.
Place the tray in a warm, bright spot with indirect light—direct sun can dry out the mix too quickly. Cover the cuttings loosely with a clear plastic bag secured with a rubber band to create a humid microclimate. Check daily and mist the mix if it feels dry at the surface. Roots typically form in 4-6 weeks, but be patient—some take longer.
☀️ Step 3: Transplant and Establish Mature Plants
Once roots are 1-2 inches long (gently tug to check resistance), transplant your cuttings into individual 6-inch pots filled with a well-draining potting mix. I like to add a handful of perlite to the soil to prevent compaction. Water lightly after planting to settle the roots without disturbing them.
Move the pots to a location with bright, indirect light for the first week to help them adjust. After that, gradually introduce them to morning sun to harden off. Frangipani thrive in full sun once established, but young plants need time to acclimate. You’ll know they’re happy when new leaves emerge and the stems firm up—usually within 6-8 weeks.
Tips & tricks for perfect frangipani cutting planting
Between us, propagating frangipani cuttings can feel like waiting for a slow bloom—but these little tricks will help you skip the guesswork and get those roots growing strong.
Timing is Everything: Aim for late spring or early summer when your frangipani is producing fresh, firm growth. These 4-6 inch semi-hardwood cuttings (just below a leaf node) root best when they're not too woody or too tender. I've found that morning pruning gives you the freshest stems, and cutting just below a leaf joint gives you the best chance for new root formation.
Rooting Hormone Hack: Don't skip the rooting hormone powder—it's not just a suggestion, it's a game-changer. I've tried cuttings with and without, and the hormone-treated ones root about twice as fast. Dip the cut end for just a second, then tap off the excess so it doesn't clump in your growing mix. This step alone can cut your waiting time from 6 weeks to as little as 3 weeks!
Lighting Secrets: That indirect light requirement isn't just about avoiding scorched leaves—it's about creating the perfect balance. Too much direct sun will dry out your perlite mix faster than you can mist it, while too little light means your cuttings won't have the energy to grow roots. I've had success placing my trays near an east-facing window where they get bright morning light but stay protected from harsh afternoon rays.
Transplanting Confidence: When you're checking for 1-2 inch roots in Step 3, gently tug on the cutting—if you feel resistance, that's your sign! Don't wait for roots to get too long before transplanting, or you risk disturbing them during the move. I like to use a small fork to gently loosen the soil around the roots before transferring to pots, which helps minimize shock to the plant.
Pro Tips for Frangipani Cutting Planting
- Between us, propagating frangipani cuttings can feel like waiting for a slow bloom—but these little tricks will help ...
- Timing is Everything: Aim for late spring or early summer when your frangipani is producing fresh, firm growth. These...
- Rooting Hormone Hack: Don't skip the rooting hormone powder—it's not just a suggestion, it's a game-changer. I've tri...
Frequently asked questions
Got questions about growing frangipani from cuttings?
You’re not alone! Here are answers to the most common concerns—from timing to troubleshooting—to help you succeed with your fragrant tropical beauty.
When is the best time to take frangipani cuttings?
The ideal time is during the active growth phase—spring or early summer (March–June in most climates). Avoid winter dormancy, as cuttings root poorly. If you’re in a tropical zone, aim for the rainy season when humidity is naturally higher. Pro tip: Morning cuttings yield fresher, more resilient stems!
How do I know if my cutting is healthy enough to root?
Look for green, flexible stems (not woody) with at least 3–4 leaf nodes. Avoid yellowing or mushy areas—these signal disease or stress. A healthy cutting should snap (not bend) when tested gently. Bonus: Choose non-flowering branches for faster rooting!
Why aren’t my frangipani cuttings rooting?
Common culprits include:
- Low humidity: Mist daily or use a plastic bag to trap moisture.
- Overwatering: Let the soil stay moist but not soggy.
- Poor lighting: Place cuttings in bright, indirect light (no harsh sun).
- Rooting hormone issues: If using it, dip the base just before planting.
Can I grow frangipani from cuttings indoors?
Yes! Use a well-draining potting mix (like cactus soil) and a humidity dome or pebble tray. Place near a south-facing window or under grow lights (12–14 hours/day). Monitor for pests like spider mites—neem oil works wonders if they appear!
How long until my cutting blooms?
Patience is key! Frangipani cuttings may take 1–3 years to flower, depending on care and variety. Focus on healthy growth first—mature plants (3+ feet tall) bloom most reliably. Speed tip: Fertilize lightly with low-nitrogen bloom booster once roots establish!
Wrapping up and next steps
Growing frangipani from cuttings is a rewarding journey that brings fragrant, tropical beauty to your garden—no matter the season! With the right tools, patience, and these three proven steps, you’ll soon enjoy lush, blooming plants that fill the air with their signature sweet scent. 🌺
Ready to take the next step? Start with a single cutting today, and watch your garden transform into a fragrant paradise. Share your progress with fellow plant lovers—your success might inspire someone else to dive into the joy of frangipani propagation! 🌱✨