Container Gardens
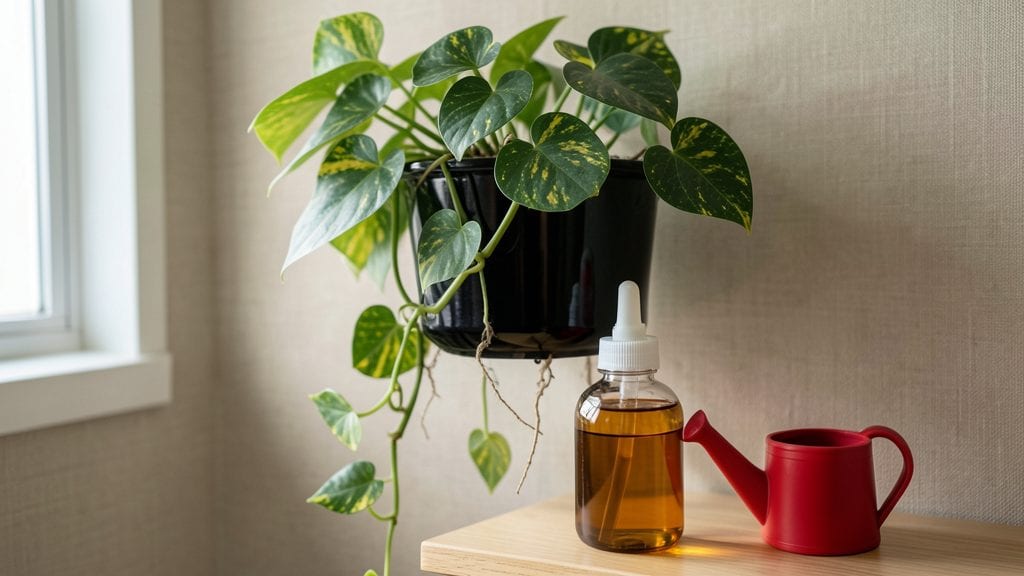
Feeding indoor plants is the secret weapon behind those shockingly lush collections you see on Instagram—though most beginners overdo it and end up with crispy brown leaves. I’ve been there, drowning my snake plant in fertilizer until it looked like it had a sunburn.
The key isn’t more; it’s timing, type, and knowing when your plant is begging for a break.
Start with a balanced, water-soluble fertilizer diluted to half-strength—most houseplants thrive on this every 4-6 weeks during spring and summer. For ferns and flowering types, switch to a low-nitrogen blend to encourage foliage or blooms.
Slow-release granules are perfect for forgetful gardeners, while compost tea gives a gentle nutrient boost without the burn risk. The goal? Feeding that mimics nature’s slow release, not a chemical rush.
You’ll spot over-fertilizing fast: brown leaf tips, white crust on soil, or roots peeking out like they’re gasping for air. Underfeeding shows up as pale, slow growth or yellowing leaves. The sweet spot?
Healthy, vibrant foliage that grows steadily without sudden bursts. Once you nail this, your plants won’t just survive—they’ll flourish like they’re on a tropical vacation, not a windowsill.
This works for everything from picky succulents to high-maintenance orchids, though flowering plants often need a seasonal boost with phosphorus-rich feeds. Let’s get those roots growing strong—without the drama.
📚 In This Guide
- What you need
- Instructions
- Tips and common mistakes
- Wrapping up and next steps
What you need
- ● Potting soil: Well-draining, nutrient-rich mix (e.g., African violet or cactus/succulent blends, depending on your plant). Quantity: Enough to fill your pots (check plant tags for recommendations).
- ○ Watering can: A lightweight, narrow-spout can (1–2 gallons) to avoid overwatering. Optional: A self-watering can for convenience.
- ● Fertilizer: Liquid fertilizer: Balanced (e.g., 10-10-10 NPK) or slow-release granules. Quantity: Follow label instructions (typically 1–2 tbsp per gallon of water).
- ● Organic options: Compost tea, worm castings, or fish emulsion (great for nutrient-dense feeding!).
- ● Spray bottle: For misting humidity-loving plants (e.g., ferns, calatheas). Size: 8–16 oz with a fine mist nozzle.
- ● Trowel or small shovel: For repotting or mixing soil amendments. Size: 4–6 inches long.
- ○ Glove: One pair (optional but helpful for handling prickly plants or soil).
- ● pH testing kit: To check soil acidity/alkalinity (ideal ranges vary by plant—e.g., azaleas love acidic soil!).
- ● Plant food boosters: Epsom salt (for magnesium-loving plants like snake plants or peperomias).
- ● Citric acid (to lower pH for acid-lovers).
- ● Self-watering planters: For forgetful plant parents!
- ● Grow lights: LED or fluorescent (if your plants need extra light, like pothos or calatheas).
Step-by-step instructions for feeding indoor plants
Here's how to nourish your houseplants for vibrant, healthy growth without overdoing it.
Determine Your Plant's Nutritional Needs
Not all indoor plants require the same feeding schedule or fertilizer type. Leafy plants like pothos or snake plants thrive on a balanced liquid fertilizer (10-10-10 NPK ratio) diluted to half-strength, applied every 4-6 weeks during spring and summer. Succulents and cacti, however, need a low-nitrogen, high-phosphorus fertilizer (like 5-10-10) applied only twice a year in early spring. Check your plant's label or research its specific needs—overfeeding is just as harmful as underfeeding.
Pay attention to visual cues: Yellowing leaves often signal nitrogen deficiency, while brown leaf tips can indicate over-fertilization or salt buildup. If you notice crispy edges or white crust on the soil surface, flush the soil with water immediately to remove excess salts. This is your plant's way of saying, "I'm stressed."
Choose the Right Fertilizer and Application Method
For most tropical houseplants, a slow-release granular fertilizer mixed into the top 1-2 inches of soil at planting time provides steady nutrition for 3-4 months. This method reduces the risk of root burn and is ideal for forgetful plant parents. If you prefer liquid fertilizers, always dilute them more than recommended—half-strength or even quarter-strength is often better, especially for sensitive plants like ferns or calatheas.
I like to use a fish emulsion or seaweed extract for a gentle, organic boost during active growth. These fertilizers also improve soil structure and encourage beneficial microbial activity. Apply them in the early morning so the leaves have time to dry before nightfall, reducing the risk of fungal issues. Avoid fertilizing during dormancy—most houseplants slow down in fall and winter, and feeding them then can lead to root damage.
Water Before Feeding for Even Distribution
Never fertilize a dry soil. Always water your plant thoroughly until water runs out the drainage hole 24 hours before applying fertilizer. This ensures the nutrients dissolve evenly and reach the roots rather than sitting on the surface, where they can burn tender root tips. If your plant is root-bound, consider soaking the pot in water for 10-15 minutes before fertilizing to encourage deeper root penetration.
For plants in terracotta pots, which dry out faster, I recommend fertilizing every 6-8 weeks during the growing season. For plastic or self-watering pots, which retain moisture longer, stretch the interval to 8-10 weeks. Overwatering and overfertilizing go hand in hand—both can suffocate roots and lead to root rot. Always err on the side of caution.
Monitor and Adjust Based on Plant Response
After feeding, observe your plant for 7-10 days. Healthy growth looks like new leaves emerging, vibrant green color, and firm, upright stems. If you see slow growth, yellowing between veins, or stunted leaves, your plant may need more nitrogen. Conversely, brown leaf edges, wilting, or a sudden drop in leaves are signs of overfeeding. In this case, flush the soil with water immediately and reduce fertilizer strength next time.
Seasonal adjustments are key. In fall and winter, most houseplants enter dormancy and require no fertilization. Resume feeding in early spring as new growth appears. If your home has low light, reduce fertilizer strength by half—plants photosynthesize less and absorb fewer nutrients. You'll know you're doing it right when your plants look lush, not leggy, and strong, not stressed.
Tips & tricks for perfect indoor plant feeding
Mastering the art of feeding houseplants transforms them from mere decorations into thriving companions. Here's how to optimize every step for lush, healthy growth.
Fertilizer Timing Precision: The 24-hour waiting period before fertilizing after watering is non-negotiable. This ensures nutrients penetrate evenly to the roots rather than pooling on the surface where they can cause salt buildup. I've seen plants develop crispy edges from fertilizer burn when this step was skipped—don't let that be your plant's downfall. For tropical plants, this 24-hour window also mimics natural rainfall patterns they're accustomed to in their native environments.
Soil Preparation Strategy: When mixing slow-release granular fertilizer into the top 1-2 inches of soil, use a small trowel to create gentle furrows rather than piling it on the surface. This distributes nutrients more evenly throughout the root zone. For sensitive plants like ferns, I recommend mixing the granules with a bit of moist soil before adding to the pot—this creates a buffer that prevents sudden nutrient spikes. The 3-4 month nutrition release from granules makes them ideal for busy plant parents who might forget regular liquid feeding schedules.
Organic Boost Technique: Fish emulsion and seaweed extracts deserve special attention for their microbial benefits. Before applying, I always shake the bottle vigorously to distribute settled nutrients, then apply in a zig-zag pattern across the soil surface. This creates multiple entry points for nutrients to reach the roots. The early morning application time isn't just about leaf drying—it also prevents fungal spores that thrive in evening moisture from taking advantage of any potential sugar residues left on leaves after feeding.
Seasonal Adjustment Insight: The transition from summer's every-4-6-week feeding schedule to winter's complete cessation requires careful observation. I've learned to watch for new leaf growth as a signal to resume feeding in early spring—this natural indicator is more reliable than calendar dates. For plants in low-light conditions, that half-strength fertilizer recommendation becomes even more critical, as their reduced photosynthesis means they can't process nutrients as efficiently.
Pro Tips for Feeding Indoor Plants
- Mastering the art of feeding houseplants transforms them from mere decorations into thriving companions.
- Fertilizer Timing Precision: The 24-hour waiting period before fertilizing after watering is non-negotiable.
- Soil Preparation Strategy: When mixing slow-release granular fertilizer into the top 1-2 inches of soil, use a small trowel to create gentle furrows rather than piling it on the surface.
Frequently asked questions
Got questions about keeping your indoor plants happy and healthy? You're not alone! Here are some of the most common queries—and their straightforward answers—to help you master the art of feeding your leafy friends.
How often should I fertilize my indoor plants?
Most houseplants thrive with monthly fertilization during spring and summer (their active growth phase). Reduce to every 6–8 weeks in fall and winter, or skip it entirely if your plant looks dormant. Over-fertilizing can harm roots, so always follow label instructions and dilute liquid fertilizers by half for sensitive species like ferns or calatheas.
Can I use coffee grounds or eggshells as plant food?
Coffee grounds add nitrogen (great for leafy greens) and improve soil acidity, while crushed eggshells provide calcium. How to use:
- Coffee grounds: Mix 1–2 tbsp into the topsoil or compost monthly.
- Eggshells: Rinse, dry, crush, and sprinkle over soil every 2–3 months.
Why are my plant leaves turning yellow or brown after fertilizing?
Yellow/brown leaves often signal fertilizer burn, caused by too much salt or chemical buildup. Fix it fast:
- Flush the soil with water (run water through the pot for 5–10 minutes).
- Let the soil dry slightly between feedings.
- Switch to a balanced, organic fertilizer (like fish emulsion) for sensitive plants.
What’s the easiest no-fail fertilizer for beginners?
Start with a liquid houseplant fertilizer (like 10-10-10 or 20-20-20) diluted to half-strength. For zero effort, try worm castings—mix 1–2 tbsp into the soil every 2–3 months. Bonus: Worm castings also improve soil texture and microbial life, reducing the need for frequent feeding.
Do I need to fertilize dormant plants in winter?
Most indoor plants (like snake plants or succulents) enter dormancy in winter and don’t need fertilizer during this time. Focus on watering lightly—only when the top inch of soil is dry. Resume feeding in early spring when you spot new growth. Exception: Tropical plants (e.g., ferns, peace lilies) may need light feeding every 8 weeks if they stay active year-round.
| Plant Type | Winter Fertilizer Needs |
|---|---|
| Succulents/Cacti | None—wait until spring |
| Tropicals (e.g., Monstera, Calathea) | Light feeding every 8 weeks |
| Dormant Bulbs (e.g., Amaryllis) | None until shoots appear |
Wrapping up and next steps
Feeding your indoor plants doesn’t have to be complicated—just consistent, mindful, and tailored to their needs! 🌿 Whether you’re using organic compost, diluted liquid fertilizers, or homemade tea blends, the key is observing your plants and adjusting their diet for vibrant growth.
Start small, experiment with what works, and soon you’ll have a thriving green sanctuary that brightens up your space.
Ready to take the next step? Pick one plant this week and give it a little extra care—maybe a foliar spray or a slow-release pellet. Watch it flourish, and soon, your entire collection will thank you!