
Pruning
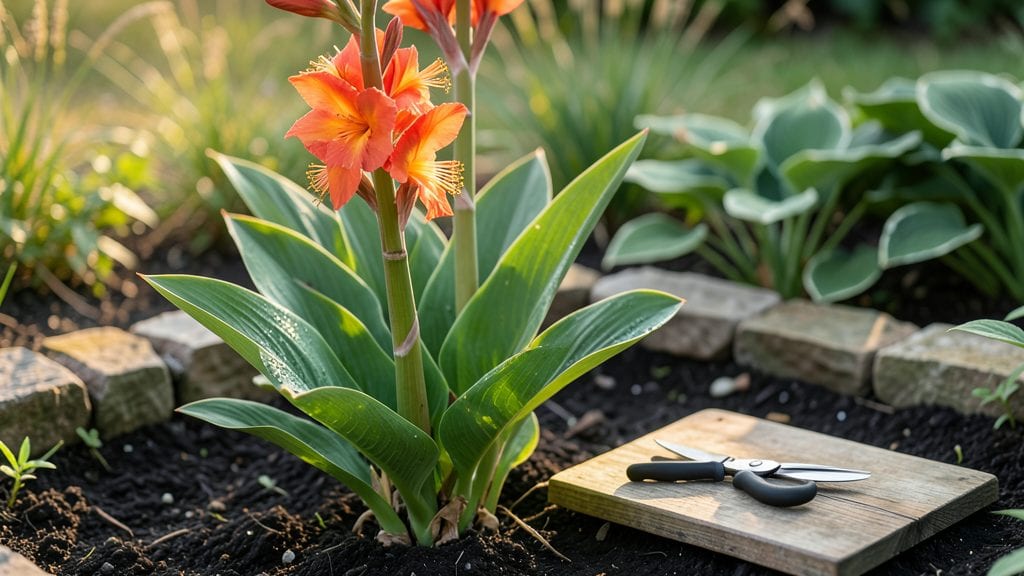
My canna plants look like tropical showstoppers because I prune them three times a year—spring cleanup, midseason shaping, and late-season prep for dormancy. 🌿 The right cuts keep them blooming longer, stronger, and more dramatic than any neighbor’s unpruned stalks.
Most gardeners wait until the plant looks ragged, but that’s too late. I’ve found the sweet spot between aggressive trimming and letting them get leggy.
The secret isn’t just when you cut—it’s how. You’ll need sharp pruners, a clean cut just above a leaf node, and a little patience while the plant recovers. My biggest mistake was snipping too close to the ground in fall, which left no energy for next year’s growth.
Now I leave 6-8 inches of stalk, and the plants bounce back like nothing happened.
After pruning, you’ll see new shoots emerge within 10-14 days, often with bigger, bolder blooms than before. The foliage stays lush, the stems stay sturdy, and you avoid the sad, bare stalks that signal a plant past its prime.
This method works for cannas in pots or garden beds, whether you’re in a hot summer zone or a cooler climate with winter dormancy.
Fair warning: the first time you prune cannas, you might hesitate—what if you cut too much? Trust the process. Even if you make a mistake, cannas are forgiving.
By the end of the season, you’ll have a foolproof system that keeps your plants thriving year after year, with minimal effort and maximum impact.
📚 In This Guide
- What you need
- Instructions
- Tips and common mistakes
- Wrapping up and next steps
What you need
- ● Sharp bypass pruners (1 pair) – Look for ergonomic, stainless-steel blades (3.5"–4" opening) to avoid crushing stems.
- ● Hand pruners or shears (1 pair) – For smaller cuts and delicate foliage (2"–3" blades).
- ● Gloves (1 pair) – Garden or cut-resistant gloves to protect hands from thorns or sap.
- ● Disinfectant (70% isopropyl alcohol or bleach solution) – 1:10 bleach-water mix to sterilize tools between cuts.
- ● Garden twine or plant ties (small roll) – For securing heavy stems post-pruning.
- ● Compost bin or bag – To collect pruned material for nutrient recycling.
- ● Watering can or hose – For post-pruning hydration (1–2 gallons per plant).
- ● Loppers – For thicker stems (if your cannas grow over 4 feet tall).
- ● Pruning saw – For stubborn, woody growth (rare in cannas but useful for established plants).
- ● Plant food (balanced 10-10-10 or compost tea) – To boost recovery after heavy pruning.
- ● Mulch (straw or shredded leaves) – To retain moisture and protect roots post-cut.
- ● Camera or sketchpad – To document your pruning strategy for future reference!
Step-by-Step guide to pruning canna plants for lush year-round growth
Three well-timed cuts keep cannas thriving—here's my foolproof method for stronger stems and bigger blooms.
✂️ Step 1: Early Spring Cleanup Cut
Start in late February or early March when new growth begins to sprout from the rhizomes. Look for fresh green shoots pushing through the soil—this is your signal. Using clean, sharp pruners, cut back all old, brown stems to about 2 inches above the soil line. This removes dead growth and redirects energy to new shoots.
I always sterilize my pruners with rubbing alcohol first to prevent disease transfer. If you spot any blackened or mushy stems, trim those extra aggressively—they're often infected. After cutting, remove all debris from the base to keep the area clean and dry.
✂️ Step 2: Mid-Summer Bloom Boost Cut
Wait until late July or early August when your cannas have finished their first major flush of blooms. This is the moment that matters: you'll see spent flower stalks and some leaves starting to yellow. Using your pruners, cut back one-third of the tallest stems at a 45-degree angle, leaving 4-6 inches of growth above a leaf node.
This encourages bushier growth and triggers a second round of blooms. I like to make these cuts on a cloudy day—the plants handle stress better when they're not battling midday sun. After pruning, give the plant a light application of balanced fertilizer (10-10-10) to support new growth.
✂️ Step 3: Late Season Prep Cut
Begin this cut in mid-October when nighttime temperatures dip below 50°F. Look for stems that have stopped producing flowers and leaves that are turning brown. Using your pruners, cut back all stems to about 6 inches tall, but leave the lower leaves intact. This protects the rhizomes while allowing sunlight to reach them.
Here's the thing—don't remove all the foliage. The remaining leaves continue photosynthesizing until frost, storing energy in the rhizomes for next year. After cutting, I spread a 2-inch layer of mulch around the base to insulate the rhizomes through winter. This simple step prevents freeze damage and makes spring regrowth effortless.
🌱 Step 4: Post-Frost Spring Revival Trim
Wait until after the last frost date in your area (usually mid-April or later). Look for new shoots emerging from the ground—this means the rhizomes have survived winter. Using your pruners, trim back any dead or blackened growth to clean, healthy tissue. You'll see fresh green shoots pushing through the soil.
This final cut removes any winter damage while leaving the new growth intact. I like to add a slow-release fertilizer at this stage to give the plants a nutrient boost as they start their second growing season. Water deeply after trimming to help the roots establish in the fresh soil.
Tips & tricks for perfect canna plant pruning
Mastering these simple strategies will help your cannas thrive through all four seasons—no green thumb required.
Sterilize Your Tools: Always wipe your pruners with rubbing alcohol between cuts, especially in Step 1 when dealing with old growth. I've seen fungal infections spread just from using the same tools on healthy and diseased stems. For extra protection, keep a small bottle of alcohol handy by your gardening station—it takes seconds and prevents years of plant struggles.
Timing is Everything: The mid-summer cut in Step 2 should happen when you notice those yellowing leaves and spent blooms—don't wait until the stems are completely brown. I've learned this the hard way: cutting too late means you miss the chance for that second flush of blooms. Check your plants weekly in July and August to catch the perfect moment.
Mulch Matters: That 2-inch layer of mulch in Step 3 isn't just decoration—it's insulation. I've seen cannas survive winters with just this simple protection, even in zones where temperatures dip below freezing. Use straw or shredded leaves for the best results, and avoid piling mulch directly against the stems to prevent rot.
Fertilizer Strategy: When you apply that light 10-10-10 fertilizer after Step 2, focus on the soil around the base rather than sprinkling it on the leaves. I've noticed the biggest difference in plant vigor when I follow this method—it encourages root development rather than leafy growth that won't translate to more blooms.
Pro Tips for Canna Plant Pruning
- Mastering these simple strategies will help your cannas thrive through all four seasons—no green thumb required.
- Sterilize Your Tools: Always wipe your pruners with rubbing alcohol between cuts, especially in Step 1 when dealing with old growth.
- Timing is Everything: The mid-summer cut in Step 2 should happen when you notice those yellowing leaves and spent blooms—don't wait until the stems are completely brown.
Frequently asked questions
Got questions about keeping your Canna plants thriving with strategic pruning? You’re not alone! Here are answers to the most common concerns—from timing to troubleshooting—so you can prune like a pro.
When is the best time to prune Canna plants?
Prune Canna plants in early spring (just as new growth starts) and late summer (after flowering) to encourage bushier growth. Avoid heavy cuts in fall if frost is imminent—focus on shaping instead. For tropical climates, prune lightly year-round to maintain size.
Can I prune Canna plants during flowering?
Yes, but lightly! Trim spent blooms (deadheading) to redirect energy to new flowers. Avoid cutting back more than 1/3 of the plant during peak bloom—this can reduce flowering. Save heavier pruning for post-flowering (late summer) to prep for next season’s growth.
What should I do if my Canna plant looks leggy after pruning?
Leggy growth often means your plant needs more light or balanced nutrients. After pruning, move it to a sunnier spot (6+ hours of light daily) and fertilize with a balanced 10-10-10 or high-potassium formula to encourage compact, bushy regrowth. Avoid overwatering, which can stretch stems.
Do I need to sterilize my pruning tools for Canna plants?
Sterilize shears with rubbing alcohol (70%+) or a 10% bleach solution between cuts to prevent disease spread (like bacterial blight). Canna plants are tough, but clean tools keep them healthier and reduce the risk of fungal infections in cuts.
Can I propagate Canna plants from pruned cuttings?
Yes! Use healthy, 4–6 inch cuttings with at least one node (growth point). Dip in rooting hormone, plant in moist potting mix, and keep in bright, indirect light. Roots should form in 2–4 weeks. Great way to multiply your plants for free!
What if my Canna plant doesn’t regrow after pruning?
Check for root health first—over-pruning or underwatering can stress the plant. If the rhizome (underground stem) is soft or mushy, it may be rotting. Trim away damaged areas, replant in fresh soil, and ensure well-draining containers (if potted). Patience helps—new shoots often emerge within 2–3 weeks.
Wrapping up and next steps
Mastering canna plant pruning is your ticket to lush, vibrant foliage year-round—no green thumb required! By focusing on just three strategic cuts (spring cleanup, summer shaping, and fall preparation), you’ll encourage healthier growth, brighter blooms, and even bigger harvests. 🌿✨
Now that you’re armed with the tools, timing, and techniques, it’s time to roll up your sleeves! Start with one section of your garden this weekend—you’ve got this! For extra confidence, revisit our FAQs or snap a photo of your progress and tag us. Happy pruning!