Diseases
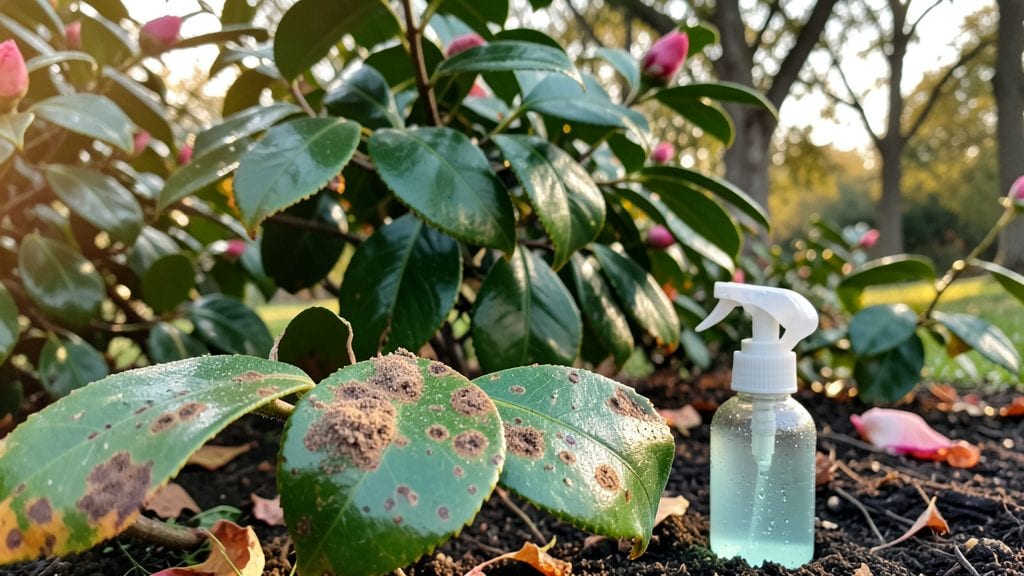
Camellia plant diseases can turn your glossy evergreen into a sad, spotty mess if you don’t catch them early. 🌿 I’ve seen petal blight turn perfect blooms into slime-covered ruins and root rot silently strangle plants from below—both are preventable with the right know-how.
The key is spotting symptoms before they spread: brown spots on petals, yellowing leaves, or mushrooms popping up at the base. Most problems start with watering or airflow issues, but once they take hold, even organic fixes take time.
Petal blight and fungal infections love damp leaves and crowded branches, while root rot thrives when soil stays soggy for days. My first mistake? Waiting until the damage was obvious—by then, the plant was already stressed.
The good news is that copper fungicide sprays, neem oil treatments, and proper spacing can stop these issues before they start. Even better, healthy camellias resist disease far better than neglected ones. A little pruning to improve airflow and mulching to regulate soil moisture makes a huge difference.
You’ll save your camellias—and your sanity—by acting fast when you see the first signs. A single copper spray can halt petal blight in its tracks, while adjusting your watering schedule (deep but infrequent soaks) keeps roots happy.
The goal isn’t just to fix what’s broken but to create conditions where diseases can’t take hold in the first place. Think of it like armor for your plants: stronger roots, cleaner foliage, and a few simple habits keep them thriving year after year.
This works for both old garden camellias and new transplants, though mature plants need extra attention during rainy seasons. The same principles apply whether you’re dealing with a single infected bloom or a whole hedge.
Start with the basics—watering, airflow, and regular checks—and you’ll avoid the heartbreak of losing a plant to something preventable. Let’s get those camellias back to their best.
Root Causes Behind Camellia Struggles
Camellias are stunning evergreen shrubs, but their health can take a hit from a mix of environmental stressors, pathogens, and cultural mismanagement. Understanding why these diseases strike is the first step to prevention—and keeping your camellias thriving. Let’s break down the key culprits behind their decline.
Fungi are the #1 enemy of camellias, especially in humid climates. These microscopic invaders thrive when conditions are just right—think warm, damp air and poor air circulation. Here’s how they sneak in:
- Overhead Watering 💦: Splashing water onto leaves creates the perfect fungal buffet. Botrytis blight and anthracnose love damp foliage, leading to brown spots and wilting.
- Thick, Dense Canopies 🌿: When branches grow too close together, airflow stalls, trapping moisture and inviting powdery mildew or leaf spot diseases.
- Old or Damaged Leaves 🍂: Fungi latch onto weak spots, turning yellowing or dead leaves into infection hotspots.
Pro Tip: 💡 Space plants 3–5 feet apart and water at the base—never from above—to starve fungi of their favorite conditions.
While pests themselves don’t cause diseases, their damage weakens camellias, making them vulnerable to infections. Here’s how they pave the way:
- Scale Insects 🛡️: These sap-sucking pests leave sticky residue (honeydew) that attracts sooty mold—a fungal growth that smothers leaves.
- Spider Mites 🕷️: Their feeding causes stippling (tiny white dots) on leaves, reducing the plant’s ability to photosynthesize and fight off pathogens.
- Caterpillars 🐛: Chewing on leaves creates wounds where bacterial blight or root rot can sneak in.
Action Step: 🔥 Monitor undersides of leaves weekly and treat infestations early with neem oil or insecticidal soap to prevent secondary infections.
Camellias hate soggy feet. When soil stays waterlogged, root rot (caused by Phytophthora fungi) sets in, cutting off nutrient flow. Here’s why it happens:
| Problem | Why It Weakens Camellias |
|---|---|
| Compacted Soil 🪨 | Prevents oxygen from reaching roots, suffocating them and inviting fungal growth. |
| Clay-Heavy Soil 🏗️ | Holds too much moisture, creating anaerobic (oxygen-free) zones where root rot thrives. |
| Lack of Organic Matter 🍂 | Reduces soil porosity, trapping water and nutrients in harmful concentrations. |
Fix It: 🌱 Amend soil with compost or pine bark fines to improve drainage. For container-grown camellias, ensure pots have drainage holes and use a well-draining mix.
Camellias are sensitive to extreme conditions. When pushed too far, their defenses drop, making them easy targets for diseases. Common triggers include:
- Sudden Temperature Shifts ❄️☀️: Cold snaps followed by warm spells stress plants, weakening cell walls and inviting fungal infections like canker disease.
- Low Light Exposure 🌑: Etched or pale leaves signal poor photosynthesis, reducing the plant’s ability to resist pathogens.
- High Humidity 💧: While camellias love humidity, stagnant air (especially in greenhouses) accelerates fungal spread.
Solution: ✨ Place camellias in partial shade during peak summer and ensure good airflow—even a small fan can reduce humidity around potted plants.
By tackling these root causes, you’ll give your camellias the best shot at staying disease-free. Next, we’ll dive into organic treatments to restore their health naturally.
Quick Fixes for Camellia Ailments
When your camellia shows signs of distress, acting fast can save its life—and its beauty! Below are practical, organic solutions tailored to the most common issues, from fungal infections to pest invasions. Each fix includes prevention tips to keep your plant thriving long-term.
1. Brown Leaf Spots (Anthracnose or Leaf Spot Fungus) 🔥 Fix It:
- Prune infected leaves immediately (sterilize shears with rubbing alcohol to avoid spreading spores).
- Apply a copper fungicide spray (like copper sulfate) every 7–10 days until symptoms fade.
For an organic option, mix 1 tsp baking soda + 1 quart water + a drop of dish soap and spray foliage. - Improve airflow by thinning dense branches or spacing plants 3–4 feet apart.
💡 Prevention Tips:
- Water at the base (avoid wetting leaves) and water early in the day so foliage dries quickly.
- Mulch with pine needles or gravel (not organic mulch) to reduce humidity near the soil.
- Avoid overhead irrigation—use drip systems instead.
2.
Root Rot (Soggy Soil & Yellowing Leaves) 🍳 Fix It: - Stop watering immediately and let the soil dry out for 3–5 days. - Repot the camellia in well-draining soil (mix equal parts peat moss, perlite, and pine bark). - Add fungicide (like neem oil or mycorrhizal fungi) to the new soil to prevent reinfection.
👨🍳 Prevention Tips:
- Ensure pots have drainage holes—camellias hate "wet feet."
- Use raised beds or containers if your garden retains too much moisture.
- Test soil pH (camellias prefer 5.5–6.5)—acidic, compacted soil worsens rot.
3.
Camellia Scale or Mealybugs (Sticky Leaves & White Cottony Patches) 🔪 Fix It: - Wipe off pests with a soapy water solution (1 tsp mild soap per quart of water) using a soft cloth. - Spray with neem oil (repeat every 5–7 days for 2–3 weeks). - Introduce beneficial insects like ladybugs or lacewings to eat the pests naturally.
⏰ Prevention Tips:
- Inspect new plants before bringing them home—quarantine for a week if possible.
- Keep the area weed-free (weeds harbor pests).
- Use reflective mulch (like aluminum foil) to deter insects.
4. Spider Mites (Tiny Webs & Speckled Leaves)
🌡️ Fix It:
- Blast mites off with a strong spray of water (they hate humidity).
- Apply horticultural oil or insecticidal soap (follow label instructions).
- Increase humidity around the plant (mist leaves or use a pebble tray with water).
🎯 Prevention Tips:
- Water deeply and regularly—drought stress attracts mites.
- Prune crowded branches to improve air circulation.
- Rotate sprays (don’t overuse one product) to avoid resistance.
| Issue | Quick Fix | Long-Term Fix |
|---|---|---|
| Slow Growth | Fertilize with acid-loving plant food (like 8-3-9) in spring. | Test soil pH yearly; amend with sulfur if too alkaline. |
| Dropping Buds | Check for bud blast (fungus)—spray with baking soda mix. | Avoid late-season fertilizing; prune for airflow. |
| Chlorosis (Yellow Leaves) | Apply chelated iron or Epsom salt (1 tbsp/gallon water). | Ensure soil is acidic (pH 5.5–6.5); avoid lime. |
✨ Pro Tip: Rotate treatments—if one method stops working, switch to a different organic remedy (e.g., after neem oil, try potassium soap). Consistency is key!
By tackling problems early and organically, your camellia will bounce back stronger—and put on a show-stopping bloom display next season. 🌸
Frequently asked questions about camellia plant diseases
What are the most common signs of fungal infections in camellias?
Look for dark brown or black spots on leaves and petals, often with a fuzzy or slimy texture. Powdery mildew appears as white, powdery patches, while anthracnose causes irregular, sunken lesions. Early detection is key—remove infected parts immediately and apply a copper fungicide spray.
How do I know if my camellia has root rot instead of another disease?
Root rot shows as yellowing leaves, stunted growth, and a sour, foul smell from the soil. Gently lift the plant—healthy roots are firm and white, while rotten roots are mushy, brown, and crumble easily. If you see mushrooms at the base, that’s a sure sign of fungal root rot.
Can I use household items to treat camellia diseases organically?
For fungal issues, mix 1 tsp baking soda + 1 quart water + a drop of dish soap and spray leaves. Neem oil (2 tsp per quart of water) works against pests and mild fungal infections. Always test sprays on a small area first to avoid leaf burn.
Why do my camellia leaves turn yellow even when I water regularly?
Yellowing leaves often signal chlorosis, caused by iron deficiency or alkaline soil. Test your soil pH—camellias need acidic soil (5.5–6.5). Apply chelated iron or Epsom salt (1 tbsp/gallon water) every 2 weeks until leaves green up again.
How can I prevent diseases in camellias before they start?
Focus on proper spacing (3–5 feet apart), watering at the base, and pruning for airflow. Use mulch like pine needles (not organic mulch) to reduce humidity. Spray with neem oil preventatively every 4–6 weeks during humid seasons.