
Companion Plants
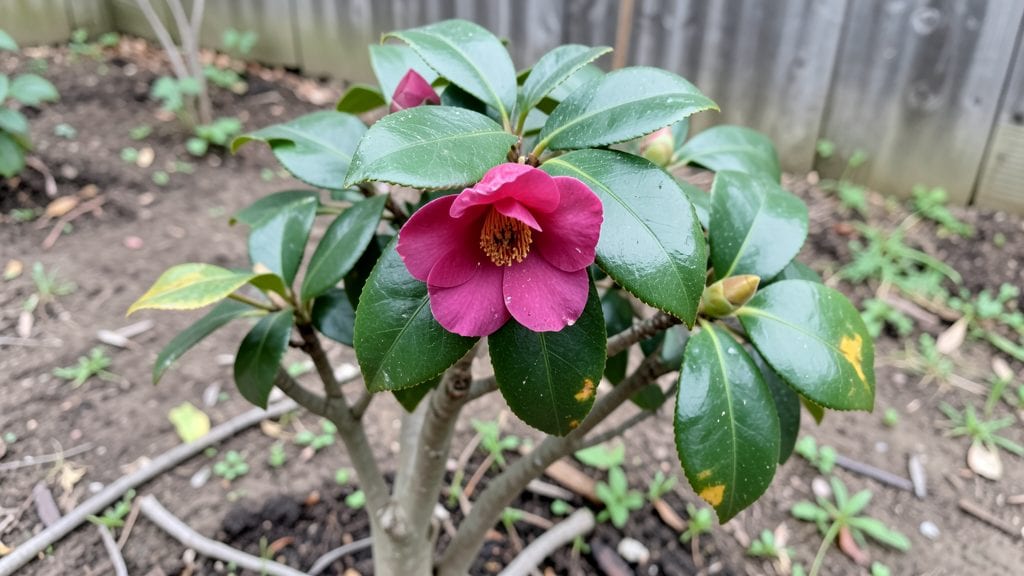
Camellia evergreen plants transform any yard into a lush, year-round privacy screen with their glossy, dark leaves and stunning blooms. 🌿 I planted mine last spring, and by summer, they’d already outgrown the flimsy bamboo fence—now they’re a thick, living wall that never loses its color.
The secret lies in their adaptability: they thrive in partial shade, handle humidity like a champ, and bloom in late winter when most gardens are still dormant.
These plants love acidic, well-draining soil—think pine mulch or peat moss mixed in—and prefer morning sun with afternoon shade to prevent leaf scorch. Water them deeply once a week, but avoid soggy roots, which lead to root rot.
A slow-release fertilizer in early spring keeps them lush, and they’ll reward you with rosy pink, deep red, or creamy white flowers that last for weeks. Prune lightly after blooming to shape them, but never cut into old wood.
What makes camellias special is their four-season appeal: glossy leaves stay vibrant even in winter, and the blooms arrive when gardens feel bare. My neighbors now ask how I keep my yard so green year-round—the answer?
These evergreen workhorses that need almost no effort once established. They’re perfect for hedges, foundation plantings, or even container growing in smaller spaces.
Fair warning: camellias hate alkaline soil and harsh winds, so test your dirt and pick a sheltered spot. But once they’re happy, they’ll outlast any other privacy solution—and look better doing it. Here’s how to get them thriving in your yard.
📚 In This Guide
- What you need
- Instructions
- Tips and common mistakes
- Wrapping up and next steps
What you need
- ● Camellia plants: 1–5 mature nursery-grown camellias (Camellia japonica or Camellia sasanqua), depending on desired screen size (6–10 ft tall at maturity).
- ● OR Seeds or cuttings (if propagating from scratch).
- ● Well-draining soil: 5–10 bags of acidic, organic potting mix (pH 5.0–6.5) or amended garden soil with peat moss, compost, and perlite.
- ● Planting site: Partial shade (3–6 hours of sunlight daily).
- ● Space 6–10 ft apart for full coverage (adjust based on variety).
- ● Mulch: 2–3 cubic yards of pine bark or wood chips to retain moisture and regulate temperature.
- ● Garden trowel or spade (for digging).
- ● Pruning shears (sterilized with rubbing alcohol).
- ● Garden hose or watering can (with a fine rose nozzle).
- ○ Gloves (optional, for handling thorns or soil).
- ○ Stakes and twine (optional, for young plants to prevent wind damage).
- ● Slow-release fertilizer (acid-loving plant formula, e.g., Miracle-Gro Azalea, Camellia & Rhododendron).
- ● Soil pH test kit (to confirm acidity levels).
- ● Fungicide (e.g., copper fungicide, for prevention of leaf spot).
- ● Drip irrigation system (for consistent moisture in dry climates).
Step-by-step guide to planting Camellia evergreen shrubs for a lush privacy screen
Here’s how to plant bold, glossy camellias that deliver year-round privacy and stunning foliage.
🌱 Step 1: Choose the Perfect Planting Location
Camellias thrive in partial shade, with morning sun and afternoon shade—especially in hotter climates. Avoid deep shade, which weakens growth and reduces flowering. Test your spot by observing sunlight patterns for a week; the ideal location gets 3-6 hours of filtered light daily. South-facing windows or east-facing gardens work best.
Check soil drainage by digging a 12-inch hole—if water pools after 30 minutes, amend the area with 2-3 inches of compost or sand to improve airflow. Camellias hate soggy roots, so raised beds or slightly elevated areas help in heavy clay soil. I always plant mine where they’ll have room to spread 6-10 feet wide—they’re not shrinking violets!
🪴 Step 2: Prepare the Soil and Planting Hole
Mix 3 gallons of acidic potting mix (pH 5.5-6.5) with 1 gallon of peat moss or sphagnum peat to create a well-draining, nutrient-rich blend. Camellias are divas about soil—too alkaline, and they sulk by dropping leaves. Test your soil’s pH with a kit; if it’s off, add sulfur or pine needles to acidify gradually.
Dig a hole twice as wide as the root ball but no deeper—camellias hate being buried too deep, which suffocates roots. Loosen the roots gently if they’re circling in the pot, then place the plant so the top of the root ball sits 1-2 inches above ground level. This prevents water from pooling at the stem. I always tap the sides of the hole lightly to settle the soil before adding the plant.
💧 Step 3: Plant and Water Deeply for Establishment
Backfill the hole with your amended soil mix, pressing firmly around the roots to eliminate air pockets. Water deeply until the soil is saturated 6 inches down—you’ll know it’s right when water runs out the drainage holes of the pot. Mulch the base with 2 inches of pine bark or wood chips, keeping it 3 inches away from the stem to prevent rot.
Camellias need consistent moisture but despise soggy feet. Water 2-3 times per week for the first month, then taper to once a week once established. Watch for wilting leaves—that’s your cue to water. I set a reminder on my phone for the first few weeks; these plants are thirsty but hate being drowned.
☀️ Step 4: Prune and Protect for Long-Term Growth
Prune in late winter or early spring before new growth appears, cutting back one-third of the oldest stems to encourage bushier growth. Remove any dead, crossing, or weak branches with clean sterilized pruners. Camellias bloom on old wood, so avoid heavy pruning after flowering—you’ll sacrifice next year’s blooms.
Fertilize twice a year in early spring and mid-summer with a balanced, slow-release fertilizer (10-10-10 ratio). I swear by a handful of coffee grounds around the base every few months—it’s free, acidic, and gives them a little caffeine boost. Protect young plants from winter winds with a burlap windbreak if you’re in a harsh climate.
⏰ Step 5: Maintain Year-Round for Maximum Privacy
Camellias are evergreen, so they’ll provide year-round privacy, but their glossy leaves shine brightest with regular care. Trim back leggy growth in early spring to maintain a dense screen. Watch for aphids or scale insects—spray with neem oil at the first sign of sticky leaves. I also rotate my plants quarter-turn every 6 months to keep them growing evenly toward the sun.
By year 3, your camellias will form a 6-foot-tall, 10-foot-wide living wall—thick enough to block nosy neighbors and bright enough to turn heads. Just remember: patience is key. These beauties grow slowly but reward you with decades of lush, fragrant foliage if you give them the right conditions.
Tips & tricks for perfect Camellia evergreen planting
These simple tricks will help you create a thriving privacy screen that grows into a lush, evergreen wall over time.
Light Observation: Before planting, observe your chosen spot for a full week to track sunlight patterns. Camellias need that perfect balance of 3-6 hours of filtered light daily—morning sun with afternoon shade is ideal. I’ve learned the hard way that even slight variations can affect growth and flowering. Use a small notebook to jot down sun exposure times at different locations in your yard.
Soil Preparation: Don’t skip the soil test! Camellias are particular about pH—aim for 5.5-6.5. If your soil tests higher, mix in 2-3 inches of compost or pine needles to acidify gradually. I always add a handful of sulfur to the planting hole when I know my soil runs alkaline. The key is patience—amending soil takes time, but it’s worth it for those glossy leaves.
Planting Depth: Position your camellia so the top of the root ball sits 1-2 inches above ground level—this prevents water from pooling at the stem. I use a small stake to mark the correct depth before planting. After backfilling, gently tap the sides of the hole to settle the soil and eliminate air pockets around the roots.
Watering Strategy: The first month is critical for establishing roots. Water 2-3 times per week until the soil is saturated 6 inches down. I set a reminder on my phone for these watering sessions—camellias are thirsty but hate soggy feet. After the first month, you can reduce to once a week, but always check for wilting leaves as your cue to water.
Pro Tips for Camellia Evergreen Plants
- These simple tricks will help you create a thriving privacy screen that grows into a lush, evergreen wall over time.
- Light Observation: Before planting, observe your chosen spot for a full week to track sunlight patterns.
- Soil Preparation: Don’t skip the soil test!
Frequently asked questions
Got questions about growing and caring for camellia evergreen plants? Here are some of the most common ones—and their answers—to help you create a stunning, low-maintenance privacy screen:
How fast do camellias grow, and when can I expect a full privacy screen?
Camellias grow at a moderate pace—about 12 to 18 inches per year under ideal conditions. A 6-foot-tall screen may take 5 to 7 years to fully mature. For faster results, plant them closer together (3 to 5 feet apart) or pair them with taller companion plants like bamboo or aralias.
Are camellias frost-hardy, and how do I protect them in winter?
Most camellias thrive in USDA Zones 7-9, but some varieties (like Camellia japonica) can tolerate light frost. To shield them from cold snaps, mulch heavily (3-4 inches of organic mulch) and water deeply before the first freeze. For extreme winters, wrap young plants in burlap or use a frost cloth.
Why are my camellia leaves turning yellow or brown?
Yellowing leaves often signal overwatering or poor drainage, while brown edges or spots may mean underwatering, sunburn, or fungal issues. Check soil moisture (keep it consistently moist but not soggy) and ensure 6+ hours of dappled shade daily. If fungal disease (like anthracnose) is suspected, prune affected leaves and apply neem oil.
Can I grow camellias in containers, or do they need to be planted in the ground?
Yes! Camellias adapt well to large containers (15+ gallons) if you provide well-draining soil and regular watering. Use a mix of peat moss, perlite, and pine bark for best results. Repot every 2-3 years and place containers in partial shade (avoid harsh afternoon sun). Container-grown camellias may need winter protection in colder zones.
What pests commonly attack camellias, and how do I get rid of them?
Watch for scale insects, spider mites, and camellia leaf miners. For mild infestations, spray plants with water to dislodge pests. For stubborn problems, use insecticidal soap or horticultural oil. Encourage natural predators like ladybugs by planting neighboring pollinator-friendly flowers.
Wrapping up and next steps
Camellia evergreen plants are the perfect blend of beauty and function—offering year-round privacy, lush foliage, and stunning blooms while requiring minimal fuss. Whether you're a seasoned gardener or just starting out, these versatile shrubs can transform any space into a serene, green oasis. 🌿✨
Ready to elevate your garden? Start by selecting the right variety for your climate, then plant with confidence—your future privacy screen (and curb appeal!) will thank you. Happy gardening!