
Planting
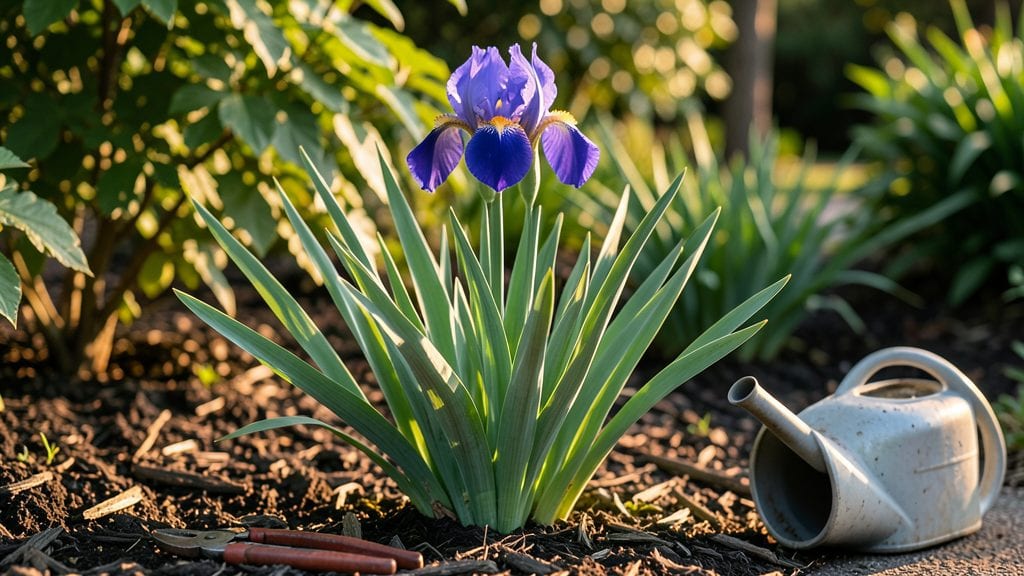
Growing blue iris plants with those showstopping striped blooms starts with the right conditions—full sun, rich soil, and patience that pays off in dramatic color. 🌿 I’ve grown irises for years, and the key to those bold blue-and-yellow blooms isn’t complicated: it’s about mimicking their natural habitat.
Too many gardeners overwater or plant them in the wrong spot, and the results are disappointing. But when you get it right, your garden will have a centerpiece that lasts for months.
The secret to success begins with well-draining soil that’s slightly acidic, mixed with compost for nutrients. Irises hate soggy roots, so raised beds or slopes work best in wetter climates. Once planted, they’re surprisingly low-maintenance—just cut back the old foliage in late summer and fertilize lightly in early spring.
Most people skip this step, which is why their irises never bloom as dramatically as they should.
By late spring, you’ll be rewarded with sword-like leaves and clusters of those striking blue flowers that draw in pollinators. The blooms last for weeks, and with proper care, your irises will multiply over time, creating naturalized drifts that look effortless.
The best part? Once established, they’re nearly foolproof—just water occasionally and enjoy the show.
If your irises aren’t flowering, it’s usually because they’re getting too much nitrogen or not enough sunlight. Yellowing leaves often mean overwatering or poor drainage. But with the right approach, you’ll have a garden feature that’s both stunning and resilient.
Let’s get those roots settled for a season of bold color.
📚 In This Guide
- What you need
- Instructions
- Tips and common mistakes
- Wrapping up and next steps
What you need
- ● Blue iris rhizomes: 3–5 healthy, firm rhizomes (choose Siberian iris or German iris varieties for true blue blooms).
- ● Well-draining potting mix: 5–10 gallons (or enough to fill your planting area). Use a blend of 50% garden soil, 30% perlite/sand, and 20% compost.
- ● Garden trowel or shovel: For digging rhizomes 2–4 inches deep (depending on size).
- ● Watering can or hose with a gentle nozzle: Irises hate soggy roots—aim for 1–1.5 inches of water per week.
- ○ Mulch (optional but recommended): 2–3 inches of gravel, pine bark, or straw to retain moisture and deter weeds.
- ● Pruning shears: For trimming spent blooms (leave foliage until it yellows naturally!).
- ● Garden gloves: Protect your hands from rhizome sharpness.
- ● Stakes or trellis (for tall varieties): If growing bearded iris, add support for dramatic spikes.
- ● Slow-release fertilizer (5-10-5): 1–2 tablespoons per plant at planting time.
- ● Drip irrigation kit: Automate watering for low-maintenance growth.
Step-by-Step instructions for planting and cultivating blue iris
Here’s how to grow bold, striped blue irises that thrive in full sun and transform your garden.
🪴 Step 1: Choose the Perfect Planting Location
Blue irises demand full sun—at least 6 hours of direct sunlight daily—for their signature vibrant blooms. I always pick a spot with well-draining soil, as soggy roots lead to rot. If your soil drains poorly, amend it with 2-3 inches of coarse sand or grit mixed into the top 12 inches before planting.
Dig a hole twice as wide as the iris rhizome (the thick, fleshy root) but only 1 inch deep. The top of the rhizome should peek above the soil line—this ensures sunlight reaches the growth point. If buried too deep, the plant may rot; if too high, it won’t establish properly.
🌱 Step 2: Plant Rhizomes at the Right Depth and Spacing
Gently place the rhizome in the hole with the fan of roots facing downward and the pointy end upward. This isn’t just a quirk—it ensures the plant grows straight and strong. Space rhizomes 18-24 inches apart for mature plants, giving them room to spread their striking foliage.
Cover the rhizome with soil, leaving the top ⅓ exposed. Press lightly around the base to secure it, but don’t compact the soil. Water deeply right after planting to settle the soil and encourage root growth. You’ll know it’s right when the soil feels moist but not waterlogged.
☀️ Step 3: Provide Consistent Water and Sun for Establishment
Keep the soil evenly moist for the first 4-6 weeks after planting, but avoid soggy conditions. Irises are drought-tolerant once established, but young plants need steady moisture. Water deeply once a week (or more in extreme heat) until the foliage turns fully green and sturdy.
Fertilize lightly in early spring with a balanced, slow-release fertilizer (10-10-10) to encourage strong growth. Too much fertilizer can lead to lush foliage but fewer blooms. Watch for new fan-shaped leaves—this signals the plant is rooting and preparing for next year’s blooms.
✂️ Step 4: Prune and Maintain for Long-Town Blooms
Deadhead spent blooms by snipping the flower stalk at the base once the petals fade. This redirects energy to next year’s blooms instead of seed production. I also cut back yellowed or damaged leaves in late fall to keep the plant tidy and reduce disease risk.
Divide clumps every 3-4 years when blooms become sparse. Dig up the rhizomes in early spring, separate the fans, and replant the healthiest sections. This rejuvenates the plant and prevents overcrowding, which can lead to fewer flowers. You’ll know it’s time when you see multiple small rhizomes forming around the original plant.
⏰ Step 5: Winter Care for Next Year’s Blooms
Irises are hardy and generally low-maintenance, but a light mulch of 1-2 inches in late fall helps protect the rhizomes from freezing temperatures. Choose a permeable mulch like straw or shredded leaves—never thick layers that smother the plant.
In early spring, remove old foliage but leave the new growth intact. The old leaves provide some winter protection, and the new ones signal the plant’s readiness to bloom. You’ll see tight buds forming by late spring—this is your cue that all your care is paying off!
Tips & tricks for perfect blue iris planting
These practical tips will help you avoid common pitfalls and grow show-stopping blue irises that come back year after year.
Sunlight Secret: The 6 hours of direct sunlight mentioned in Step 1 is non-negotiable for those signature striped blooms. I always test my spot by placing a white plate where I plan to plant—if it casts a shadow for more than 3 hours during the day, move to a sunnier location. Morning sun is ideal, but afternoon sun works too as long as it's full sun.
Soil Preparation Strategy: When amending your soil with 2-3 inches of coarse sand or grit in Step 1, mix it thoroughly into the top 12 inches. I like to use a garden fork to loosen the soil first, then work in the amendment. This creates the perfect drainage without turning your soil into pure sand. Think of it as giving your irises a well-drained foundation—just like a good house needs a solid foundation!
Planting Depth Visual: That 1-inch deep planting in Step 2 can be tricky to visualize. I use a ruler to measure the depth—just make sure the top third of the rhizome stays exposed. Here's my trick: after planting, draw a small line in the soil at the rhizome's top edge. If this line disappears after watering, you've buried it too deep.
Watering Wisdom: During the critical 4-6 week establishment period in Step 3, I check soil moisture by sticking my finger about 2 inches into the soil. If it feels dry, it's time to water. The goal is consistent moisture—not soggy soil. I water deeply in the morning so the leaves have time to dry, which helps prevent fungal issues. Think of it like giving your iris a refreshing drink first thing in the morning rather than a late-night soak.
Pro Tips for Blue Iris Plant
- These practical tips will help you avoid common pitfalls and grow show-stopping blue irises that come back year after year.
- Sunlight Secret: The 6 hours of direct sunlight mentioned in Step 1 is non-negotiable for those signature striped blooms.
- Soil Preparation Strategy: When amending your soil with 2-3 inches of coarse sand or grit in Step 1, mix it thoroughly into the top 12 inches.
Frequently asked questions
Got questions about growing your own blue iris plant?
Here are some of the most common concerns—plus quick, practical answers to help you nurture those stunning striped blooms with confidence!
How do I tell if my blue iris plant is getting enough sunlight?
The blue iris (Iris germanica) thrives in full sun (6+ hours daily). If leaves turn yellow or stems flop, it’s likely underlit. Conversely, if blooms fade fast or leaves scorch, move it to partial shade (morning sun + afternoon shade) in extreme heat. Pro tip: East-facing windows or dappled sunlight work well for container growers!
When is the best time to plant blue iris bulbs?
Plant them in early fall (4–6 weeks before frost) for spring blooms. Bulbs need time to root before winter. If you miss that window, spring planting (after soil warms to 60°F) works, but expect blooms one season later. Avoid planting in summer heat—bulbs can rot!
Why aren’t my blue iris blooms opening, or they’re sparse?
Common culprits:
- Overcrowding: Dig up and divide clumps every 3–4 years (spring or fall).
- Poor nutrition: Feed with low-nitrogen fertilizer (5-10-10) in early spring.
- Too much shade: Move to sunnier spots (even 3–4 hours of direct sun helps).
- Dormancy: Iris blooms annually—some varieties need 6+ weeks of cool weather to rebloom.
Cut back dead foliage after blooming to redirect energy to next year’s flowers!
Can I grow blue iris in containers, and what’s the best pot size?
Use a container at least 12–18 inches deep with drainage holes. Solo bulbs need 3–4 inches of soil between them; clumps can share a pot. Opt for terracotta or fabric pots to prevent rot. Winter care: Move containers to a garage or insulated porch if temps drop below 20°F.
Are blue iris plants deer- or rabbit-resistant?
Not entirely! While deer rarely bother them, rabbits and rodents may nibble on foliage or bulbs. Prevent damage by:
- Planting near deer-resistant companions like lavender or Russian sage.
- Using chicken wire barriers around new plantings.
- Applying granular repellents (like hot pepper wax) around the base.
A light mulch layer can also deter burrowing pests!
How do I divide and replant blue iris clumps?
Divide in early spring or fall when leaves are green but not blooming:
- Dig up the clump and shake off soil to expose rhizomes.
- Separate with a knife or hands, ensuring each section has 1–3 fans of leaves and roots.
- Trim damaged roots and cut leaves by ⅓ to reduce stress.
- Replant with top of rhizome exposed (never buried) and 3 inches of soil around it.
Wrapping up and next steps
Growing a blue iris plant with its stunning striped blooms is a rewarding journey—perfect for adding drama and color to your garden! 🌸 With the right sun exposure, well-draining soil, and a little patience, you’ll soon enjoy vibrant flowers that thrive in full sun.
Whether you’re a beginner or a seasoned gardener, this striking plant is a fantastic addition to any landscape.
Ready to dive in? Start by gathering your supplies, then follow the steps to plant and care for your irises. Before you know it, your garden will be bursting with beauty—happy planting! 🌱