
Pruning
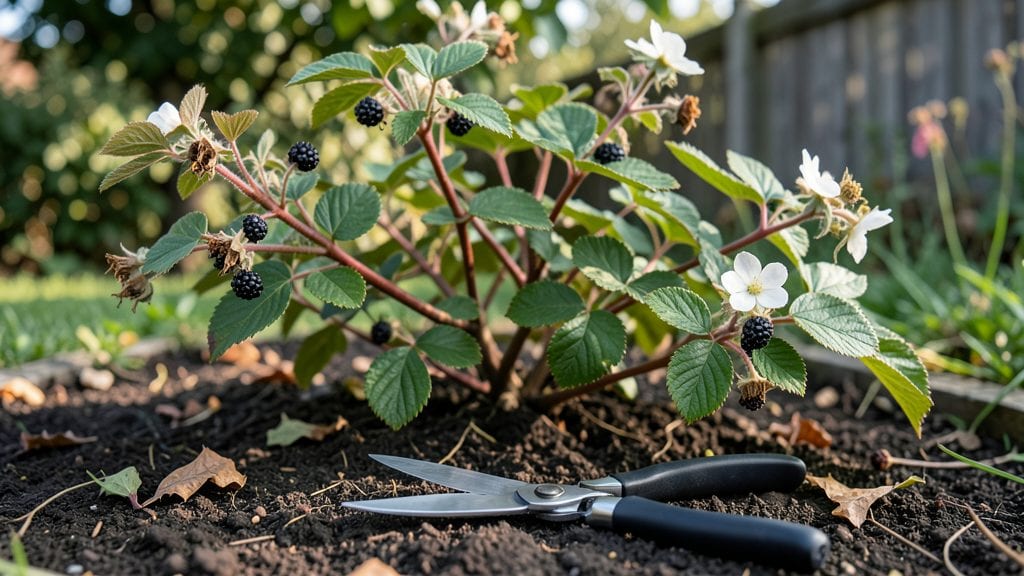
Pruning blackberry canes the right way means bigger berries and fewer thorns—I’ve gone from tangled messes to productive plants in just a few cuts. The key is timing: dormant-season pruning (late winter) clears out last year’s fruitless canes, while summer thinning opens up sunlight for new growth.
Most gardeners overlook how much pruning affects flavor and yield, but it’s the difference between handfuls of berries and buckets.
You’ll need loppers, pruning shears, and gloves—thorns are no joke—and about 30 minutes for established plants. Start by cutting back old canes to the ground (they’re done fruiting), then thin the remaining canes to 4-6 strong ones per plant.
This isn’t just about cleanup; it’s about directing energy where it counts. I learned the hard way that skipping this step leads to crowded canes, smaller berries, and more pests hiding in the shade.
After pruning, your plants will send up fresh, thorn-free canes that produce juicier, sweeter berries by summer. The air circulation keeps diseases like botrytis at bay, and you’ll spend less time fighting tangled vines.
Just avoid cutting into the green growth in spring—wait until the canes are dormant or you’ll stunt new shoots. This method works for both floricanes (second-year canes) and primocanes (first-year canes), so you’re covered no matter your variety.
For best results, mark your calendar for February or March in most zones, and repeat the process in late summer to control growth. The first year might feel drastic, but by year two, your blackberries will thank you with pounds of fruit and easier maintenance.
Ready to transform those wild patches into a productive harvest?
📚 In This Guide
- What you need
- Instructions
- Tips and common mistakes
- Wrapping up and next steps
What you need
- ● Pruning shears: Bypass pruners (sharp, clean, and capable of cutting through thick canes—1 pair). Avoid anvil pruners to prevent crushing.
- ● Loppers: For thicker canes (1–2 inches in diameter)—1 pair with a long handle for reach.
- ● Saw: A pruning saw (with a fine-tooth blade) for stubborn, oversized canes—1.
- ● Gloves: Heavy-duty, cut-resistant gloves (thorns are no joke!)—1 pair.
- ● Disinfectant: Rubbing alcohol (70%+) or bleach solution (1 part bleach to 9 parts water) to sterilize tools between cuts.
- ● Trash bags: For removing pruned canes—1–2 large bags (blackberries spread easily!).
- ○ Markers or flags: Colored plant tags or bamboo stakes to label canes (e.g., "keep" vs. "remove")—optional but helpful.
- ● Knee pads: For comfort if your blackberries are sprawling or low to the ground.
- ● Pole saw: Extendable for high canes (great for large brambles!).
- ● Compost bin: If you plan to compost pruned canes (ensure they’re disease-free!).
- ● Pruning sealant: For large cuts (e.g., tree wound paint)—only needed if canes are damaged.
Instructions for pruning blackberry plants for maximum yield
Reviving blackberry canes through strategic pruning transforms tangled thickets into productive, manageable plants.
Identify and Remove Dead or Weak Canes
Start by examining your blackberry patch in late winter or early spring, before new growth begins. Dead canes appear brown, brittle, and hollow when cut—these won’t produce fruit and should be removed at the base. Weak canes show as thin, pale stems that snap easily or lack the sturdy structure of healthy ones. I like to use pruning shears to cut these back completely, ensuring no stubs remain that could harbor disease.
Next, look for canes that are crossed or rubbing against each other. These create wounds where pathogens can enter, reducing overall plant health. Remove any canes growing toward the center of the plant, as they’ll compete for light and nutrients with stronger, outward-facing canes. You’ll know you’ve done this step correctly when the remaining canes stand upright and have good spacing between them.
Prune Last Year’s Fruit-Producing Canes
Blackberries produce fruit on second-year canes, which are the ones that grew from the previous season. After harvesting, these canes will turn brown and die back naturally. In late winter or early spring, cut these old canes down to the ground, making clean cuts just above the soil line. I use sharp loppers for this task to avoid tearing the bark, which can introduce infections.
Leave only the new, green canes that emerged last summer. These are your future fruit producers. If you have more than 10-12 strong canes per plant, thin them out to the healthiest ones. This ensures the remaining canes get enough sunlight, water, and nutrients to grow vigorously. You’ll notice the plant’s center opens up, allowing better air circulation and reducing humidity-related diseases.
Train and Support Remaining Canes
After pruning, the remaining canes need support to grow upright and access sunlight. Install T-posts or sturdy stakes around the plant, spacing them about 3 feet apart in a circle. Use 10-12 gauge blackberry trellis wire to create a fan shape, securing it to the posts at 4-5 feet high. This keeps the canes off the ground and prevents them from flopping over, which can lead to rot or pest issues.
Gently weave the canes through the wire, tying them loosely with soft plant ties or strips of old fabric. Avoid using wire or plastic ties, as they can cut into the canes as they thicken. Throughout the growing season, check the ties every few weeks and adjust as the canes grow. By summer, your pruned and supported canes will stand tall, ready to produce an abundance of fruit with minimal disease pressure.
Tips & tricks for perfect blackberry plant pruning
A few strategic adjustments during pruning can make all the difference in transforming your blackberry patch from chaotic to productive. Here's what I've learned after years of trial and error.
Timing is Everything: Prune in late winter or early spring, just before new growth begins. This timing ensures you're cutting back old canes when the plant is dormant but ready to focus energy on fresh growth. Avoid pruning in fall, as this can leave the plant vulnerable to winter damage and disease. I've seen firsthand how plants pruned too early or too late struggle to recover properly.
The Technique That Changed Everything: When cutting canes in Step 2, make clean cuts just above the soil line using sharp loppers. Avoid leaving stubs, which can trap moisture and invite fungal infections. For crossed or rubbing canes identified in Step 1, remove the weaker of the two rather than forcing them apart—this prevents unnecessary stress on the plant. I also recommend sterilizing your pruning tools with rubbing alcohol between cuts to minimize disease spread.
Support System Secrets: When installing your trellis in Step 3, position the T-posts at a slight outward angle to create a stable base. The 3-foot spacing between posts ensures canes won't be crowded as they grow. For the wire, create a fan shape that allows canes to spread naturally without competing for space. I've found that adding a second layer of wire at 3 feet high provides additional support for heavier fruit loads later in the season.
Ongoing Maintenance: After your initial pruning, monitor the plant throughout the growing season. Remove any new suckers that appear at the base—these divert energy from fruit production. Also, check the ties every 4-6 weeks and adjust as canes thicken. I've noticed that plants with properly maintained support systems produce fruit that's larger and more uniform in size.
Pro Tips for Blackberry Plant Pruning
- A few strategic adjustments during pruning can make all the difference in transforming your blackberry patch from chaotic to productive.
- Timing is Everything: Prune in late winter or early spring, just before new growth begins.
- The Technique That Changed Everything: When cutting canes in Step 2, make clean cuts just above the soil line using sharp loppers.
Frequently asked questions
Got questions about pruning your blackberry plants? You’re not alone—many gardeners want to get it right the first time! Here are some of the most common questions (and answers) to help you prune like a pro:
When is the best time to prune blackberry plants?
Prune floricanes (last year’s canes) in late winter or early spring (before new growth starts) to encourage strong fruiting canes. For primocanes (current year’s canes), prune in late summer or fall if you’re growing fall-bearing varieties. Always wait until after the first frost for semi-evergreen or evergreen types.
How do I tell which canes to cut and which to keep?
Cut back dead, weak, or thin canes to the ground. Keep thick, healthy canes (about pencil-sized) that grew last year (floricanes) for fruiting. If you’re pruning in summer, remove any canes with weak or sparse growth—they won’t produce well. Leave 3-5 of the strongest canes per plant for optimal yield.
What if I prune at the wrong time?
Pruning too early (before dormancy) can stimulate early growth, making plants vulnerable to frost damage. Pruning too late (after buds swell) can reduce fruit production. If you’ve already pruned at the wrong time, don’t panic—just focus on watering and fertilizing to help the plant recover. Next year, time it right!
Can I prune blackberries without shears?
While pruning shears make the job easier, you can use clean, sharp loppers or even a sturdy knife in a pinch. Avoid tearing canes—make clean cuts at a 45-degree angle just above a bud or branch. For large canes, cut in stages to avoid overloading the plant. Just be patient and take your time!
Why did my blackberries stop producing after pruning?
Lack of production can happen if you cut back too aggressively (removing all canes) or pruned at the wrong time. Ensure you’re leaving healthy floricanes (for summer-bearing types) or primocanes (for fall-bearing types). Also, check for disease, pests, or poor soil—sometimes the issue isn’t pruning alone!
Wrapping up and next steps
Pruning your blackberry plants might seem daunting, but with the right tools and techniques, you’ll unlock a healthier, more productive harvest every season! 🌱 By mastering the three-step revival method—removing dead canes, thinning for airflow, and shaping for growth—you’re setting your bushes up for success.
Don’t wait until it’s too late; spring is the perfect time to act—so grab your pruners and get started!
Ready to transform your blackberry patch? Bookmark this guide, gather your supplies, and roll up your sleeves! Your future berries will thank you. 🍇✨