
Planting
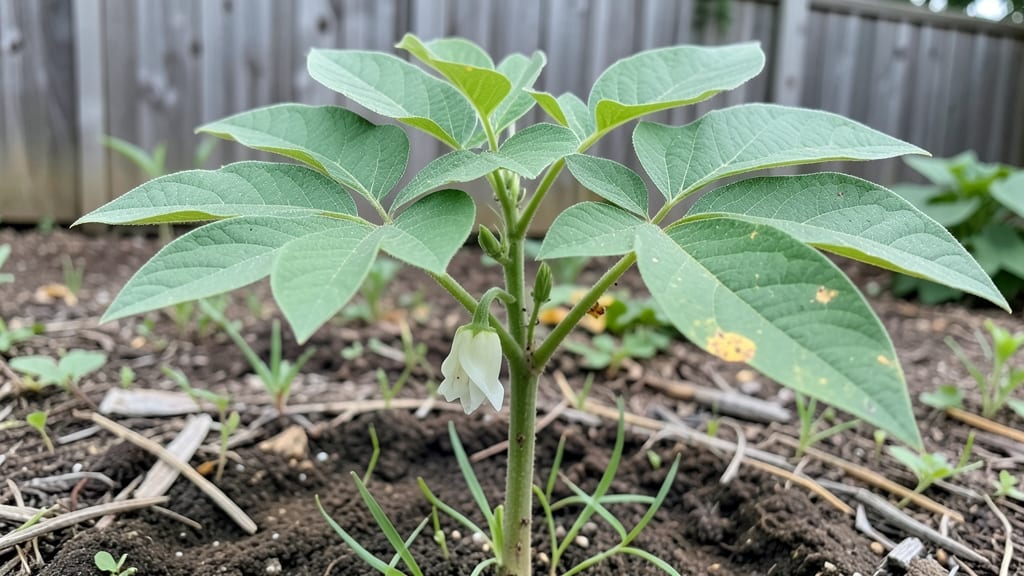
My bean plant leaves used to look like someone ran a lawnmower through them—until I learned the right pruning tricks. 🌱 The secret isn’t just cutting back; it’s knowing when and how to shape those vines for maximum growth and fewer problems.
Yellowing, holes, or curling leaves? Those are usually signals your plants need better airflow, light, or a little TLC—not just more water.
Start by removing any leaves touching the soil (they rot) and snipping off damaged or crowded foliage. Use clean scissors and cut just above a leaf node to encourage new growth.
Most gardeners overlook this, but proper pruning prevents fungal diseases like rust and keeps pests like aphids from moving in. I’ve saved entire plants by acting fast when I spot the first signs of trouble.
What you’ll end up with is bushier plants that produce more beans and stay healthier all season. The leaves turn a vibrant green, and the vines grow stronger.
Best of all, you’ll spend less time fighting problems and more time enjoying the harvest. Ready to transform those ragged leaves into lush, productive growth?
This works for both bush and pole beans, whether you’re growing in the ground or containers. The key is consistency—check your plants weekly and prune as needed. Once you see the difference, you’ll never go back to letting them grow wild.
📚 In This Guide
- What you need
- Instructions
- Tips and common mistakes
- Wrapping up and next steps
What you need
- ● Pruning shears or scissors – Sharp, clean, and sterilized (bypass pruners work best for precision).
- ● Gloves – Garden-grade, durable gloves (nitrile or leather) to protect your hands from thorns or rough edges.
- ● Disinfectant (70% isopropyl alcohol or bleach solution) – 1 part bleach to 9 parts water for sterilizing tools between cuts.
- ● Small trash bag or compost bin – For removing pruned leaves and debris (keep your workspace tidy!).
- ○ Water spray bottle (optional) – To dampen leaves before pruning for cleaner cuts.
- ● Hand lens or magnifying glass – For spotting pests or diseases on leaves up close.
- ● Pruning saw (for thick stems) – If your bean plant has woody or overly thick growth.
- ● Plant growth hormone (like rooting powder) – For propagating cuttings if you’re feeling ambitious!
- ● Notebook & pen – To track pruning dates and plant progress.
- ● Healthy bean plants – Wait until plants are at least 6-8 inches tall and showing signs of legginess or overcrowding.
- ● Good weather – Choose a cloudy day or prune in the early morning to avoid stressing the plant.
- ● Clear workspace – Lay down a tarp or old sheet to catch fallen leaves and debris.
Step-by-Step guide to pruning bean plant leaves for maximum growth
Here's the method I use to keep bean plants thriving—more pods, fewer leaves, and plants that practically beg you to harvest.
🌿 Step 1: Identify Leaves to Prune
Start by examining your bean plants for leaves that are yellowing, brown, or diseased. These are your first targets—they're stealing energy from your plant instead of producing. I also remove any leaves that are rubbing against each other or the plant stem, as this can create moisture pockets that invite fungal infections.
Next, focus on the lower leaves. Bean plants naturally shed their lower foliage as they grow taller, but you can give them a head start by gently twisting off leaves that are within 6 inches of the soil. This improves airflow and prevents soil-borne diseases from spreading upward. Watch for leaves that are smaller than average—they often indicate a nutrient deficiency or pest stress.
✂️ Step 2: Use the Right Tools and Technique
Never use your fingers to pinch off leaves. Grab a pair of clean, sharp pruning shears and make cuts just above a leaf node (the small bump where leaves and stems meet). This ensures the plant can heal properly and encourages new growth from that spot. I always sterilize my shears with rubbing alcohol between cuts to prevent spreading any potential diseases.
For larger leaves, cut them at the base of the leaf stem rather than tearing them off. This prevents damaging the plant's vascular system. If you're dealing with a particularly stubborn leaf, I've found that a quick, decisive cut works better than struggling with it. Remember, you're not trying to remove every leaf—just the ones that aren't contributing to pod production.
🌱 Step 3: Prune for Airflow and Light Penetration
Step back and look at your plant from all angles. Your goal is to create a canopy that allows sunlight to reach the lower pods and leaves. Thin out crowded areas by removing leaves that are shading others. I aim to leave about 3-4 inches of space between leaves to ensure good airflow—this dramatically reduces the risk of powdery mildew, a common bean plant enemy.
Pay special attention to the center of the plant. If leaves are growing inward, they'll trap moisture and create a perfect environment for fungal growth. Gently remove any inward-facing leaves, even if they look healthy. You'll see a noticeable difference in just a few days as new leaves grow outward, creating a more open, productive plant structure.
⏰ Step 4: Time Your Pruning for Best Results
Prune your bean plants in the morning when the plants are well-hydrated. This gives them plenty of time to recover before evening temperatures drop. I avoid pruning during hot afternoons or when rain is forecasted, as the open wounds are more susceptible to infection when conditions aren't ideal.
Plan to prune every 2-3 weeks during the growing season. This regular maintenance keeps your plants from becoming overgrown and ensures they're always putting energy into pod production rather than maintaining excessive foliage. You'll know you're doing it right when you see new leaves emerging from the nodes where you made cuts—this is your plant's way of saying "thank you" for the help.
💧 Step 5: Follow Up with Care
After pruning, give your plants a light watering to help them recover. Focus on the soil rather than the leaves to prevent fungal spores from splashing onto fresh cuts. I've found that a slow, deep watering in the early morning works best. This also gives the plant time to dry out during the day, reducing the risk of disease.
Keep an eye on your plants in the days following pruning. If you notice any signs of stress—like wilting or yellowing—give them a boost with a balanced, water-soluble fertilizer. The goal is to support the plant as it recovers and redirects its energy toward producing more pods. You'll likely see an increase in harvest within a few weeks of consistent pruning and care.
Tips & tricks for pruning bean plant leaves
A few key strategies will help you maximize your bean plant's productivity while keeping it healthy and thriving.
Leaf Identification: In Step 1, when you're identifying leaves to prune, pay special attention to the undersides of leaves. Tiny spider mites often start there, and removing these leaves early can prevent a full-blown infestation. Also, look for leaves with tiny holes—they're likely being munched by bean beetles, and removing them helps protect your plant's energy reserves.
Tool Technique: During Step 2, when using pruning shears, make sure to cut at a 45-degree angle just above the leaf node. This angled cut helps water run off the cut surface, preventing rot. I've found that using shears with a bypass blade (rather than anvil-style) gives the cleanest cuts that heal faster. And remember, always sterilize your tools between plants to avoid spreading diseases like bacterial blight.
Airflow Strategy: In Step 3, when creating that 3-4 inch space between leaves, think about your garden layout. If you're growing beans in rows, consider staggering plants so sunlight can reach between rows as well. This open structure not only prevents disease but also makes it easier to spot pests early. You'll notice your plants develop stronger stems and more pods when they're not struggling to compete for sunlight.
Pruning Schedule: The 2-3 week pruning interval in Step 4 works best when you also consider your plant's growth rate. In hot climates, you might need to prune every 2 weeks to keep up with rapid growth, while cooler areas can stretch to 3 weeks. Always check for new growth at the nodes before your scheduled pruning—this tells you whether your plant is ready for another round of maintenance.
Pro Tips for Bean Plant Leaves
- A few key strategies will help you maximize your bean plant's productivity while keeping it healthy and thriving.
- Leaf Identification: In Step 1, when you're identifying leaves to prune, pay special attention to the undersides of leaves.
- Tool Technique: During Step 2, when using pruning shears, make sure to cut at a 45-degree angle just above the leaf node.
Frequently asked questions
about bean plant leaves and pruning—here’s what you need to know!Why are my bean plant leaves turning yellow?
Yellowing leaves (chlorosis) usually signal overwatering, nutrient deficiency (like nitrogen or magnesium), or poor drainage. Check soil moisture—beans prefer slightly dry conditions—and amend soil with compost or a balanced fertilizer. Pro tip: Yellow edges? It’s often calcium deficiency—try crushed eggshells or lime!
When is the best time to prune bean plant leaves for better harvests?
Prune early in the morning when humidity is low to reduce disease risk. For bush beans, trim leaves touching the soil to improve airflow. Pole beans? Snip leaves blocking sunlight from lower pods, but avoid heavy pruning—focus on 30-50% of foliage max. Timing tip: Do it 2-3 weeks after planting and repeat every 2-3 weeks.
Can I eat the leaves from my bean plant?
Yes! Young, tender leaves (from Phaseolus vulgaris or Phaseolus lunatus) are edible and packed with protein, fiber, and vitamins A/C. Harvest leaves before flowering for the best flavor—cook like spinach. Caution: Avoid mature leaves or those treated with pesticides.
How do I fix holes or chewed leaves on my bean plants?
Holes = pests! Start with neem oil or insecticidal soap for aphids/beetles. For slugs/snails, set beer traps or use diatomaceous earth. Prevention tip: Interplant with marigolds or basil to repel bugs. Remove heavily damaged leaves to redirect energy to new growth.
What’s the difference between pruning bush vs. pole beans?
| Bush Beans | Pole Beans |
|---|---|
| Prune only leaves touching soil or blocking airflow. No heavy trimming—focus on hygiene. | Prune selectively: Remove leaves shading lower pods or with signs of disease. Train vines upward for airflow. |
| Goal: Minimize stress—they’re short-lived! | Goal: Maximize sunlight to pods. |
Remember: Always use sterilized shears to avoid spreading disease!
Wrapping up and next steps
Caring for your bean plant leaves doesn’t have to be complicated—just a little attention and the right techniques can transform your garden into a thriving, productive space! 🌱 By mastering pruning, monitoring health, and addressing pests early, you’ll ensure strong stems, vibrant foliage, and a bountiful harvest.
Remember, every trim is a step toward healthier plants and happier harvests.
Ready to put your newfound knowledge into action? Start with one plant today! Grab your pruners, take a close look at those leaves, and give your bean plants the care they deserve. Happy gardening—your future harvest will thank you! 🌿