Watering
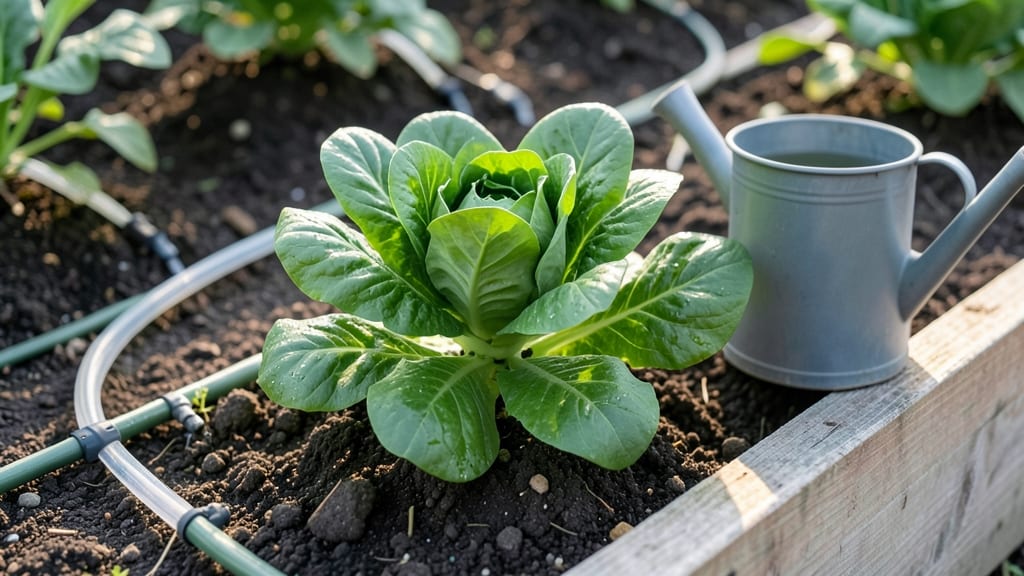
Automating plant watering saves my garden from missed days and overwatered roots—no more guessing or remembering. The right system turns your green space into a self-sustaining oasis while you're at work, on vacation, or just busy.
I've tested everything from basic drip lines to high-tech smart controllers, and the difference in plant health is shocking.
You don't need a degree in engineering to set this up. A simple drip irrigation kit for containers starts around $30, while smart systems with apps can run $150-$300.
My favorite beginner setup uses a 5-gallon bucket with a timer—just drill a hole, add a valve, and let gravity do the work. Larger gardens benefit from zone-based drip lines that deliver water right to roots, cutting waste by up to 40%.
The payoff comes fast: no more crispy leaf edges from drought stress or sad, waterlogged soil. My tomatoes stay juicy and productive, my herbs grow fragrant and bushy, and I haven't lost a single plant to forgetfulness.
Even my black thumb can't mess this up once the system's dialed in. Maintenance is just checking for clogs and adjusting water flow every few weeks.
Whether you're dealing with one hanging basket or a whole backyard, there's a solution that fits. The key is matching your system to your plants' thirst—succulents need less, thirsty veggies need more. Let's get your garden working for you instead of the other way around.
📚 In This Guide
- What you need
- Instructions
- Tips and common mistakes
- Wrapping up and next steps
What you need
- ● Water source: Hose bib or outdoor faucet (with 1/2-inch or 3/4-inch threading)
- ○ Optional: Rainwater collection barrel (5+ gallons) for eco-friendly watering
- ● Automated timer: Smart irrigation controller (e.g., Orbit B-Hyve or Rain Bird) OR
- ● Basic mechanical timer (adjustable for 1–120 minutes)
- ● Drip irrigation kit: 1/4-inch drip tubing (50–200 ft, depending on garden size)
- ● Drip emitters (0.5–4 GPH, 1–2 per plant)
- ● Drip connectors & branch fittings (quantity based on layout)
- ● Backflow preventer (required for hookup safety)
- ● Hardware: 1/2-inch male threaded adapter (to connect timer to hose)
- ● Zip ties or landscape staples (for securing tubing)
- ● Wi-Fi-enabled valve (e.g., Rachio or Meraki ) for app control
- ● Soil moisture sensors (e.g., AcuRite ) to auto-adjust watering
- ● Solar-powered timer for off-grid gardens
- ● Fertigation kit (to add liquid nutrients to water)
- ● Basic tools: Scissors, drill (for securing tubing), and Teflon tape (for leak-proof connections)
- ● Access to electricity (for smart timers) or a sunny spot (for solar timers)
- ● Time to plan your garden layout (map out plant spacing and tubing paths!)
Step-by-step guide to setting up an automated watering system
Here’s how to create a hands-off watering solution that keeps your garden thriving with minimal effort.
Choose the Right System for Your Garden
For small gardens or container plants, a drip irrigation kit with a timer works best. Larger in-ground gardens benefit from a soaker hose system connected to a smart sprinkler controller. I recommend starting with a basic drip system for beginners—it’s easy to install and customizable. Check your garden’s layout first: group plants with similar water needs together to simplify setup.
If you’re using containers, add a self-watering reservoir like a 5-gallon bucket with a wick for each pot. This method ensures consistent moisture without overwatering. For in-ground plants, lay out your tubing or soaker hose along planting rows before installing anything permanent. This way, you won’t have to dig up established plants later.
Install the Water Source and Distribution Lines
Connect your system to a garden hose or outdoor spigot using a backflow preventer to avoid contamination. For drip systems, attach the mainline tubing to the water source and run it along the garden beds. Use T-fittings to branch off to individual plants or zones. Keep lines elevated slightly above the soil to prevent clogs from dirt or debris.
For soaker hoses, lay them along the base of plants, ensuring they’re covered lightly with mulch to protect them from sunlight. Test the flow by turning on the water briefly—adjust the pressure so water drips steadily rather than sprays. If you’re using a timer, set it to run for 10-15 minutes every other day initially, then adjust based on weather and plant needs.
Set Up the Timer and Test the System
Program your smart timer to match your plants’ watering schedule. Most systems allow you to set multiple cycles per day—for example, a 5-minute watering in the morning and evening. Start with shorter cycles to avoid oversaturation, especially in clay soil or during rainy periods. Use a moisture meter to check soil dampness; aim for 1-2 inches deep to be consistently moist but not soggy.
Run a test cycle and walk through your garden to verify even coverage. Look for dry spots or areas where water pools—these may need adjustments in tubing placement or flow rate. If using a self-watering reservoir, fill it with water and check that the wick or tube delivers moisture to the soil without dripping excessively. Fine-tune the timer based on real-world results over the first week.
Maintain and Adjust for Seasonal Changes
Monitor your system weekly, especially during hot, dry spells or heavy rains. Increase watering frequency in summer and reduce it in cooler months. Clean clogged emitters or nozzles by soaking them in vinegar and water (1:1 ratio) for 30 minutes, then rinsing thoroughly. Replace damaged tubing or fittings immediately to prevent leaks or uneven watering.
In winter, drain and store drip lines or disconnect them to avoid freezing. For year-round use, insulate exposed lines with foam tubing sleeves in cold climates. Adjust the timer seasonally—spring and fall typically require less frequent watering than peak summer. Keep a log of adjustments to refine the system for next year.
Tips & tricks for perfect automated plant watering systems
Setting up an automated watering system is easier than you think—here are the key strategies to ensure your garden thrives with minimal effort.
System Selection: If you're new to automated watering, I recommend starting with a basic drip irrigation kit for small gardens or containers. These systems are forgiving and easy to customize. For larger in-ground gardens, a soaker hose system connected to a smart controller offers more flexibility. The key is matching your system to your garden's specific needs—group plants with similar water requirements together to simplify setup and maximize efficiency.
Installation Insight: When installing your mainline tubing or soaker hose, keep it slightly elevated above the soil to prevent clogs from dirt and debris. This simple step can save you hours of troubleshooting later. In Step 2, when you're testing the flow, adjust the pressure so water drips steadily rather than spraying. This gentle flow prevents soil erosion and delivers water exactly where your plants need it most.
Timer Programming: The initial 10-15 minute watering cycles every other day are just a starting point. Use a moisture meter to check soil dampness at 1-2 inches deep—this gives you the most accurate reading of what your plants are actually experiencing. Most systems allow multiple daily cycles, so consider a 5-minute morning and evening watering for most plants. This mimics natural rainfall patterns and helps prevent fungal issues from overwatering at night.
Maintenance Strategy: That 30-minute vinegar soak for cleaning clogged emitters is a game-changer. I keep a bucket of equal parts vinegar and water ready for quick maintenance. During seasonal transitions, keep a simple log of adjustments—note when you increased or decreased watering frequency, what the weather was like, and how your plants responded. This becomes incredibly valuable for next year's setup and helps you avoid common mistakes like overwatering during rainy periods or underwatering during heatwaves.
Pro Tips for Automate Watering Plants
- Setting up an automated watering system is easier than you think—here are the key strategies to ensure your garden thrives with minimal effort.
- System Selection: If you're new to automated watering, I recommend starting with a basic drip irrigation kit for small gardens or containers.
- Installation Insight: When installing your mainline tubing or soaker hose, keep it slightly elevated above the soil to prevent clogs from dirt and debris.
Frequently asked questions
Got questions about automating your plant watering? You’re not alone! Here are some of the most common concerns—and straightforward answers—to help you get started with confidence.
How often should I set my automated watering system?
This depends on your plants, climate, and soil type! A general rule is every 1–3 days for most gardens, but adjust based on weather—dry spells may need more frequent watering, while rainy days can pause the system. Start with shorter cycles (e.g., 5–10 minutes) and monitor soil moisture to fine-tune.
What if my plants look wilted even with automation?
Wilting can happen if the system isn’t delivering enough water, the soil is compacted (preventing absorption), or roots aren’t reaching the water source. Check these first:
- Verify the timer and water flow (listen for steady drips).
- Test soil moisture 2 inches deep—if dry, increase duration or frequency.
- Ensure emitters are placed near root zones (not just at the base).
Are DIY automated watering systems cheaper than buying pre-made kits?
DIY setups (using PVC pipes, timers, and sprinkler heads) can cost $20–$50 for basic systems, while pre-made smart kits range from $100–$300+. The trade-off? DIY offers customization, but smart systems add convenience (app controls, weather adjustments). Start small—test a DIY drip line for a few plants before scaling up.
Can automated watering work in extreme heat or cold?
Yes, but with tweaks! In heat waves, run the system twice daily (early morning + late evening) to prevent evaporation. For freezing temps, pause automation or use insulated tubing to protect pipes. Pro tip: Group heat-loving plants (like tomatoes) near emitters and wrap vulnerable pipes in foam insulation for winter.
What’s the easiest way to troubleshoot a clogged emitter?
Clogs are a common headache, but fixing them is simple:
- Disconnect the emitter and soak it in white vinegar or hydrogen peroxide for 30 minutes.
- Use a needle or wire to gently clear debris from the tiny holes.
- Flush the system with clean water to remove sediment.
Wrapping up and next steps
Automating your plant watering isn’t just about saving time—it’s about giving your garden the consistent care it deserves, even when life gets busy. 🌱 Whether you’re a busy professional, a traveler, or simply someone who loves lush greenery, smart systems make plant care effortless while reducing waste and stress. Now’s the perfect moment to take action!
🚀 Your Next Step:
- Pick a system that fits your garden’s size and needs.
- Gather your materials and start small—even one automated setup makes a difference!
- Watch your plants thrive with minimal effort and maximum joy.
Your green oasis is just a setup away—let’s grow together! 🌿