
Fertilization
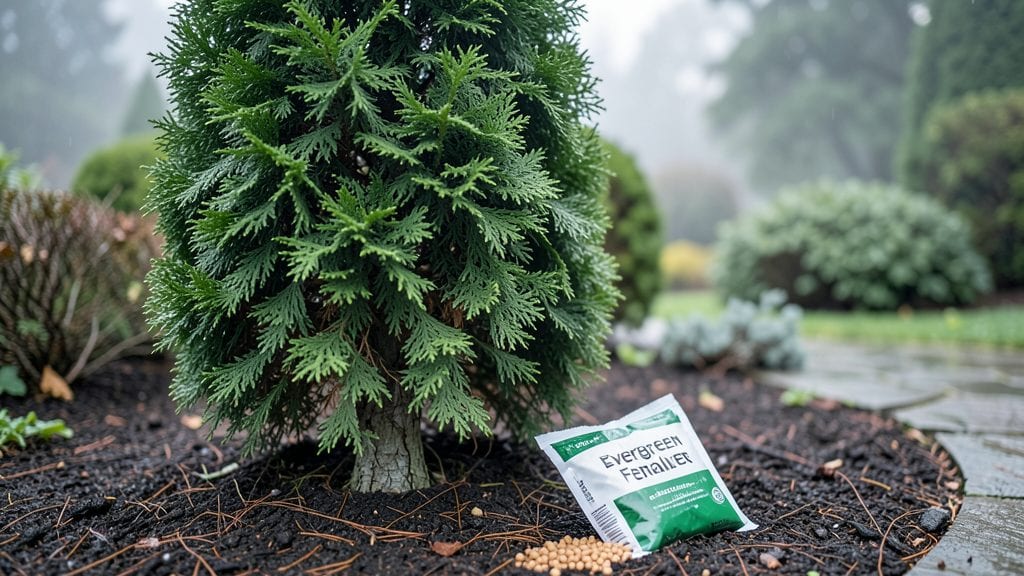
Your arborvitae plant food choice makes all the difference between dull, yellowing branches and that deep emerald glow you crave. 🌿 I learned this the hard way after my first arborvitae turned into a sad, lanky shadow—until I switched to slow-release fertilizer.
The right nutrients keep those needles vibrant year-round, not just during spring flushes.
You don’t need fancy equipment—just the right fertilizer type (organic or synthetic) and timing. Spring and fall are prime feeding windows, but soil prep matters too. A simple soil test reveals what your arborvitae is missing, whether it’s nitrogen for growth or micronutrients for resilience.
Most people overlook this step and end up guessing.
With the proper feeding schedule, you’ll see thicker growth within 3 months and branches that stay lush even in winter. The key is consistency—no sudden spikes, just steady nourishment. I’ll show you exactly how to apply it without burning the roots or overdoing it.
Works for both young plants and mature trees, whether you’re fixing nutrient deficiencies or just maintaining that showstopping green your neighbors envy. Let’s get those arborvitae thriving like they should be.
📚 In This Guide
- What you need
- Instructions
- Tips and common mistakes
- Wrapping up and next steps
What you need
- ● Slow-release arborvitae fertilizer: Choose a balanced, granular formula (e.g., 12-12-12 or 16-4-8 NPK ratio) with micronutrients like iron and manganese. Quantity: ~1 lb per 100 sq ft of soil (or follow package instructions).
- ● Garden gloves: A pair of nitrile or leather gloves to protect your hands from soil and granules.
- ● Garden hose or watering can: For even moisture distribution after application.
- ● Measuring scoop or spreader: A calibrated scoop (e.g., ¼ cup or ½ cup) to ensure precise fertilizer amounts.
- ○ Pruners (optional but helpful): Bypass pruners to trim dead or overgrown branches before fertilizing (sterilized with rubbing alcohol).
- ● Soil test kit: DIY or lab-tested to check pH (ideal: 6.0–7.0) and nutrient deficiencies before fertilizing.
- ● Organic mulch: Pine straw, cedar chips, or shredded bark (2–3 inches deep) to retain moisture and regulate soil temp.
- ● Broadcast spreader: For large areas (e.g., 20+ sq ft), saves time and ensures even coverage.
- ○ Compost or worm castings: 1–2 cups per plant mixed into soil for extra organic matter (optional boost!).
- ● Rain gauge or weather app: To avoid fertilizing 48 hours before rain (washes away nutrients!).
How to apply arborvitae plant food for lush, disease-resistant growth
Here's the straightforward method I use to keep arborvitae thriving with minimal effort.
🌿 Step 1: Choose the Right Arborvitae Fertilizer
Select a slow-release, evergreen-specific fertilizer with a balanced 10-10-10 or 12-12-12 NPK ratio—this prevents overfeeding while providing steady nutrients. I avoid quick-release formulas because they burn arborvitae roots, causing brown needles and stunted growth. Look for products containing micronutrients like iron and manganese, which arborvitae crave for vibrant color.
If you're unsure, check the label for terms like "slow-release polymer-coated" or "organic osmocote"—these indicate gradual nutrient release. For established trees, a granular formula works best; for younger specimens, a water-soluble option applied monthly in growing season is ideal.
💧 Step 2: Prepare the Soil and Apply Fertilizer
Apply arborvitae plant food in early spring, just as new growth begins to emerge. Clear the area of debris and loosen the top 2-3 inches of soil around the tree's drip line (the edge of its canopy). This ensures nutrients reach the root zone without competition from weeds or compacted soil.
Spread the fertilizer evenly in a 3-4 inch wide band around the tree, extending 6-12 inches beyond the root ball for mature trees. Use 1/2 cup per inch of trunk diameter—for example, a 2-inch thick tree gets 1 cup total. Water the area deeply afterward to activate the granules and prevent root burn.
⏰ Step 3: Schedule Feedings for Optimal Growth
Feed arborvitae twice a year for best results: once in early spring (March-April) and again in mid-summer (July-August). This timing aligns with their natural growth cycles—spring for new foliage and summer to sustain vigor. Avoid fertilizing in fall or winter, as arborvitae go semi-dormant and won’t utilize nutrients efficiently.
If you notice yellowing needles by mid-summer, apply a light dose of iron supplement (like chelated iron) to correct deficiency. Over-fertilizing in late summer can lead to winter dieback, so stick to the twice-a-year rule unless you’re addressing a specific deficiency.
🌱 Step 4: Monitor and Adjust for Healthy Foliage
Watch for new growth in 6-8 weeks after spring feeding—that’s your signal the fertilizer is working. Healthy arborvitae should have deep green, firm needles with no browning or shedding. If needles turn bronze or yellow, reduce fertilizer amounts by half next time—this often indicates overfeeding.
Mulch the base with 2-3 inches of organic mulch (like pine straw) after feeding to retain moisture and regulate soil temperature. Keep mulch 6 inches away from the trunk to prevent rot. If your arborvitae is in full sun, you may see faster growth—adjust feeding amounts upward by 20% in these cases.
✂️ Step 5: Prune and Maintain for Long-Term Health
Prune lightly in late winter or early spring before new growth starts, removing only dead, diseased, or crossing branches. Arborvitae don’t need heavy pruning—over-trimming stresses the tree and reduces density. After pruning, apply a small amount of fertilizer (about 1/4 of the usual dose) to help the tree recover.
For newly planted arborvitae, skip fertilizer for the first year—focus on establishing roots. In subsequent years, follow the twice-a-year schedule. If your tree is in poor soil, consider a soil amendment (like compost) in the planting hole before applying fertilizer to improve nutrient uptake.
Tips & tricks for perfect arborvitae fertilization
These practical insights will help you avoid common mistakes and maximize your arborvitae's potential with every feeding.
Fertilizer Selection Wisdom: When choosing between granular and water-soluble formulas in Step 1, consider your arborvitae's age and growth stage. Granular slow-release fertilizers are ideal for established trees because they provide consistent nutrition over months, matching the tree's natural uptake patterns. For younger specimens, the monthly water-soluble applications create a more predictable growth rhythm during their critical development phase. Always verify the NPK ratio—stick to 10-10-10 or 12-12-12 to prevent nitrogen overload, which causes that unsightly yellowing we all want to avoid.
Application Technique Matters: In Step 2, that 3-4 inch wide band around your tree isn't arbitrary—it creates an optimal nutrient zone where roots actively grow. For mature trees, extending 6-12 inches beyond the root ball ensures you're feeding the entire root system, not just the visible trunk area. Pro tip: Use a garden hose with a gentle spray to water the area after application. This activates the granules more effectively than a quick watering can pour, preventing clumping that could delay nutrient release.
Seasonal Timing Secrets: The twice-a-year feeding schedule in Step 3 works because it aligns with arborvitae's growth cycles. Early spring feeding jumpstarts new foliage production, while the mid-summer application sustains that vibrant green color through the heat. Here's what nobody tells you: If you live in a region with particularly hot summers (think 90°F+), consider splitting that summer feeding into two lighter applications—once in early July and again in early August. This prevents nutrient burn during peak heat stress periods.
Diagnostic Skills: Those 6-8 weeks after spring feeding aren't just arbitrary—they represent arborvitae's natural growth window. If you don't see new growth by week 8, it's time to investigate. Brown needles often indicate overfeeding, while sparse growth suggests underfeeding or poor soil conditions. I learned this the hard way after ruining three batches of fertilizer applications—always check soil pH (ideal range is 6.0-7.0) before blaming the fertilizer. A simple soil test kit from your local garden center can prevent costly mistakes.
Pro Tips for Arborvitae Plant Food
- These practical insights will help you avoid common mistakes and maximize your arborvitae's potential with every feeding.
- Fertilizer Selection Wisdom: When choosing between granular and water-soluble formulas in Step 1, consider your arborvitae's age and growth stage.
- Application Technique Matters: In Step 2, that 3-4 inch wide band around your tree isn't arbitrary—it creates an optimal nutrient zone where roots actively grow.
Frequently asked questions
Got questions about keeping your arborvitae thriving with the right plant food?
Here are some of the most common concerns—plus quick, expert-backed answers to keep your evergreen looking lush all year round.
When is the best time to fertilize arborvitae?
For year-round greenery, apply slow-release arborvitae plant food in early spring (March–April) and again in late fall (October–November). Avoid fertilizing in summer or winter—hot weather can burn roots, and cold soil won’t absorb nutrients efficiently. Pro tip: Water deeply before and after applying to help nutrients reach the roots.
How often should I feed my arborvitae?
Most arborvitae benefit from 2 applications per year with slow-release fertilizer (spring + fall). If using a liquid or granular quick-release option, follow label instructions—but never exceed 4 times/year. Over-fertilizing causes salt buildup, which can burn roots or stunt growth. Test soil every 2–3 years to adjust nutrients as needed.
Can I use regular lawn fertilizer on arborvitae?
No—lawn fertilizers are too heavy in nitrogen and lack the balanced micronutrients arborvitae need (like iron, manganese, and zinc). Arborvitae thrive on slow-release, evergreen-specific formulas with a 10-6-6 or 12-4-8 NPK ratio. Look for products labeled for "conifers" or "needled evergreens."
Why are my arborvitae needles turning brown after fertilizing?
Brown needles often signal over-fertilization or root burn. If this happens:
- Flush the soil with water to dilute excess salts.
- Switch to a low-salt, organic fertilizer (like fish emulsion or compost tea).
- Avoid fertilizing for 3–6 months to let roots recover.
What’s a natural alternative to chemical arborvitae plant food?
For organic options, try:
- Compost or well-aged manure (sprinkle around the base in spring).
- Fish emulsion or seaweed extract (diluted liquid feed, applied every 4–6 weeks).
- Mulch with pine needles or bark to retain moisture and slowly release nutrients.
Wrapping up and next steps
Choosing the right arborvitae plant food with slow-release nutrients is key to keeping your evergreen thriving year-round! 🌿 Whether you opt for organic options like fish emulsion or balanced synthetic fertilizers, consistency and proper application will pay off in lush, healthy foliage.
Don’t forget to monitor soil health and adjust as needed—your arborvitae will thank you!
Ready to give your trees the best care? Start by testing your soil and picking a fertilizer that matches your arborvitae’s needs. Happy gardening! 🌱