How To
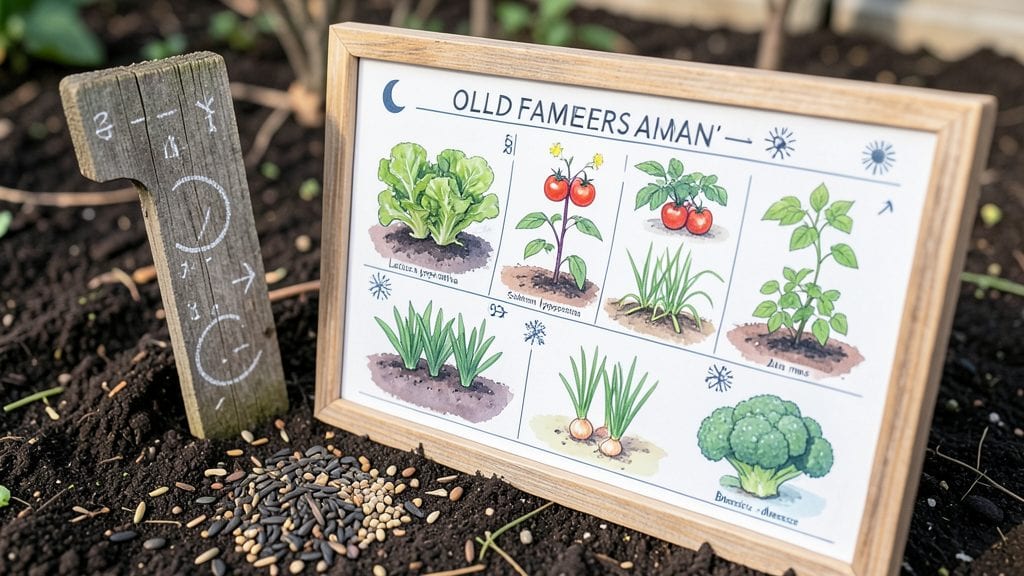
Planting by the Old Farmer’s Almanac’s timing saved my first season of tomatoes from a late frost. 🌱 The almanac’s planting days aren’t just dates—they’re a roadmap for matching seeds to your climate’s natural rhythm, whether you’re in Zone 5 or 9.
I used their frost-free calculator to adjust my spring schedule, and my plants hit the ground running instead of struggling to catch up.
The key is understanding their three planting phases: "before last frost," "after last frost," and "throughout the season." My zucchini went in right after the almanac’s first green-light date, and I had baby squash by July.
For fall crops, I follow their "moon sign" cues—planting root veggies during waxing phases for sweeter harvests. It’s not magic; it’s data-backed timing that accounts for your local microclimate.
You’ll end up with stronger starts, fewer failed seeds, and harvests that arrive exactly when the almanac predicts. My basil thrives when planted on a "fruitful" moon day, and my carrots grow straighter when sown during a root-friendly phase.
The almanac even adjusts for organic gardeners who rely on compost heat or cold frames—just add or subtract a week based on your setup.
Works for every region, every garden style, and every crop—from heirloom beans to peony flowers. Here’s how to make it work for your plot, no matter where you garden.
📚 In This Guide
- What you need
- Instructions
- Tips and common mistakes
- Wrapping up and next steps
What you need
- ● Almanac Planting Guide: A physical or digital copy of the Old Farmer’s Almanac (or a trusted alternative) to reference planting dates for your region and zone.
- ● Garden Journal/Notebook: A dedicated space to log planting dates, weather notes, and progress (1 per gardener).
- ● Seed Starting Supplies: Seed-starting trays or pots (biodegradable or reusable, 2–4 inches deep).
- ● Seed-starting mix (sterilized, lightweight potting soil—1–2 bags depending on volume).
- ● Seeds (choose varieties suited to your zone and almanac recommendations—quantity varies by crop).
- ● Outdoor Gardening Tools: Trowel (sturdy, stainless steel—1–2).
- ● Garden gloves (nitrile-coated for durability—1 pair).
- ● Pruners (bypass type for clean cuts—1).
- ● Watering can or hose with adjustable nozzle (1).
- ● Soil Amendments: Compost (aged, 1–2 5-gallon buckets or bags).
- ● Organic fertilizer (balanced NPK or crop-specific—1 bag).
- ● Mulch: Straw, wood chips, or shredded leaves (1–2 bags, depending on garden size).
- ● Soil pH test kit (to ensure optimal growing conditions).
- ● Row covers or frost blankets (for early/late planting protection).
- ● Plant markers (wooden sticks, labels, or a DIY system with popsicle sticks).
- ● Garden kneeler or pad (for comfort during long planting sessions).
- ● Weatherproof calendar (to track almanac planting days and deadlines).
- ● Smart garden tools (e.g., moisture meters, solar-powered lights).
How to use almanac planting days for perfect timing
Here’s how I align my garden with nature’s rhythm for stronger plants and bountiful harvests.
🌱 Step 1: Know Your First and Last Frost Dates
Start by checking your local frost dates—these are the backbone of almanac planting. I always reference the Old Farmer’s Almanac for my region, but you can also find this data through your local cooperative extension office. The last spring frost marks when tender plants like tomatoes and peppers can safely go outdoors, while the first fall frost tells me when to harvest or protect frost-sensitive crops.
Write these dates in your gardening journal. For example, if your last frost is April 15, you’ll know to wait until then before planting warm-season crops. If frost arrives early—say, October 20—you’ll have just enough time to get a fall crop of spinach or kale in before winter sets in.
⏰ Step 2: Calculate Planting Windows for Each Crop
Almanac planting days aren’t just about frost—they’re about heat units, too. For cool-season crops like lettuce or broccoli, I plant 4-6 weeks before the last frost so they mature before summer heat stresses them. Warm-season crops like beans or squash need 2-3 weeks after the last frost to avoid chilly soil shocking their roots.
I use a simple formula: Subtract the days to maturity (from seed packets) from your last frost date. For instance, if your frost is May 10 and your tomato seeds take 80 days to fruit, I plant them by February 20 indoors. This ensures they’re ready to transplant right as the soil warms.
☀️ Step 3: Adjust for Your Microclimate
Your yard isn’t the same as the almanac’s average—microclimates matter. If your garden sits in a frost pocket (a low spot where cold air settles), plant heat-lovers like peppers a week later than the almanac suggests. Conversely, if you’re on a south-facing slope, you might plant a week earlier because the ground warms faster.
I test this by watching nearby plants. If my neighbor’s lilacs bloom two weeks earlier than the almanac predicts, I adjust my planting dates accordingly. A simple thermometer buried in the soil (at root depth) helps track when the ground actually hits 50°F—the magic number for warm-season crops.
🌿 Step 4: Plan for Successive Plantings
Almanac planting days aren’t just for one-and-done crops. I use them to stagger plantings for continuous harvests. For example, if my last frost is April 15, I might plant:
- Lettuce on March 1 (harvest before bolting)
- More lettuce on April 1 (as days lengthen)
- A final batch on May 1 (for late-summer harvests)
This way, I avoid gluts and always have fresh greens.
For warm crops, I repeat the process in late summer for fall harvests. If my first frost is October 20, I’ll plant bush beans on August 1 and September 1 to ensure a harvest before the cold sets in.
✂️ Step 5: Use Almanac Moon Phases for Extra Boosts
Here’s a trick I picked up from old-school gardeners: Plant above-ground crops (like lettuce or tomatoes) during the waxing moon (when the moon is growing brighter) for stronger tops. Root crops (carrots, potatoes) do better during the waning moon (when the moon is shrinking) for deeper growth.
I cross-reference moon phases with frost dates. For instance, if my last frost is May 10 and the waxing moon peaks on May 5, I’ll time my tomato transplanting for that window. It’s not science, but I’ve seen noticeably healthier plants when I follow this rhythm.
Tips & tricks for perfect almanac planting timing
Mastering almanac planting days takes practice, but these insider tricks will help you avoid common mistakes and maximize your garden's potential.
Microclimate Testing: Don't rely solely on almanac averages—your yard is unique. I always test my microclimate by planting a few extra lilac bulbs or pansies in different spots. Watch which ones bloom first and last—this tells you exactly where cold air settles and where warmth lingers. For example, if your south-facing bed warms up 7 days earlier than the almanac predicts, adjust your warm-season planting dates accordingly.
Soil Temperature Secret: The 50°F soil temperature mentioned in Step 3 is your golden rule for warm crops, but I've found a simple trick to verify it: Press your hand into the soil about 4 inches deep. If it feels comfortably warm (like a lukewarm bath), your soil is ready. For cooler climates, I use a soil thermometer for precision—it's worth the $10 investment to avoid stunted plants.
Moon Phase Calendar: While moon phases aren't scientific, I've seen real differences in plant vigor when timed right. Create a simple planting calendar by marking waxing moon periods for above-ground crops and waning phases for roots. Pro tip: Use a free moon phase app to get alerts for optimal planting windows in your area. I schedule my tomato transplanting during the waxing moon before my last frost date for the strongest starts.
Successive Planting Hack: The staggered planting example in Step 4 is brilliant, but here's how I make it even more efficient: I plant my first cool-season crop (like lettuce) 6 weeks before last frost, then repeat every 2 weeks until 2 weeks before frost. This creates a rolling harvest without overwhelming me with one big planting. For warm crops, I use the same 2-week intervals in late summer for fall harvests.
Pro Tips for Almanac Planting Days
- Mastering almanac planting days takes practice, but these insider tricks will help you avoid common mistakes and maximize your garden's potential.
- Microclimate Testing: Don't rely solely on almanac averages—your yard is unique.
- Soil Temperature Secret: The 50°F soil temperature mentioned in Step 3 is your golden rule for warm crops, but I've found a simple trick to verify it: Press your hand into the soil about 4 inches deep.
Frequently asked questions
Got questions about using the Almanac planting days to time your garden? You're not alone!
Here are answers to the most common ones to help you plan like a pro.
What exactly are "Almanac planting days," and why should I follow them?
The Almanac planting days are based on the Old Farmer’s Almanac’s lunar planting calendar, which aligns planting with the moon’s phases to optimize growth. These dates account for frost risk, soil conditions, and seasonal shifts—helping you avoid common pitfalls like bolting or poor germination. Think of it as your garden’s personal cheat code!
Do I have to plant exactly on the recommended Almanac days?
Not necessarily! The Almanac provides a window (usually 1–3 days) for planting. If you miss the exact date, don’t stress—just plant within the suggested phase (e.g., "root crops" during a waxing moon). Flexibility is key, especially in unpredictable climates. Pro tip: Use the dates as a guide, but always check your local frost dates too!
Are Almanac planting days different for every region?
Yes! The Almanac offers customized planting maps by ZIP code, accounting for your hardiness zone, last frost date, and soil type. For example, a tomato planted in Zone 5 might go in mid-May, while the same plant in Zone 10 could start in February. Always check your local guide—one size doesn’t fit all!
Can I use the Almanac for container gardening or indoor plants?
While the Almanac focuses on outdoor planting, its principles (like moon phases and seasonal timing) still apply to transplanting seedlings or starting seeds indoors. For containers, prioritize the moon phase and your plant’s light needs—just avoid planting during a full moon for leafy greens (they may grow too fast).
My plants didn’t thrive after following the Almanac dates. What went wrong?
Even with perfect timing, factors like soil quality, watering, or pest pressure can derail growth. Double-check:
- Was your soil properly amended?
- Did you water consistently (but not overwater)?
- Could pests or disease be the issue?
How do I find the Almanac planting days for my area?
Head to the Old Farmer’s Almanac website and use their interactive planting calendar. Enter your ZIP code, and you’ll get:
- Best planting dates for 30+ crops
- Moon phase recommendations
- Local frost warnings
Wrapping up and next steps
Mastering almanac planting days is your secret weapon for a thriving garden—no guesswork, just timed perfection! 🌱 Whether you’re a seasoned green thumb or a curious beginner, aligning your planting schedule with nature’s rhythm ensures stronger yields, healthier plants, and less frustration.
Now that you’re armed with the right dates, soil prep tips, and troubleshooting tricks, it’s time to roll up your sleeves and get growing!
Your next step? Pick one crop from this year’s almanac list, mark its ideal planting window on your calendar, and start small. Every expert gardener began with a single seed—why not you? Happy planting!