Watering
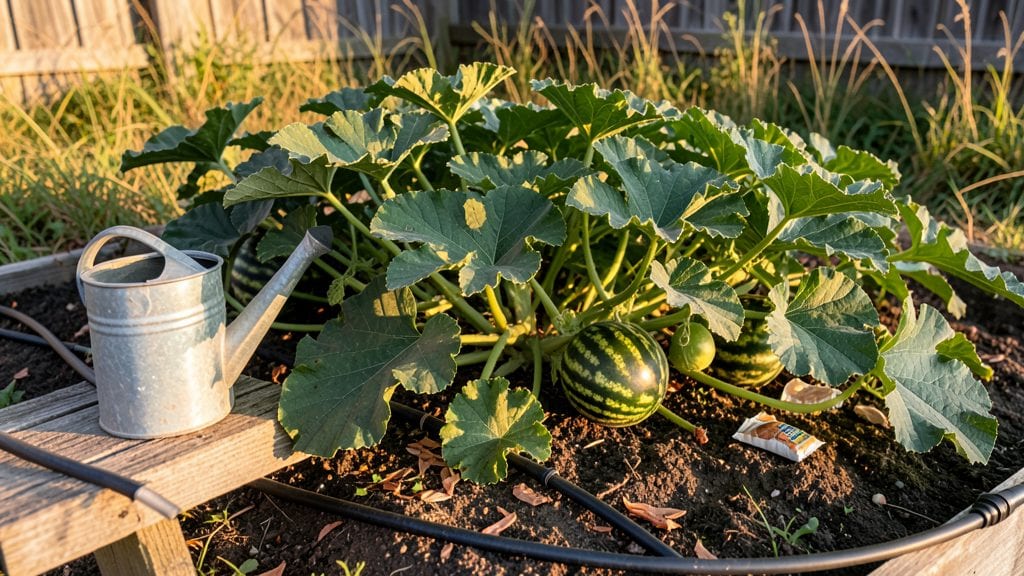
Watering watermelon plants right from the start determines whether you’ll end up with sweet, heavy fruit or bitter, cracked messes. 🌱 I’ve learned the hard way that watermelons demand deep, consistent watering—not just a quick sprinkle.
The first few weeks are critical, but summer heat changes everything once vines sprawl across the garden.
You’ll need a soaker hose or drip irrigation to deliver 1-2 inches of water per week, deeper as plants mature. Stick your finger in the soil—if it’s dry past 2 inches, it’s time to water.
Mulch helps retain moisture, but don’t let vines sit in soggy soil, or you’ll invite rot. Watermelons are thirsty, but they hate inconsistency.
By mid-summer, you’ll see the payoff: glossy leaves, sturdy vines, and fruit that feels heavy for its size. The secret is matching water to growth stages—deep soaks when flowers appear, then steady moisture as fruit swells.
Too little? Fruit stays small and hard. Too much? Cracks and uneven ripening ruin the harvest.
Adjust for your climate: in 90°F+ heat, you might water twice a week, while cooler zones can stretch it to once. Watch for wilting leaves or yellowing vines—they’re screaming for water or a break from it.
Once you nail this, you’ll have watermelons so sweet they’ll make your neighbors jealous.
📚 In This Guide
- What you need
- Instructions
- Tips and common mistakes
- Wrapping up and next steps
What you need
- ● Water source: Garden hose with adjustable nozzle (preferably a soaker hose or drip irrigation for efficiency) or watering can (5+ gallon capacity).
- ● Watering schedule tracker: Calendar or app (e.g., Gardenate) to monitor frequency.
- ● Mulch: Organic mulch (straw, wood chips, or black plastic) to retain moisture (cover soil around plants with a 2–3 inch layer).
- ● pH testing kit: To check soil pH (ideal range: 6.0–7.0 for watermelons).
- ● Moisture meter: To check soil moisture before watering (aim for 1–2 inches deep).
- ● Rain gauge: To track natural precipitation and adjust watering.
- ● Plant supports: Small stakes or cages (if trellising vines).
- ● Fertilizer: Balanced organic fertilizer (e.g., 10-10-10) or compost tea for nutrient boosts.
Step-by-Step guide to watering watermelon plants for maximum yield
Watermelons thrive with consistent moisture—here's how to water them like a pro.
💧 Step 1: Water Deeply at Planting and Keep Soil Moist
When you first plant watermelon seedlings, give them a deep watering—about 1-2 gallons per plant—to settle the soil and encourage root growth. Watermelons develop deep roots, so you want those roots to establish quickly. After planting, keep the soil evenly moist but not soggy. You'll know it's right when the top 2-3 inches of soil feel damp to the touch but not wet.
Here's the thing—watermelons hate dry spells. If the soil dries out completely, the plant will struggle to recover, and fruit development suffers. I like to check soil moisture daily during the first two weeks, then every other day once established. Use your finger to test—if it feels dry past 1 inch down, it's time to water.
☀️ Step 2: Water Early in the Morning for Best Absorption
Water your watermelon plants early in the morning, between 6-9 AM. This timing gives the plant plenty of time to absorb moisture before the heat of the day causes evaporation. Wet leaves in the afternoon sun can lead to fungal diseases like powdery mildew, which is the last thing you want on a watermelon vine.
When watering, aim for the base of the plant rather than overhead. Use a soaker hose or drip irrigation to deliver water slowly and directly to the roots. This method reduces waste and keeps foliage dry. You'll see the soil around the base darken slightly—this is your signal that water is penetrating deeply. Aim for 1-1.5 gallons per plant per watering during hot, dry periods.
🌱 Step 3: Adjust Watering as Fruits Develop
Once watermelons start forming, increase watering slightly—about 20-30% more than before. The fruit itself is 90% water, so consistent moisture is key for sweet, juicy results. During fruit development, water every 2-3 days if the weather is hot and dry. You'll notice the vines growing more vigorously, and the fruits will plump up noticeably.
Here's where many gardeners go wrong: they overwater when the fruit is near harvest. Instead, reduce watering 1-2 weeks before picking to concentrate sugars in the melon. You'll know it's ready when the tendril near the stem turns brown and the melon sounds hollow when tapped. This adjustment ensures your watermelons are sweeter and more flavorful.
⏰ Step 4: Monitor and Adapt to Weather Changes
Watermelons are sensitive to weather shifts. During hot, dry spells, increase watering frequency to every 1-2 days, especially if there's no rain. If you're in a humid climate, reduce watering slightly to prevent fungal issues. Always check the soil—if it's dry past 2 inches, it's time to water.
Real talk: mulching makes a huge difference. Spread 2-3 inches of organic mulch around the base of the plant to retain moisture and regulate soil temperature. This reduces watering needs by 30-40% and keeps roots cool. Watch for signs of stress like yellowing leaves or wilting—these are your cues to adjust watering immediately.
Tips & tricks for watering watermelon plants
Here's what I've learned after growing watermelons for years—these tricks make all the difference between average yields and jaw-dropping harvests.
Soil Moisture Test: The finger test in Step 1 is your best friend. Stick your finger about 1 inch down—if it feels dry, water immediately. For a more precise check, grab a handful of soil. If it crumbles easily, you need water. If it sticks together, hold off. This simple test prevents both underwatering and overwatering, both of which stress watermelon plants.
Equipment Matters: Don't just use a regular hose! In Step 2, I can't stress enough how much better a soaker hose or drip irrigation system works. They deliver water directly to the roots without wetting the leaves, which prevents fungal diseases. If you don't have these, at least water at the base of the plant and avoid getting water on the foliage. Even a simple watering can with a long spout helps.
Fruit Development Secret: When your watermelons start forming in Step 3, increase your watering by about 20-30% more than before. But here's the trick: don't water too close to harvest. That 1-2 week reduction before picking concentrates the sugars, making your watermelons sweeter. I've tasted the difference—it's night and day compared to overwatered melons.
Mulching Magic: The mulch recommendation in Step 4 isn't just optional—it's essential. Organic mulch like straw or grass clippings helps retain moisture, reducing your watering needs by 30-40%. Plus, it keeps the soil temperature consistent, which watermelon roots love. Just make sure to keep the mulch 2-3 inches away from the plant stem to prevent rot.
Pro Tips for Watering Watermelon Plants
- Here's what I've learned after growing watermelons for years—these tricks make all the difference between average yields and jaw-dropping harvests.
- Soil Moisture Test: The finger test in Step 1 is your best friend.
- Equipment Matters: Don't just use a regular hose!
Frequently asked questions
Got questions about keeping your watermelon plants thriving with the perfect watering routine? Here are answers to the most common concerns—so you can grow juicy, sweet fruit without the guesswork!
How often should I water watermelon plants?
Watermelons need 1–2 inches of water per week, but young plants (first 2–3 weeks) may need daily watering to establish roots. Once vines start spreading, water deeply 2–3 times per week, adjusting for heat or drought. Pro tip: Let the top inch of soil dry between waterings to prevent root rot.
What’s the best time of day to water watermelon plants?
Water in the early morning (6–9 AM) to reduce evaporation and fungal risks. Avoid evening watering—wet foliage overnight can invite mildew. If you must water later, focus on the soil base, not the leaves.
Can I use a sprinkler, or should I water at the base?
Sprinklers work for young plants but risk fungal diseases as vines grow. Once established, water at the base using a soaker hose or drip irrigation to keep leaves dry. For containers, ensure drainage holes prevent soggy roots.
Why are my watermelon leaves yellowing after watering?
Yellow leaves often signal overwatering or poor drainage. Check soil moisture—if it’s soggy, reduce frequency. Yellowing at the edges? It could be underwatering or nutrient deficiency (like nitrogen). Test soil pH (6.0–6.8 is ideal) and adjust watering accordingly.
How does extreme heat affect watermelon watering needs?
During 90°F+ temps, watermelons may need water every 2–3 days to prevent stress. Monitor soil moisture closely—sandy soil dries faster than clay. Mulch (straw or grass clippings) retains moisture and keeps roots cool.
| Issue | Quick Fix |
|---|---|
| Blossoms but no fruit | Check for consistent watering—fluctuations can cause pollination failure. |
| Cracked fruit | Water deeply but avoid heavy rain before harvest (overhydration causes splitting). |
| Slow vine growth | Ensure 1 inch of water weekly and add compost for nutrients. |
Wrapping up and next steps
Mastering the art of watering watermelon plants is your ticket to juicy, homegrown success! 🌱 By focusing on deep, consistent hydration, mulching, and adjusting for weather, you’ve got everything you need to nurture thriving vines. Remember, patience and observation are key—your efforts will pay off with sweet, sun-ripened rewards.
Ready to take the next step? Start a watering schedule today and watch your watermelon patch flourish. Happy growing—your future slices of summer are waiting! 🍉✨