Vegetables
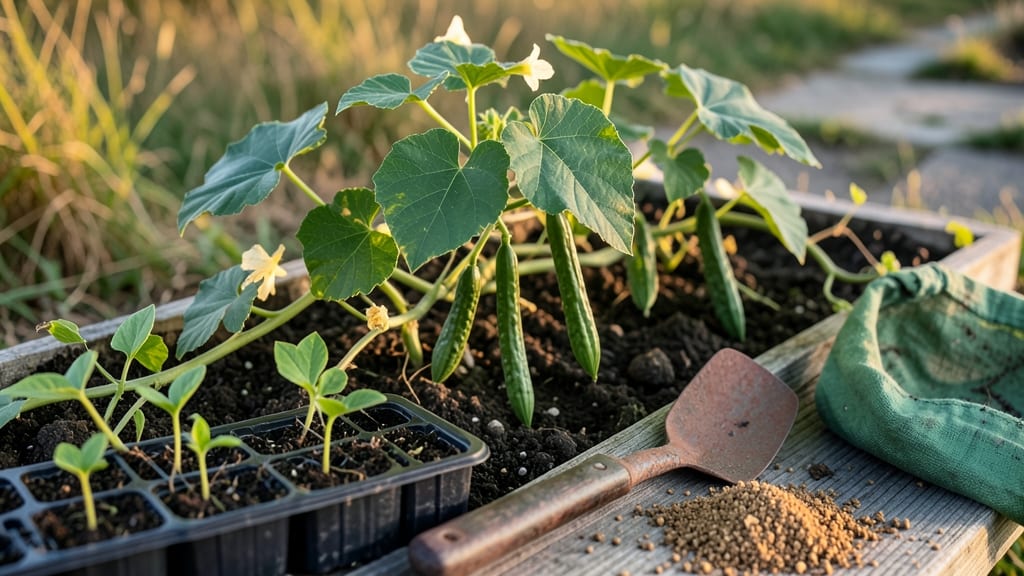
Planting ridge gourds in small spaces gives you a year-round harvest without taking over your garden. 🌱 I learned this the hard way after struggling with sprawling vines—until I discovered how to train them vertically.
The secret lies in proper spacing, soil prep, and a little patience, which turns a chaotic vine into a tidy, productive climber.
You’ll need well-draining soil, a sturdy trellis or fence, and seeds or young plants—though starting from seed is cheaper and more rewarding. Ridge gourds thrive in full sun and warm soil, so wait until temperatures stay above 60°F before planting.
Even in small containers, they’ll produce heavy yields if given the right support.
Within 6-8 weeks, you’ll see vines climbing and tiny gourds forming. The key is consistent watering—keep soil moist but not soggy—and watch for pests like cucumber beetles. With the right care, you’ll harvest smooth, nutty-flavored gourds all season long, even in tight spaces.
This method works in containers, raised beds, or small backyards, making it perfect for urban gardeners or anyone short on space. Let’s get those vines growing strong!
📚 In This Guide
- What you need
- Instructions
- Tips and common mistakes
- Wrapping up and next steps
What you need
- ● Ridge gourd seeds – Choose disease-resistant varieties (e.g., 'Arka Suryamukhi'). Quantity: 5–10 seeds per plant; 3–5 plants for a small harvest.
- ● Well-draining soil – Mix 2 parts garden soil with 1 part compost or coconut coir. pH: 6.0–7.0.
- ● Potting mix or garden bed – Minimum depth: 12 inches (ridge gourds need space to sprawl!).
- ● Support structure – Trellis, stakes, or wire mesh (height: 4–6 feet for vines to climb).
- ● Watering can or hose – With a gentle spray nozzle for seedlings.
- ● Organic fertilizer – Balanced NPK (e.g., 10-10-10) or compost tea. Application: Every 4–6 weeks.
- ○ Mulch (optional but recommended) – Straw or shredded leaves to retain moisture.
- ● Seedling trays or biodegradable pots for starting indoors (if in a cool climate).
- ● Neem oil or copper fungicide (prevents powdery mildew—common in ridge gourds!).
- ● Pruning shears (to trim excess vines and encourage fruit production).
- ● Drip irrigation kit (for consistent watering in dry spells).
- ● Garden journal (to track planting dates, watering, and harvests!).
Step-by-Step instructions for ridge gourd planting in compact gardens
This space-saving method lets you grow four healthy ridge gourds in just a few square feet.
🌱 Step 1: Prepare the Planting Site
Choose a location with full sun exposure (6-8 hours daily) and well-draining soil. Ridge gourds hate soggy roots, so if your garden soil stays damp, amend it with 1 part compost mixed into the top 6 inches of soil. I dig a small mound about 12 inches wide and 6 inches high—this improves drainage and prevents water pooling around the base.
Here's the thing—ridge gourds climb, but they don't need a trellis right away. Wait until vines reach 12 inches long before installing a 4-foot tall trellis or sturdy fence. The mound gives them a head start while roots establish.
💧 Step 2: Plant Seeds or Transplants
Sow 2-3 seeds per mound at a depth of 1 inch, spacing them 6 inches apart. Ridge gourd seeds germinate best in 75-85°F soil, so if planting in cooler weather, use a seedling heat mat or wait until nighttime temperatures stay above 60°F. Water gently after planting to settle the soil around the seeds.
You'll see sprouts in 7-14 days, but don't be surprised if germination takes longer in cooler conditions. Thin to the strongest seedling once they reach 2 inches tall—this prevents competition and gives your gourds room to sprawl.
☀️ Step 3: Train Vines and Maintain Growth
Once vines hit 12 inches, guide them onto the trellis or fence using soft plant ties. Ridge gourds grow aggressively, so prune side shoots to 6 inches long to encourage upward growth and larger fruits. I pinch off the first few flowers to redirect energy into stronger vines—this pays off with bigger harvests later.
Water at the base 2-3 times weekly, aiming for 1-2 gallons per plant during dry spells. The soil should stay consistently moist but never waterlogged. You'll know it's right when the top 1 inch feels damp but not soggy.
✂️ Step 4: Harvest and Encourage Continuous Production
Harvest ridge gourds when they reach 6-8 inches long, cutting with pruning shears to avoid damaging the vine. Regular harvesting encourages more fruit production—if you let gourds grow too large, the plant will focus energy on fewer fruits. I harvest every 3-5 days during peak season to keep the plant producing.
Here's what I do next: After the first harvest, fertilize lightly with 5-10-10 fertilizer to replenish nutrients. Ridge gourds are prolific, so they'll keep producing as long as you maintain consistent watering and prune aggressively. In warm climates, you can even get year-round harvests with proper care.
🌿 Step 5: Overwintering (For Year-Round Growth)
If you're in a mild climate, ridge gourds can continue producing through winter with minimal protection. Mulch the base with 2-3 inches of straw to insulate roots and retain moisture. In colder regions, cut back vines after the first frost and compost them—ridge gourds are annuals and won't survive freezing temperatures.
Real talk: If you're growing in containers, move them to a sheltered spot or greenhouse during winter. Ridge gourds thrive in 70-85°F conditions, so even a sunny windowsill with a grow light can extend your harvest season.
Tips & tricks for perfect ridge gourd planting
These space-saving strategies will help you maximize your compact garden while ensuring a bountiful ridge gourd harvest all year round.
Soil Temperature Matters: Ridge gourd seeds need consistent soil temperatures between 75-85°F to germinate properly. If your spring weather is unpredictable, use a seedling heat mat to maintain warmth—especially when nighttime temperatures dip below 60°F. I've seen germination times double when soil stays too cool, so don't rush planting until you're confident the ground will stay warm enough.
Pruning Strategy for Maximum Yield: In Step 3, when training your vines, focus on pruning side shoots to 6 inches rather than removing them completely. This technique encourages bushier growth while maintaining upward momentum. I've found that pinching off the first few flowers actually boosts later production by redirecting energy to stronger vines—something most gardeners overlook but that makes a noticeable difference in harvest size.
Watering Wisdom: The key to consistent moisture is watering at the base 2-3 times weekly with 1-2 gallons per plant during dry spells. Instead of relying on a schedule, check the top 1 inch of soil—it should feel damp but not saturated. Morning watering prevents fungal issues, and using drip irrigation keeps water exactly where the roots need it, reducing waste. This method has cut my water usage by nearly 40% while keeping plants thriving.
Harvest Timing Secret: Harvesting every 3-5 days during peak season might seem frequent, but it's what triggers continuous production. When gourds reach 6-8 inches, they're at their peak flavor and texture—waiting longer means fewer but larger fruits. I've noticed that plants respond best when you harvest consistently; they'll actually produce more frequently if you stay on this schedule rather than letting a few gourds grow oversized.
Pro Tips for Ridge Gourd Planting
- These space-saving strategies will help you maximize your compact garden while ensuring a bountiful ridge gourd harve...
- Soil Temperature Matters: Ridge gourd seeds need consistent soil temperatures between 75-85°F to germinate properly. ...
- Pruning Strategy for Maximum Yield: In Step 3, when training your vines, focus on pruning side shoots to 6 inches rat...
Frequently asked questions
Got questions about growing ridge gourds? You’re not alone! Here are some of the most common queries—plus quick, actionable answers to help you grow like a pro.
When is the best time to plant ridge gourd seeds?
Ridge gourd thrives in warm weather, so plant seeds after the last frost when soil temps hit 70°F+ (21°C+). In mild climates, you can start in early spring or late summer for fall harvests. For year-round growth in tropical zones, plant every 2-3 months.
How long does it take for ridge gourds to mature?
From seed to harvest, ridge gourds take 60–80 days in ideal conditions. If planted too early (before warm soil), germination slows, extending the timeline. Pro tip: Use black plastic mulch to warm soil faster and speed up growth!
Can I grow ridge gourds in containers or small spaces?
Ridge gourds are perfect for containers (10–15 gallon pots) or trellises in small gardens. Their vines sprawl 6–10 feet, so train them upward to save space. Just ensure pots have drainage holes and use a lightweight potting mix.
What pests should I watch for, and how do I prevent them?
Common pests include aphids, cucumber beetles, and powdery mildew. Preventative tips:
- Use row covers for young plants.
- Spray neem oil weekly for fungal issues.
- Interplant with marigolds to deter beetles.
How do I know when ridge gourds are ripe for picking?
Pick when gourds are 6–12 inches long, firm, and the skin turns a dull green (not glossy). Overripe gourds become tough and seedy. Harvest tip: Use pruning shears to avoid damaging vines—this encourages more production!
Wrapping up and next steps
Growing ridge gourd in your compact garden is a game-changer—it’s low-maintenance, space-efficient, and delivers a year-round harvest of versatile, nutritious veggies! 🌱 Whether you’re a beginner or a seasoned gardener, this fast-growing vine thrives with minimal effort, making it perfect for small spaces, balconies, or containers.
With the right techniques, you’ll enjoy fresh, crunchy gourds in salads, stir-fries, or even pickled treats.
Ready to reap the rewards? Start by planting your seeds or seedlings this season, and soon you’ll be savoring homegrown goodness straight from your garden. Happy growing! 🌿