Pruning
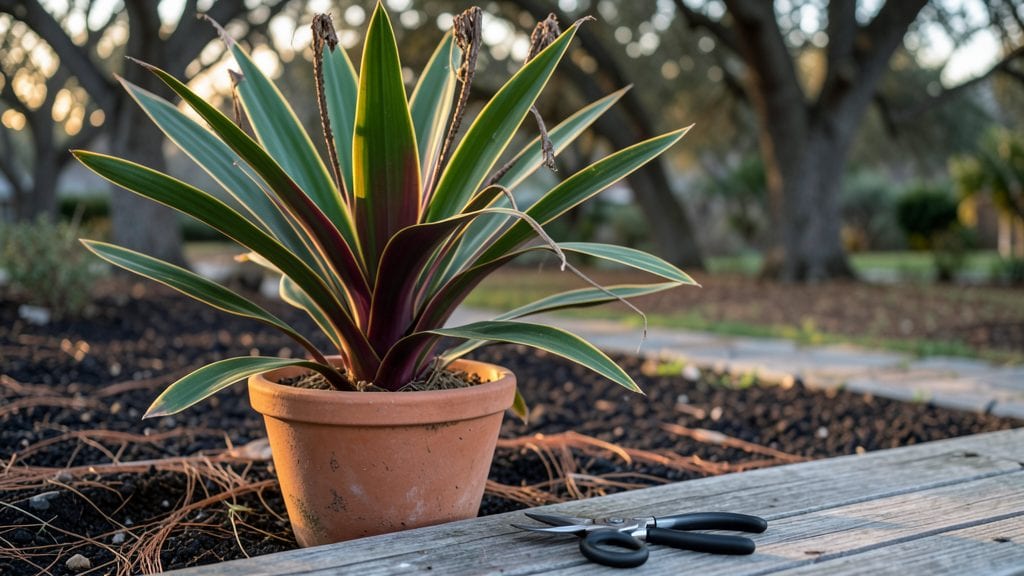
Pruning cordyline plants keeps them looking sharp and growing strong year after year. ✨ I’ve learned that skipping this step leads to leggy, sparse plants that lose their dramatic shape—something I fixed after my first overgrown cordyline took over a corner of the patio.
The secret isn’t just cutting back; it’s timing those cuts to match the plant’s natural growth cycles.
You’ll need sharp pruners, a clean cutting surface, and about 15 minutes to tackle a single plant.
Most people wait until spring, but I’ve found that three seasonal trims—light in early spring, mid-summer cleanup, and a final touch before winter—keep cordylines lush and encourage fresh growth when you need it most.
The key is removing only the dead or damaged fronds while leaving healthy ones to photosynthesize.
After pruning, you’ll notice new shoots emerging within 4-6 weeks, with a fuller, more compact shape that shows off those striking foliage colors. Airflow improves, reducing humidity pockets where pests love to hide, and the plant redirects energy toward stronger roots and new growth.
It’s the difference between a plant that fades into the background and one that becomes the centerpiece of your garden.
This method works for both tropical and temperate climates, though timing shifts slightly depending on your zone. Whether you’re dealing with a 10-foot-tall specimen or a compact patio plant, the same principles apply. Let’s get those shears ready and bring your cordylines back to life!
📚 In This Guide
- What you need
- Instructions
- Tips and common mistakes
- Wrapping up and next steps
What you need
- ● Sharp pruning shears or bypass pruners – Must be clean and sterilized (alcohol wipes work great!). Choose bypass (not anvil) for clean cuts on thicker stems.
- ● Hand pruners or loppers – For thicker stems (½”+ diameter). Opt for bypass loppers with 4-6” cutting blades.
- ● Gloves – Garden-grade (nitrile or leather) to protect from sap and sharp edges.
- ● Disinfectant (70% isopropyl alcohol or bleach solution) – 1 part bleach to 9 parts water for sterilizing tools between cuts.
- ● Rubbing alcohol or hydrogen peroxide (3%) – For cleaning tools and wiping sap off cuts to prevent infection.
- ○ Pruning sealant (optional but helpful) – Tree wound pruning paste or beeswax-based sealant for large cuts (½”+).
- ● Sharpie or permanent marker – For marking stems if you’re doing structured pruning (e.g., topping or shaping).
- ● Buckets or trash bags – For collecting pruned foliage (line with bags for easy disposal).
- ● Ladder or step stool – If your Cordyline is taller than 6 feet.
- ● Extension pole pruners – For hard-to-reach branches without climbing.
- ● Hose or water spray bottle – To rinse sap off tools and hands mid-pruning.
- ● Compost bin or mulch – For repurposing healthy pruned leaves as nutrient-rich compost.
- ● Safety glasses – If you’re dealing with spiky or dense foliage.
Step-by-Step guide to pruning cordyline plants
Keep your cordylines lush and vibrant with this seasonal pruning routine.
🌿 Step 1: Spring Pruning for New Growth
Start in early spring when new growth begins to emerge. Look for the first fresh shoots—these are your signal to prune. Using clean, sharp pruning shears, cut back any dead or damaged leaves at the base, making sure to remove them completely to prevent disease. I like to trim back about one-third of the oldest leaves to encourage new, healthy foliage.
Focus on removing leaves that are yellowed, brown, or otherwise unsightly. This isn’t just about looks—it’s about redirecting the plant’s energy toward new growth. Avoid cutting into the main stem unless it’s absolutely necessary, as cordylines store water and nutrients there. If you do need to trim the stem, make the cut just above a leaf node where new growth can sprout.
✂️ Step 2: Summer Maintenance Trimming
Mid-summer is the time for light maintenance. Check your cordyline for any leaves that have become leggy or overly crowded. These are the ones that need attention. Trim back any stems that are growing too long or are rubbing against each other, as this can cause damage and invite pests. Use your shears to make clean cuts just above a leaf node or a set of leaves.
This is also the time to shape your plant if needed. Cordylines respond well to shaping, so you can gently guide their growth by trimming back any stray branches or leaves that are growing in directions you don’t want. Keep your cuts precise—ragged edges can lead to unsightly regrowth and potential infections. After trimming, wipe down your shears with rubbing alcohol to keep them sterile for the next cut.
🌱 Step 3: Fall Cleanup for Winter Prep
As the weather cools, focus on preparing your cordyline for winter. Remove any leaves that are turning brown or yellow, as these won’t survive the colder months and can drain energy from the plant. Cut them back to the base, leaving only the healthiest, greenest leaves. This step is crucial for plants in colder climates, where winter damage can be more severe.
If your cordyline is in a container, this is also a good time to check the roots and repot if necessary. Trim back any roots that are circling or growing out of the drainage holes. After pruning, give your plant a light feeding with a balanced fertilizer to help it recover and store nutrients for the winter. This ensures it’ll bounce back strong in the spring.
⏰ Step 4: Year-Round Monitoring and Adjustments
Throughout the year, keep an eye on your cordyline for any signs of stress, disease, or pests. If you notice any issues, address them promptly with targeted pruning or treatments. For example, if you see signs of fungal disease like black spots on the leaves, remove those leaves immediately and treat the plant with a fungicide if needed.
Regular monitoring helps you catch problems early and adjust your pruning schedule as needed. Sometimes, a cordyline might need an extra trim if it’s growing too fast or if a storm has damaged some of its leaves. Trust your observations—if something looks off, it’s better to act sooner rather than later. With consistent care, your cordyline will stay healthy and vibrant year-round.
Tips & tricks for pruning cordyline plants
Here's what nobody tells you about keeping your cordylines thriving year-round—these tricks make all the difference.
Tool Prep is Everything: Before you start pruning in Step 1, sterilize your pruning shears with rubbing alcohol. I learned this the hard way after transferring a fungal infection between plants. Sharp tools also make cleaner cuts that heal faster—dull blades crush plant tissue, inviting disease. Test your shears on a scrap piece of cardboard first to ensure they're sharp enough for clean cuts through tough cordyline leaves.
The One-Third Rule: In Step 1, when trimming back about one-third of the oldest leaves, focus on the bottom third of the plant. This creates air circulation at the base while maintaining the plant's natural shape. I always work from the bottom up—this prevents over-pruning and gives your cordyline time to adjust to the new growth pattern. Think of it like giving your plant a fresh start without shocking it.
Shape with Purpose: During summer maintenance in Step 2, use your pruning to guide growth direction. If your cordyline is leaning toward a window, trim the top growth on that side to encourage upward growth. For bushier plants, trim the center stems slightly to allow sunlight to reach inner leaves. This shaping technique takes practice, but it transforms a wild, leggy plant into a structured, show-stopping specimen.
Winter Prep Secret: In Step 3, after removing brown or yellow leaves, take a moment to inspect the remaining foliage. Any leaves with black spots or powdery residue should be removed immediately and discarded—not composted—to prevent spreading fungal spores. A light application of neem oil after pruning can provide extra protection against winter pests while your plant rests. This simple step makes all the difference in spring recovery.
Pro Tips for Pruning Cordyline Plants
- Here's what nobody tells you about keeping your cordylines thriving year-round—these tricks make all the difference.
- Tool Prep is Everything: Before you start pruning in Step 1, sterilize your pruning shears with rubbing alcohol.
- The One-Third Rule: In Step 1, when trimming back about one-third of the oldest leaves, focus on the bottom third of the plant.
Frequently asked questions
Got questions about keeping your Cordyline plants lush and healthy? You’re not alone! Here are some of the most common queries—and straightforward answers—to help you prune like a pro.
When is the best time to prune Cordyline plants?
The ideal times are early spring (to encourage new growth), late summer (for shaping before winter), and winter (to remove dead or damaged foliage). Avoid heavy pruning in fall, as it can stress the plant before dormancy. Light trims to tidy up are fine year-round!
How do I prune a Cordyline without harming it?
Always use clean, sharp pruners to make clean cuts just above a leaf node or branch. Avoid cutting into the thick stem unless necessary—focus on removing only the outer leaves or leggy growth. Sterilize tools with rubbing alcohol to prevent disease. Never remove more than 1/3 of the plant at once!
What should I do if my Cordyline looks sad after pruning?
If your plant seems stressed (yellowing leaves, wilting, or slow regrowth), it might be over-pruned or underwatered. Give it time to recover by keeping soil consistently moist (not soggy) and placing it in bright, indirect light. A light fertilizer after pruning can also boost recovery. Patience is key!
Can I propagate my Cordyline from pruned cuttings?
Healthy cuttings (4–6 inches long) with at least 2–3 leaves can root in water or soil. Dip the cut end in rooting hormone (optional) and place in moist potting mix or a jar of water. Keep in bright, indirect light and maintain humidity. Roots typically form in 4–8 weeks!
Do I need to prune Cordyline in winter?
Winter pruning is optional but helpful for removing brown, crispy, or dead leaves that can harbor pests. Light trims improve airflow and keep the plant looking tidy. Avoid heavy cuts—wait until early spring for major shaping. If your plant is dormant, minimal pruning is best.
Wrapping up and next steps
Pruning your cordyline plants doesn’t have to be intimidating—with the right tools, timing, and technique, you can keep them thriving year-round! 🌿 Whether you’re shaping for aesthetics, encouraging new growth, or maintaining health, seasonal trims are key.
Remember: confidence comes with practice, so start small and observe how your plant responds.
Now that you’re armed with knowledge, grab those pruners and give your cordyline the care it deserves! Next, check out our guide on repotting to ensure your plant stays happy as it grows—because a well-maintained cordyline is a showstopper in any garden! 🌟