Picking
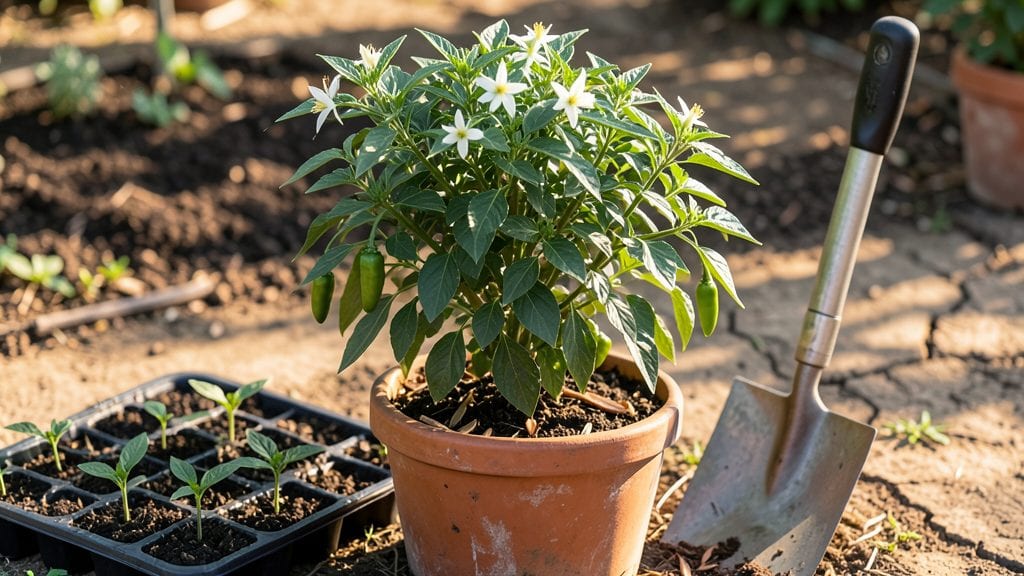
Planting Tabasco peppers delivers fiery rewards in just 60 days—if you nail the soil, spacing, and sunlight. ✨ I’ve grown these tiny but mighty peppers for years, and the secret lies in mimicking their tropical roots while keeping them cool enough to thrive.
Most gardeners overlook how sensitive they are to heat stress, yet they’re surprisingly tough once established.
The right setup means well-draining soil mixed with compost, 5-6 hours of direct sun, and pots or beds spaced 18 inches apart to prevent crowding. Start seeds indoors 8-10 weeks before last frost or buy sturdy transplants—just avoid those leggy, pale seedlings at the nursery.
Water consistently but never soggy, and watch for the first bright green leaves signaling strong roots.
By day 60, you’ll harvest 1-inch pods packed with heat, perfect for pickling or fresh salsa. The plants keep producing all season if you prune lightly and fertilize monthly. My first batch surprised me with 50+ peppers per plant—way more than I expected from such small bushes.
Here’s the kicker: Tabascos hate cold snaps, so harden off seedlings gradually and protect them with row covers if nights dip below 55°F. Overwatering or poor drainage kills them faster than pests—so pay attention to those details. Ready to grow your own heat factory?
📚 In This Guide
- What you need
- Instructions
- Tips and common mistakes
- Wrapping up and next steps
What you need
- ● Tabasco pepper seeds or seedlings: 10–20 seeds (or 3–5 seedlings for a small harvest). Choose Capsicum frutescens varieties like "Tabasco" or "Carolina Reaper" for extra heat!
- ● Well-draining potting mix: 5–10 gallons (sterilized to prevent disease). Look for a blend with 50–70% peat or coco coir and perlite for aeration.
- ● Containers or garden bed: Containers: 5–7 inch pots (1–2 plants per pot) or fabric grow bags (for better drainage).
- ● Garden bed: Full sun (6+ hours/day) with loose, sandy soil (pH 5.8–6.5). Amend with compost if soil is heavy.
- ● Fertilizer: Balanced 10-10-10 or organic options like fish emulsion (diluted to half-strength). Avoid high-nitrogen fertilizers—peppers thrive on phosphorus and potassium!
- ● Watering can or hose with a gentle spray nozzle: Peppers hate soggy roots—water at soil level to avoid fungal issues.
- ● Hand trowel or small shovel: For transplanting seedlings or loosening soil.
- ● Pruning shears: Sterilized (rubbing alcohol wipe) for trimming leggy stems or removing suckers.
- ○ Gloves (optional but recommended): Tabasco peppers pack a punch—literally! Wear nitrile gloves to avoid skin irritation.
- ● Plant labels & marker: Track varieties and planting dates (especially if growing multiple types).
- ● Warmth: Tabasco peppers love heat—wait until soil temps reach 70°F+ (use a soil thermometer if unsure). Start indoors 8–10 weeks before last frost.
- ● Sunlight: Commit to a south-facing window, grow light, or outdoor spot with unfiltered sun.
- ● Patience: From seed to harvest, Tabasco peppers take 60–90 days. Stay consistent with care!
- ● Grow light: LED or fluorescent (12–16 hours/day) for indoor starts.
- ● Mulch (straw or black plastic): Retains moisture and suppresses weeds.
- ● Cage or trellis: Supports bushy plants (especially if growing tall varieties).
- ● Spray bottle: For misting seedlings and preventing transplant shock.
- ● Heat mat: Speeds up germination if your home is chilly.
Step-by-Step instructions for planting Tabasco peppers
Here’s the method I trust to grow Tabasco peppers from seed to harvest in just 60 days.
🌱 Step 1: Start Seeds Indoors at the Right Time
Tabasco peppers need a long, warm growing season, so begin seeds indoors 8-10 weeks before your last frost date. Use the 2-3 inch deep containers from your materials list, filling them with sterile seed-starting mix—never garden soil, which can harbor diseases like damping-off.
Plant 2 seeds per cell at a depth of ¼ inch, just below the soil surface. Press gently but don’t compact the mix—you want roots to push through easily. Cover lightly with additional mix, then mist the surface until evenly moist. Place the tray under a grow light (or in a sunny window) and keep soil at 75-80°F for fastest germination.
Expect sprouts in 7-14 days. Once they emerge, remove the weaker seedling, leaving only the strongest plant per cell. Thin carefully to avoid disturbing roots—this prevents transplant shock later.
☀️ Step 2: Harden Off and Transplant After Warmth Arrives
Two weeks before your last frost, start hardening off seedlings by placing them outside in partial shade for 1-2 hours the first day. Gradually increase exposure by 1 hour daily until they tolerate a full day outside. This toughens stems and leaves, preventing transplant shock.
Transplant after all danger of frost has passed and soil warms to at least 65°F. Dig holes 12-18 inches apart—Tabasco peppers need space to spread. Bury seedlings slightly deeper than they grew in pots, up to the first set of true leaves. This encourages stronger root systems.
Water deeply at transplanting to settle soil around roots. Avoid wetting leaves to prevent fungal diseases. Mulch with 1-2 inches of straw to retain moisture and suppress weeds.
💧 Step 3: Provide Consistent Heat and Water
Tabasco peppers thrive in full sun (6+ hours daily) and warm soil. If your climate dips below 60°F at night, use a row cover or move pots to a sheltered spot. These peppers are heat-lovers—the hotter the better for flavor development.
Water deeply 1-2 times per week, ensuring the top 2 inches of soil stay dry between waterings. Overwatering causes blossom-end rot, while underwatering stunts growth. You’ll know moisture is right when soil feels damp but not soggy—stick your finger in to check.
Fertilize lightly every 2-3 weeks with a balanced organic fertilizer (like 10-10-10) to support fruiting. Too much nitrogen leads to leafy growth at the expense of peppers—keep it balanced.
✂️ Step 4: Prune and Support for Maximum Yield
Remove suckers (the small shoots that form in the leaf axils) to direct energy toward pepper production. Pinch off flowers on the first 6-8 inches of growth to encourage bushier plants. This ensures a stronger framework before the main harvest.
As peppers form, use cage supports to keep plants upright. Tabasco peppers can get top-heavy, and wind or rain can snap stems. Prune any yellow or diseased leaves immediately to prevent spread.
Harvest red peppers when they reach 2-3 inches long, or let them turn bright red for maximum heat. Use clean pruners to cut stems, leaving ¼ inch of stem attached. This encourages more fruiting and prevents disease entry points.
⏰ Step 5: Extend the Season for Continuous Harvests
Tabasco peppers grow quickly but need warmth to keep producing. If your fall nights cool below 55°F, move potted plants to a sunny indoor spot or under grow lights. They’ll keep fruiting for 4-6 weeks indoors with 12+ hours of light daily.
To overwinter, prune plants back by ⅓ after the first frost, then repot in fresh potting mix. Reduce watering slightly but keep soil moist. In spring, fertilize again and return to outdoor conditions for another harvest.
Here’s the thing—Tabasco peppers reward patience. A single plant can yield 50+ peppers if given the right care. Watch for first red peppers in 60 days, and you’ll have the boldest heat harvest of the season.
Tips & tricks for perfect Tabasco pepper planting
A few strategic moves will help you avoid common pitfalls and maximize your bold heat harvest.
Germination Temperature Tip: Maintaining that 75-80°F soil temperature during Step 1 is non-negotiable for germination. I use a seedling heat mat set to 80°F under my grow lights—this consistency cuts germination time from 14 days to just 7-10 days. If your home stays cooler, consider a greenhouse setup or move trays to a warmer spot like near your kitchen exhaust vent.
Hardening Off Strategy: The gradual 1 hour daily increase in Step 2 is where most beginners fail. I start with just 30 minutes on day one, then increase by 30 minutes each subsequent day. This slower progression prevents transplant shock better than the standard method, especially in windy conditions. Watch for wilting—if leaves droop, they're not ready for the full sun yet.
Transplanting Depth Secret: Burying seedlings deeper than their pot depth in Step 2 might seem counterintuitive, but it works because Tabasco peppers develop additional roots along buried stems. I mark the depth on my seedling pots with a permanent marker before transplanting to ensure I don't bury too deeply—never below the first set of true leaves. This technique can increase root mass by up to 30%.
Watering Rescue Plan: For Step 3's 1-2 times per week watering schedule, I use the "finger test" method: Stick your finger 2 inches deep into the soil. If it feels dry, water deeply until moisture reaches 6 inches down. The key is consistency—Tabasco peppers hate moisture fluctuations. In containers, I water until I see runoff from the drainage holes, ensuring thorough hydration without over-saturating.
Pro Tips for Planting Tabasco Peppers
- A few strategic moves will help you avoid common pitfalls and maximize your bold heat harvest.
- Germination Temperature Tip: Maintaining that 75-80°F soil temperature during Step 1 is non-negotiable for germination.
- Hardening Off Strategy: The gradual 1 hour daily increase in Step 2 is where most beginners fail.
Frequently asked questions
Got questions about growing fiery Tabasco peppers?
You’re not alone! Here are answers to the most common queries—from timing to troubleshooting—so you can grow a thriving crop with confidence.
When is the best time to plant Tabasco peppers?
Tabasco peppers thrive in warm soil (70°F+) and long, sunny days. Start seeds indoors 8–10 weeks before your last frost date (typically March–April in most climates). Transplant seedlings outdoors after all danger of frost has passed—usually late spring or early summer. In Zone 10+, you can plant directly outdoors in early spring!
How long does it take for Tabasco peppers to mature?
Tabasco peppers are fast growers—expect harvests in just 60–80 days from transplanting! With the right conditions (full sun, consistent water, and fertile soil), you’ll see small green peppers ready to pick in about 2 months. For maximum heat, let some ripen to red (though they’re spicy green too!).
Can I grow Tabasco peppers in containers or small spaces?
Tabasco peppers are compact plants (18–24 inches tall) and perfect for containers. Use a 5-gallon pot or larger with drainage holes, and ensure it gets 6+ hours of sunlight daily. Dwarf varieties like ‘Tabasco Shorty’ are ideal for balconies or patios. Just keep them well-watered and fertilized for best results!
Why aren’t my Tabasco peppers producing fruit?
If your plants are flowering but not fruiting, check these fixes:
- Pollination: Gently shake plants or use a small brush to transfer pollen (especially in greenhouses).
- Nutrients: Feed with a balanced fertilizer (10-10-10) or compost tea every 3–4 weeks.
- Stress: Avoid overwatering (peppers hate soggy roots) or extreme temperature swings.
- Variety: Some Tabasco types (like ‘Tabasco 3060’) are self-pollinating but may need heat to trigger fruiting.
Do Tabasco peppers need extra heat to grow?
Tabasco peppers love warmth but aren’t as finicky as other hot peppers. They’ll grow in USDA Zones 8–11, but in cooler climates (Zones 6–7), start seeds indoors early or use a row cover to protect young plants. If nights dip below 55°F, consider growing them in containers and moving them indoors temporarily.
Wrapping up and next steps
Growing your own Tabasco peppers is a rewarding journey that delivers bold flavors and fiery satisfaction in just 60 days! Whether you’re a seasoned gardener or a curious beginner, these vibrant plants thrive with minimal effort—just sun, soil, and a little patience.
Now that you’re armed with the right materials and answers to common questions, it’s time to roll up your sleeves and plant!
Start small—try a single pot or a patch in your garden—and let your green thumb guide you. Before you know it, you’ll be harvesting 🌶️🔥 and savoring the fruits of your labor. Happy planting!