Shrubs
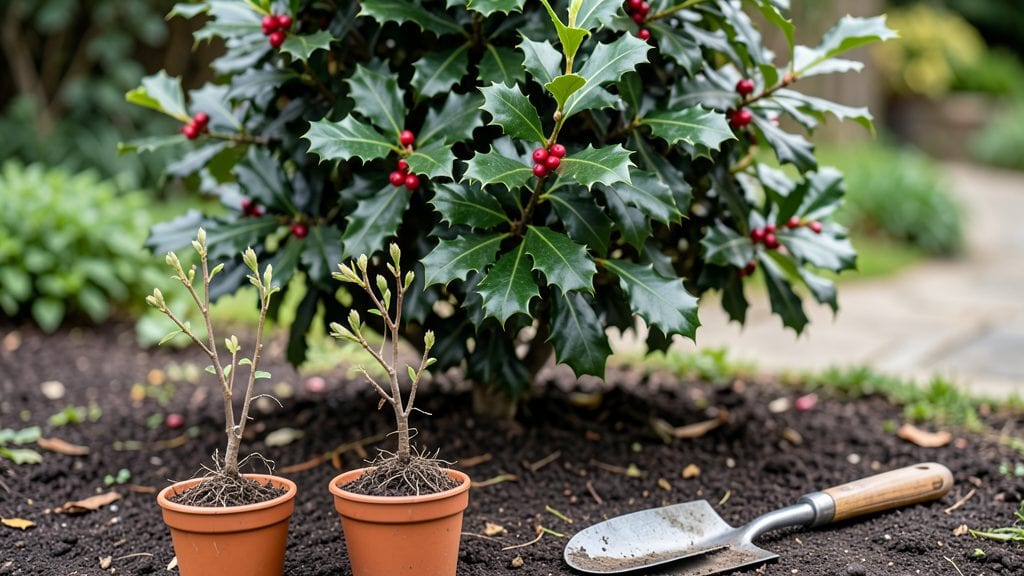
Planting holly bushes transforms your yard into a year-round privacy screen with glossy leaves and striking red berries. 🌿 I’ve planted holly in every season—spring, summer, and even late fall—and the key to success isn’t complicated. It’s about soil, spacing, and a little patience.
The real secret? Holly thrives in well-draining soil mixed with compost, and spacing them 6 to 8 feet apart gives them room to grow without crowding. Dig a hole twice as wide as the root ball but no deeper—holly hates sitting too low.
For berries, you’ll need at least one male and one female plant nearby, but even without them, the foliage alone makes a bold statement.
Once planted, water deeply to settle the soil, then keep it consistently moist for the first two weeks. After that, holly is drought-tolerant once established. The best part?
These bushes grow slowly but steadily, so you won’t see overgrown messes or constant pruning. By next winter, you’ll have a lush, evergreen backdrop that never fades.
Works in zones 5 through 9, though colder climates need winter protection for young plants. Whether you’re lining a fence or filling a large border, holly delivers low-maintenance beauty with almost no effort. Let’s get those roots in the ground!
📚 In This Guide
- What you need
- Instructions
- Tips and common mistakes
- Wrapping up and next steps
What you need
- ● Holly bushes: 3–5 plants per 5-foot section of screen (adjust based on desired height and spacing). Choose Ilex opaca (American holly) or other varieties like Ilex × 'Nellie R. Stevens' for faster growth.
- ● Shovel or trowel: A round-point shovel for digging holes (12–18 inches wide and deep). For larger plantings, a mattress shovel saves time.
- ● Garden gloves: Heavy-duty, waterproof gloves (size medium or large) to protect your hands from thorns and soil.
- ● Compost or well-aged manure: 2–3 gallons per plant to enrich the soil. Opt for organic matter like coco coir or leaf mold for best results.
- ● Mulch: 2–3 inches of pine straw, shredded bark, or wood chips to retain moisture and suppress weeds.
- ● Watering can or hose with nozzle: A soaker hose or watering wand for gentle, deep watering.
- ○ Stakes (optional but helpful): 6–12-inch bamboo or metal stakes + soft plant ties if your holly is young or top-heavy.
- ● Soil test kit: To check pH (holly prefers acidic soil, pH 5.0–6.0). Adjust with sulfur or peat moss if needed.
- ● Fertilizer: Slow-release holly-specific fertilizer (e.g., 10-10-10) or iron sulfate for yellowing leaves.
- ● Pruning shears: Bypass pruners (for clean cuts) to shape bushes after planting.
- ● Planting grid or string: To ensure even spacing (especially for long screens).
- ● Weed barrier fabric: Landscape fabric under mulch to reduce weed competition.
Instructions for planting holly bushes: your evergreen privacy screen
Here's the straightforward method I use to plant holly bushes that thrive for decades.
🪴 Step 1: Dig Holes at the Right Spacing and Depth
Holly bushes need room to grow—space them 8-12 feet apart for a full, dense screen. Dig holes twice as wide as the root ball and 2-3 inches deeper than the container. This gives roots plenty of room to spread without crowding.
Use a shovel to loosen the soil at the bottom of the hole. Holly bushes prefer well-draining soil, so if your area gets waterlogged, mix in 2-3 inches of compost to improve drainage. Tap the container gently to release the plant, then slide it out and check the root ball. If roots are circling tightly, use your fingers to loosen them slightly before planting.
🌱 Step 2: Position and Backfill the Bushes
Place each holly bush in the hole so the top of the root ball sits 1-2 inches above ground level. This prevents water from pooling around the stem and causing rot. Adjust the depth by adding or removing soil as needed.
Backfill the hole with native soil, pressing gently around the roots to remove air pockets. Water the plant deeply to settle the soil and encourage root growth. You'll see the soil sink slightly as it compacts—this is normal. Once settled, add a 2-inch layer of mulch around the base, keeping it 3 inches away from the stem to prevent moisture buildup.
☀️ Step 3: Water and Provide Aftercare for the First Year
Water holly bushes 1-2 times per week during the first growing season, providing 1-2 gallons per plant each time. They prefer moist but well-drained soil, so avoid soggy conditions. After the first year, holly bushes are drought-tolerant and need watering only during prolonged dry spells.
Holly bushes thrive in full sun to partial shade, with at least 4-6 hours of direct sunlight daily. If planting in a shady area, choose a variety like 'Sky Pencil' holly, which tolerates lower light better than others. Prune lightly in late winter or early spring to shape the bush and remove any dead or diseased branches. You'll know it's established when new growth appears in early spring—this is your sign everything is on track.
Tips & tricks for planting holly bushes
Holly bushes are a fantastic choice for creating a lush, evergreen privacy screen—but planting them right makes all the difference. Here are my go-to tips to help you avoid common mistakes and set your bushes up for long-term success.
Spacing is Everything: The 8-12 foot spacing in Step 1 isn't just a suggestion—it's crucial for airflow and preventing disease. If you're planting along a fence or property line, measure carefully before digging. I always lay out stakes first to visualize the final screen. Trust me, you'll thank yourself later when your bushes grow into a thick, unbroken hedge without gaps.
Root Ball Prep Matters: Before planting, gently check the root ball for any circling roots mentioned in Step 1. I've seen people skip this and end up with stunted growth because the roots couldn't expand properly. If you notice tight circles, use your fingers to loosen them—this encourages outward growth instead of the roots staying compacted. It takes just a minute but prevents years of frustration.
Mulching the Right Way: That 2-inch layer of mulch in Step 2 serves two purposes: moisture retention and weed suppression. Here's the thing—keep it 3 inches away from the stem to prevent rot. I've seen people pile mulch right against the trunk, which leads to soggy stems and fungal issues. Pro tip: Use organic mulch like shredded bark or wood chips, which break down slowly and improve soil quality over time.
Sunlight Strategy: The 4-6 hours of sunlight mentioned is ideal, but holly bushes are flexible. If your area gets less light, choose a variety like 'Sky Pencil' holly that tolerates partial shade better. I've planted in full shade before, and while they survive, they grow more slowly and produce fewer berries. Match your variety to your light conditions for the best results.
Pro Tips for Planting Holly Bushes
- Holly bushes are a fantastic choice for creating a lush, evergreen privacy screen—but planting them right makes all the difference.
- Spacing is Everything: The 8-12 foot spacing in Step 1 isn't just a suggestion—it's crucial for airflow and preventing disease.
- Root Ball Prep Matters: Before planting, gently check the root ball for any circling roots mentioned in Step 1.
Frequently asked questions
Got questions about planting holly bushes? You’re not alone! Here are some of the most common concerns—plus quick, actionable answers to help you grow a lush, thriving privacy screen with ease.
When is the best time to plant holly bushes?
The ideal window is early spring or fall—when temperatures are mild (50–70°F) and soil is workable. Avoid extreme heat or frost, as these can stress young plants. Pro tip: If planting in summer, water deeply every 2–3 days to prevent root shock.
How far apart should I space holly bushes for a privacy screen?
Spacing depends on your holly variety and mature size. For most common types (like Ilex opaca or Ilex × ‘Nellie R.’), plant them 6–10 feet apart. Check the tag for specifics—tighter spacing (4–6 ft) works for faster coverage but may require pruning later.
Are holly bushes prone to pests or diseases? How do I prevent them?
Holly bushes can attract scale insects, spider mites, or holly leaf miner. To prevent issues:
- Choose disease-resistant varieties (e.g., ‘Dwarf Burford’).
- Water at the base (not overhead) to reduce fungal risks.
- Inspect leaves regularly—treat pests early with neem oil or insecticidal soap.
Can I plant holly bushes in containers instead of the ground?
Yes! Holly bushes thrive in large containers (at least 18–24 inches deep) with well-draining soil. Use a mix of potting soil + perlite and ensure the pot has drainage holes. Container-grown hollies need regular watering and winter protection (move indoors or wrap pots in burlap).
Do holly bushes need winter care?
Most hollies are hardy to USDA Zones 5–9, but young plants or tender varieties may need help. Try this:
- Mulch 3–4 inches deep around the base to insulate roots.
- Water deeply before the first frost to prevent drought stress.
- Wrap young trunks in burlap if your area gets harsh winds.
What’s a good alternative if I can’t grow hollies?
If your climate or soil isn’t ideal for hollies, consider these evergreen privacy screen alternatives:
- Arborvitae (fast-growing, deer-resistant)
- Leyland Cypress (tall, dense, but needs pruning)
- Boxwood (compact, great for hedges)
- Cherry Laurel (tolerates shade, glossy leaves)
Wrapping up and next steps
Planting holly bushes is a rewarding way to add year-round beauty and privacy to your yard with minimal effort! 🌿 Whether you’re a seasoned gardener or a beginner, these evergreens thrive with just a little care—sunlight, well-drained soil, and occasional pruning.
Now that you’re armed with the right tips, it’s time to roll up your sleeves and get growing.
Ready to transform your space? Start by marking your planting spots—then grab those gloves and dig in! For extra inspiration, browse holly varieties or check local climate guidelines to ensure your new shrubs flourish. Happy planting! 🌟