Flowers
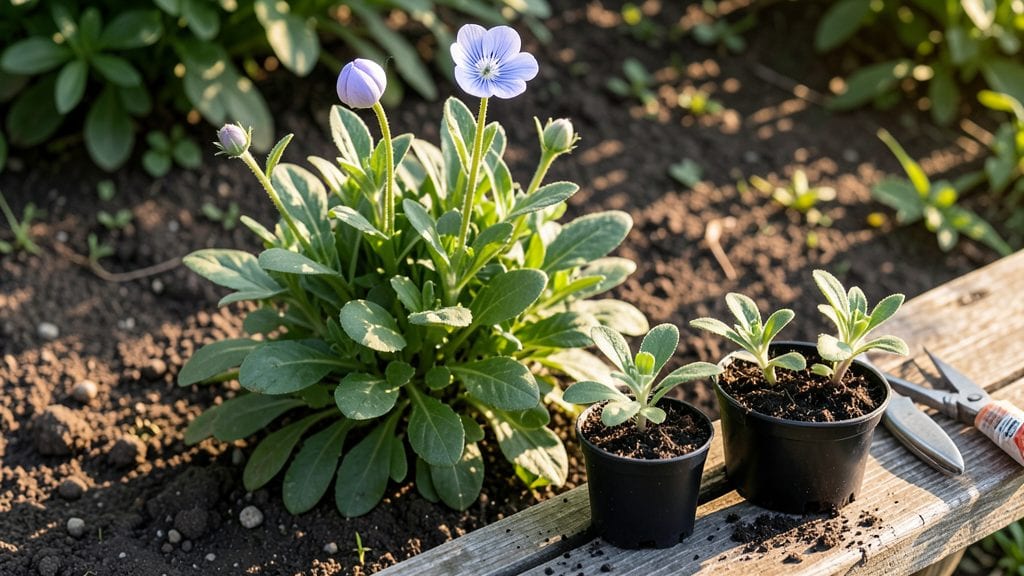
Planting balloon flowers in your sunny garden spot unlocks year-round blooms with those signature puffball blooms that pop in shades of blue, purple, and white. 🌿 I’ll never forget the first time I saw my first batch of balloon flowers push through the soil—it was like nature’s own confetti exploding from the ground.
These hardy perennials thrive where many others falter, and once established, they’ll reward you with bold color from early summer straight through fall.
The key to getting them off to the right start is well-draining soil mixed with a little compost—think loose, airy, and slightly acidic (around 6.0 to 7.0 pH).
They’re not picky about soil type, but they do demand full sun (at least 6 hours daily) to put on their best show. Plant them in spring or early fall, spacing each clump 12 to 18 inches apart so they have room to grow without crowding.
The roots aren’t deep, so a shallow hole (about 1 inch deeper than the root ball) is all you need.
After planting, give them a deep watering to settle the soil, then keep it consistently moist but never soggy. Within 4 to 6 weeks, you’ll spot those iconic balloon-shaped buds forming—just like clockwork. The real magic happens when they open into star-shaped blooms that hummingbirds adore.
A light mulch around the base helps retain moisture and keeps weeds at bay, so your balloon flowers stay the star of the show with minimal fuss.
Here’s the secret weapon: companion planting. Pair them with ornamental grasses for texture, or tuck them near daylilies and coneflowers for a long-blooming, low-maintenance border. They’re deer-resistant too, which is a huge plus if you’re dealing with hungry critters in your yard.
Once you’ve got them planted, they’ll come back bigger and bolder every year—with almost no work from you after that first season.
📚 In This Guide
- What you need
- Instructions
- Tips and common mistakes
- Wrapping up and next steps
What you need
- ● Balloon flower seeds, bulbs, or transplants – Choose from Platycodon grandiflorus varieties (e.g., ‘Astra Double’ for double blooms or ‘Blue Sky’ for vibrant hues). Well-draining potting mix or garden soil – Aim for a pH of 6.0–7.0. Amend clay soil with compost or perlite for better aeration. Planting containers or garden bed – Containers: 6–12" pots with drainage holes (1–2 plants per 6" pot). Garden beds: Full sun (6+ hours/day) or partial shade (4–6 hours).
Step-by-Step instructions for planting balloon flowers
Here's how to create a vibrant display that keeps blooming from spring to frost.
🌱 Step 1: Choose the Perfect Sunny Spot
Balloon flowers thrive in full sun, so pick a location that gets at least 6-8 hours of direct sunlight daily. I always check the site in the afternoon when the sun is strongest—this is when you'll see the most intense light conditions. Avoid spots where trees or buildings cast shade after noon, as balloon flowers need that afternoon warmth to set buds for continuous blooming.
Your soil should drain well but retain moisture—balloon flowers hate soggy roots. If your garden soil feels heavy or stays wet for more than a few hours after rain, mix in 2-3 inches of compost to improve drainage. You'll know you've got the right spot when the soil feels loose and crumbly when squeezed, like a damp sponge that springs back when released.
🪴 Step 2: Prepare the Planting Site
Dig a hole that's twice as wide as the plant's root ball but only as deep as the container it came in. Balloon flowers have shallow roots, so planting too deep can suffocate them. Gently loosen the roots if they're circling in the pot—this encourages them to spread outward in the garden bed.
Fill the bottom of the hole with a handful of all-purpose fertilizer to give your plants a nutrient boost right away. Mix it with the native soil so it doesn't concentrate in one spot. Then, place the plant in the hole and backfill with soil, pressing lightly around the base to remove air pockets. Water deeply to settle the soil and help roots make contact with the surrounding earth.
☀️ Step 3: Space Plants Properly for Best Growth
For a full, lush display, space balloon flowers 12-18 inches apart in rows that are 18-24 inches apart. This gives them room to spread without competing for sunlight. I like to arrange them in odd-numbered groupings—three or five plants together creates a more natural, abundant look than even rows.
If you're planting in containers, use pots that are at least 12 inches wide and deep for each plant. Balloon flowers can tolerate crowding better than many perennials, but they still need enough space to develop strong stems and abundant blooms. You'll see the difference in just a few weeks—plants with proper spacing grow taller and produce more flowers than those crammed together.
💧 Step 4: Water and Mulch for Long-Term Success
Water your balloon flowers deeply once a week during the first growing season, providing 1 inch of water total. You'll know you're watering enough when the soil feels moist 2-3 inches down—stick your finger in to check. Overwatering is the biggest mistake gardeners make with these plants, as it leads to root rot and weak stems.
After watering, spread a 2-3 inch layer of mulch around each plant, keeping it 2 inches away from the stem to prevent rot. I use shredded bark mulch because it breaks down slowly and improves soil structure over time. This layer helps maintain even moisture and keeps weeds at bay, saving you time and effort throughout the growing season.
✂️ Step 5: Prune and Maintain for Continuous Blooms
Deadhead spent blooms by pinching off the flower heads just above a set of leaves. This encourages the plant to produce more flowers instead of setting seed. I do this every 2-3 weeks during the blooming season, which runs from early summer until frost. You'll see new buds forming within a week or two of pruning—it's like giving the plant a little nudge to keep going.
In early spring, cut back the previous year's growth by one-third to promote fresh, vigorous new growth. This also opens up the plant's center, allowing more sunlight to reach the lower stems and encouraging even blooming throughout the plant. After pruning, add a light application of balanced fertilizer to support the new growth.
Tips & tricks for perfect balloon flower planting
These simple insights will help you create a stunning, low-maintenance garden that blooms all season long.
Sunlight Strategy: The 6-8 hours of sunlight in Step 1 is non-negotiable for those iconic balloon-shaped blooms. I've learned the hard way that afternoon sun (2-5 PM) is most critical—this is when the buds actually form. If your location only gets morning sun, consider container planting so you can move them to sunnier spots later in the day.
Root Care Secret: In Step 2, when loosening those circling roots, take a moment to trim any roots that are growing in tight circles. This encourages outward growth into your garden soil. I also like to add a handful of perlite to the planting hole to improve aeration—balloon flowers reward you with more blooms when their roots can breathe properly.
Spacing Hack: That 12-18 inch spacing in Step 3 might seem generous, but trust me—it pays off. I've seen crowded plants produce half as many flowers. For a dramatic border effect, try planting in staggered rows rather than straight lines. This creates a natural, cascading look while still giving each plant its needed space to thrive.
Watering Wisdom: The once-weekly watering in Step 4 works best when done early in the morning. This prevents fungal issues that can occur when leaves stay wet overnight. I've found that watering at the base rather than overhead keeps the blooms cleaner and reduces the chance of powdery mildew—always a risk with these lush plants.
Pro Tips for Planting Balloon Flowers
- These simple insights will help you create a stunning, low-maintenance garden that blooms all season long.
- Sunlight Strategy: The 6-8 hours of sunlight in Step 1 is non-negotiable for those iconic balloon-shaped blooms.
- Root Care Secret: In Step 2, when loosening those circling roots, take a moment to trim any roots that are growing in tight circles.
Frequently asked questions
Got questions about growing balloon flowers? You’re not alone! Here are answers to the most common queries—from timing to troubleshooting—to help you cultivate a thriving patch of these cheerful blooms.
When is the best time to plant balloon flowers?
Balloon flowers (Platycodon grandiflorus) thrive when planted in early spring or early fall. This timing lets roots establish before extreme heat or cold. For container gardening, you can plant anytime—just keep soil consistently moist until roots settle. Pro tip: Avoid planting in late summer; the heat can stress young plants.
How long does it take for balloon flowers to bloom?
With patience, you’ll see blooms in 60–90 days after planting, depending on your climate and care. First-year plants may focus on foliage, but established plants reward you with bold, star-shaped flowers from mid-summer to fall. Deadheading spent blooms encourages longer flowering into early winter in mild zones.
Can I grow balloon flowers in containers or do they need a garden bed?
Balloon flowers adapt well to containers as long as the pot is at least 12 inches deep with drainage holes. Use a well-draining potting mix and place them in a spot with 6+ hours of sunlight daily. Just remember: container plants may need more frequent watering and winter protection in cold climates.
What should I do if my balloon flowers develop yellow leaves or wilt?
Yellow leaves often signal overwatering or poor drainage. Let soil dry slightly between waterings and ensure your pot/garden bed has drainage. Wilting can also mean underwatering or heat stress—mulch around plants to retain moisture. Pests like slugs may nibble leaves; handpick them or use organic slug bait if needed.
Are balloon flowers deer-resistant, and do they attract pollinators?
While not fully deer-proof, balloon flowers are less appealing to deer than many other perennials. They’re a pollinator magnet too! Bees and butterflies love their nectar-rich blooms. For extra protection, plant them near deer-deterrent herbs like lavender or rosemary.
Wrapping up and next steps
Planting balloon flowers is a rewarding journey that brings vibrant blooms and easy-care beauty to your garden year after year! 🌸 Whether you’re a beginner or a seasoned gardener, these cheerful flowers thrive with minimal effort—just a sunny spot, well-draining soil, and a little patience.
With the right care, you’ll enjoy their striking colors and unique charm for seasons to come.
Ready to dive in? Grab your gloves and start planting today! Share your progress with fellow gardeners or explore more tips to keep your balloon flowers flourishing. Happy gardening! 🌱