Vegetables
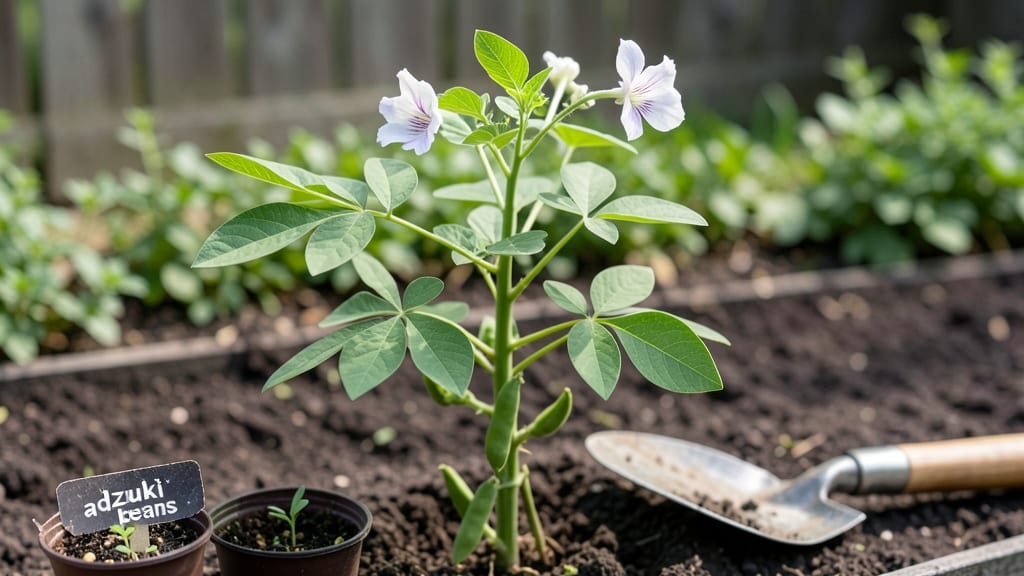
Planting adzuki beans in warm soil unlocks their speedy germination—sprouts appear in just 5–7 days, far faster than other beans. I learned this the hard way last spring when my seeds took three weeks to sprout, but now I’ve cracked the code for reliable, speedy growth.
The trick isn’t just moisture—it’s heat, and these beans are picky about it.
You’ll need soil that stays between 70-80°F, which means planting after your last frost when the ground has warmed up. A black plastic mulch laid down a week before planting adds 5-10°F extra heat, cutting germination time nearly in half.
For containers, use a heat mat or place pots in a sunny window until sprouts appear—no fancy equipment needed.
Once planted just 1 inch deep and spaced 4-6 inches apart, keep the soil consistently damp but not soggy. These beans thrive in full sun and well-draining soil, and they’re surprisingly adaptable—grow them in raised beds, containers, or even as a living mulch between other plants.
The first true leaves will appear in under a week if you’ve got the warmth right.
Here’s the best part: adzuki beans are organic-friendly, drought-tolerant once established, and even improve soil nitrogen. They’re also great companions for tomatoes, cucumbers, and squash, while repelling pests like aphids.
With these soil-warmth secrets, you’ll go from seed to harvest in record time—60-70 days for fresh pods or dried beans.
📚 In This Guide
- What you need
- Instructions
- Tips and common mistakes
- Wrapping up and next steps
What you need
- ● Adzuki bean seeds: 1–2 lbs (or ~100–200 seeds, depending on spacing goals). Choose non-GMO, heirloom varieties for best results.
- ● Soil: Well-draining, loamy soil with a pH of 6.0–7.0. Mix in compost (1 part compost to 3 parts soil) for warmth and nutrients.
- ● Warmth source: Black plastic mulch (4’x6’ sheets) or
- ● Row covers (lightweight, breathable fabric) or
- ● Heat mats (for container growing).
- ● Watering can or hose with a gentle spray nozzle.
- ● Garden trowel or transplanter for digging.
- ○ Stakes or trellis (optional but helpful if growing in cooler climates—beans love vertical support!).
- ● Seedling heat mat for indoor starts (if sowing early).
- ● Organic fertilizer (e.g., fish emulsion or bone meal) for nutrient boosts.
- ● Pest deterrents: Neem oil or row covers to protect from aphids.
- ● Soil thermometer to monitor warmth (ideal germination temp: 70–85°F).
- ● Grow lights (if starting seeds indoors before last frost).
Instructions for planting adzuki beans with soil-warmth techniques
Here’s how to get those beans sprouting in record time—warm soil is the secret weapon.
Prepare the Planting Site with Warmth
Adzuki beans demand soil temperatures above 65°F for fast germination. If your spring soil is still cool, create warmth by planting in black plastic mulch laid 2-3 weeks before sowing. The dark surface absorbs heat and raises soil temps by 10-15°F. Alternatively, use a cloche or mini greenhouse over the bed to trap daytime warmth.
Work the soil to a depth of 12 inches, loosening it without disturbing the structure. Amend with 2-3 inches of compost to improve drainage and fertility—adzuki beans thrive in well-draining soil but need steady moisture. Mix in the compost until the top 6 inches are uniformly enriched. Avoid heavy fertilizers; these beans prefer lean soil to prevent leggy growth.
Sow Seeds at the Right Depth and Spacing
Plant 4 seeds per hill, spacing hills 18 inches apart in rows 3 feet apart. Adzuki beans need room to sprawl, so don’t crowd them. Push each seed 1-1.5 inches deep—deeper planting slows germination, while shallower sowing risks drying out. Use your finger to make a small hole, drop in the seeds, and cover lightly with soil.
Water gently but deeply right after planting to settle the soil and eliminate air pockets around the seeds. The soil should feel moist to the touch but not soggy. Overwatering now can cause seeds to rot before they sprout. If using mulch, lay it 2 inches thick over the bed after watering to retain moisture and warmth.
Maintain Consistent Moisture and Warmth
Check soil moisture daily—adzuki beans need 1 inch of water per week, delivered consistently. Let the top 1 inch of soil dry slightly between waterings to prevent damping-off, but never let it become bone-dry. Morning watering is ideal; it gives roots time to absorb moisture before evening heat evaporates it.
If daytime temps drop below 60°F, cover the bed with a floating row cover or lightweight tarp during the day to trap warmth. Remove it in the afternoon to prevent overheating. You’ll see sprouts in 7-10 days if conditions are right—look for tiny green hooks breaking the soil surface. If germination takes longer, the soil may still be too cool.
Thin Seedlings and Support Vines Early
Once seedlings reach 2 inches tall, thin to 2 plants per hill, snipping the weakest at the base with clean scissors. This prevents competition and gives remaining plants enough space to develop strong roots. Handle seedlings gently—adzuki beans have delicate stems that bruise easily.
Install trellises or stakes as soon as you thin, tying the first vines with soft twine when they reach 4-6 inches. Adzuki beans climb aggressively, and early support prevents broken stems. Water at the base after thinning to reduce stress on the remaining plants. Within 3-4 weeks, you’ll see bushy vines with compound leaves—that’s your cue they’re thriving.
Monitor for Pests and Adjust Care
Watch for bean beetles or aphids, which love young adzuki leaves. Spray infested plants with neem oil at dusk if pests appear—this disrupts their life cycle without harming the beans. Avoid chemical sprays; they can linger on edible pods. Prune any yellowing leaves to redirect energy to pod production.
As pods form, reduce water slightly to ½ inch per week to improve flavor and prevent splitting. Harvest when pods are firm but slightly soft—usually 60-70 days after planting. The faster you pick, the more your plants will produce. With these warmth tricks, you’ll have plump, sweet adzuki beans ready for the table in under two months.
Tips & tricks for planting adzuki beans with soil-warmth secrets
Fast germination starts with these precision techniques that turn your adzuki beans from dormant seeds to thriving plants in record time.
Soil Temperature Precision: The 65°F minimum isn't just a suggestion—it's the biological threshold for adzuki bean germination. Use a soil thermometer to verify temperatures, especially if you're planting early spring. I've seen germination rates double when soil hits 70-75°F compared to the bare minimum. If your soil runs cooler, the black plastic mulch trick works best when laid 2-3 weeks before planting to create that critical heat buildup.
Seed Depth Science: That 1-1.5 inch planting depth is more than just a measurement—it's a moisture balance. Plant too shallow and seeds dry out; too deep and they struggle to break through. I use my finger to make the hole, then press the seeds in gently so they make good contact with the soil. For extra insurance, I water the hole before dropping in seeds to eliminate air pockets that can prevent contact with warm soil.
Watering Strategy: The daily moisture check is non-negotiable, but how you water matters just as much. I use a gentle rain shower setting on my hose to avoid disturbing the soil surface where seeds are just beginning to sprout. The goal is to keep the top inch moist without creating a soggy environment that invites rot. Morning watering gives roots time to absorb moisture before evening evaporation becomes an issue.
Early Support System: Don't wait until vines reach 4-6 inches to install trellises—set them up immediately after thinning. I use lightweight bamboo stakes tied with soft twine because adzuki beans have delicate stems that can snap under heavy support. The key is to give them something to climb early, which encourages upward growth and prevents sprawling that can lead to disease. This also creates better airflow around the plants, reducing humidity that might encourage pests.
Pro Tips for Planting Adzuki Beans
- Fast germination starts with these precision techniques that turn your adzuki beans from dormant seeds to thriving pl...
- Soil Temperature Precision: The 65°F minimum isn't just a suggestion—it's the biological threshold for adzuki bean ge...
- Seed Depth Science: That 1-1.5 inch planting depth is more than just a measurement—it's a moisture balance. Plant too...
Frequently asked questions
about planting adzuki beans—because even the best gardeners need a little extra help! Here are answers to the most common queries to ensure your beans thrive.When is the best time to plant adzuki beans?
Adzuki beans love warm soil—aim to plant them 2–3 weeks after your last frost date when soil temps hit 60°F (15°C) or warmer. For cooler climates, use black plastic mulch or a cold frame to speed up germination. If you’re in a hot region, plant in early spring or late summer to avoid summer heat stress.
How long do adzuki beans take to germinate?
With the right warmth (70–85°F / 21–29°C), seeds typically sprout in 7–14 days. If germination takes longer, check soil moisture—keep it consistently damp but not soggy. Avoid planting too deep (1–2 inches max), as deeper planting can delay sprouting. Patience pays off—once they start, growth is fast!
Can I grow adzuki beans in containers?
Adzuki beans thrive in 5-gallon containers or larger with at least 12–18 inches of depth. Use well-draining soil and a trellis or cage for vining varieties. Just ensure the pot gets 6–8 hours of sunlight daily and stays warm. Containers dry out faster, so water regularly and monitor soil moisture closely.
What pests should I watch for with adzuki beans?
Keep an eye out for bean beetles, aphids, and slugs, which can munch on leaves and pods. Use row covers early in the season to deter pests, or spray with neem oil for organic control. Healthy plants with proper spacing (4–6 inches apart) resist pests better. If you spot holes in leaves, act fast—adzuki beans recover quickly when protected!
What if my beans aren’t germinating at all?
First, check seed viability—soak a few in water for 10 minutes; if they sink, they’re likely good. Next, verify soil warmth (use a soil thermometer) and moisture. If seeds are old (2+ years), try fresh ones. For stubborn seeds, pre-soak them overnight in warm water to kickstart germination. If all else fails, try a different variety—some adzuki types sprout more reliably!
Wrapping up and next steps
Planting adzuki beans is a rewarding journey that combines patience with a little warmth and care. By understanding their love for soil warmth and following the right steps, you’ll soon enjoy a bountiful harvest of these versatile legumes.
Whether you’re a beginner or a seasoned gardener, your efforts will pay off in delicious, homegrown goodness—perfect for soups, sweets, or snacks!
Ready to take the next step? Start small—plant a few seeds in a pot or a sunny patch of your garden—and watch your green thumb grow! 🌱 For even faster results, consider using a seedling heat mat or a greenhouse. Happy planting!