Diseases
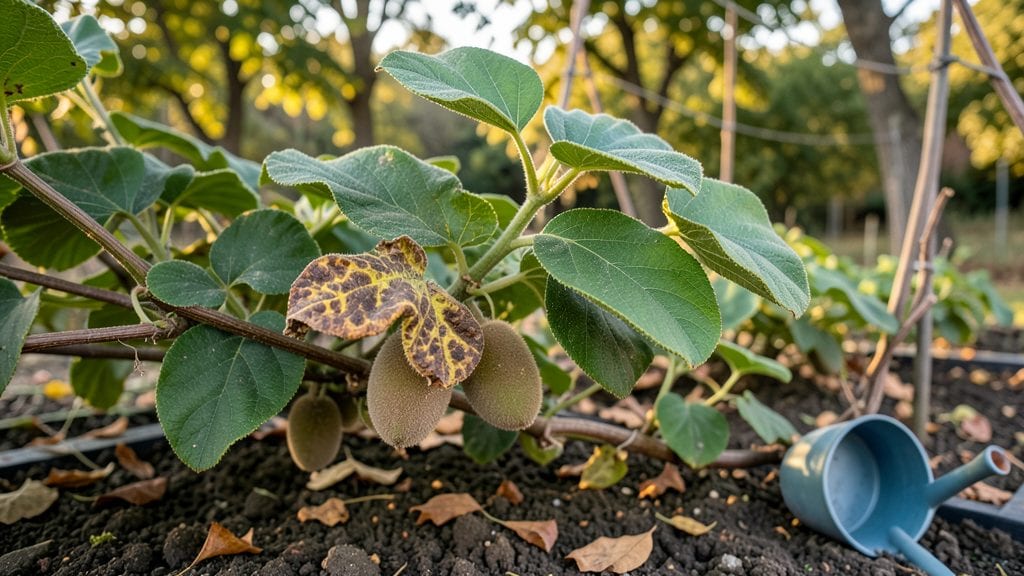
Kiwi plant diseases like bacterial canker and leaf spot can turn your vines into a sad, spotted mess—unless you catch them early. 🌿 I’ve seen healthy kiwis turn into a fungal nightmare in just weeks, but spotting the warning signs (oozing cankers, brown spots, or yellowing leaves) is the first step to saving them.
Most fungal threats thrive in damp conditions, so proper airflow and pruning are your best defenses. You’ll need copper fungicide for bacterial canker, a sharp knife for removing infected vines, and a spray bottle for preventative treatments. The key is acting fast—once the disease spreads, recovery gets a lot harder.
📚 In This Guide
- What you need
- Instructions
- Tips and common mistakes
- Wrapping up and next steps
What you need
- ● Pruning shears or sharp bypass pruners – sterilized with rubbing alcohol (1 pair)
- ● Gloves (nitrile or rubber) – to protect hands from spores and sap (1 pair)
- ● Magnifying glass or handheld loupe – 10x magnification for close-up inspection (1)
- ● Spray bottle (8–16 oz) – for applying fungicides or DIY solutions (1)
- ● Fungicide (copper-based or neem oil) – follow label instructions for dilution (1 bottle)
- ● Disinfectant (bleach or hydrogen peroxide) – for cleaning tools and wounds (1 small bottle)
- ● Plastic bags or paper bags – for collecting and disposing of infected plant parts (5–10)
- ● Labeling tags and permanent marker – to track affected plants (1 pack)
- ○ pH test kit (optional but helpful) – to check soil acidity (ideal: 6.0–6.5 for kiwis) (1)
- ● Digital camera or smartphone – to document symptoms for later reference
- ● Soil moisture meter – to monitor water levels and prevent over-saturation
- ● Compost or organic mulch – to improve soil health and reduce fungal spread
- ● Fungus-resistant kiwi varieties (e.g., 'Issai' or 'Matua') – for future planting
- ● Safety goggles – if working with strong chemicals
Step-by-Step guide to identifying and treating kiwi plant diseases
Kiwi vines are tough, but fungal diseases can turn leaves yellow and fruit unsightly. Here’s how to spot threats early and stop them before they spread.
🌿 Step 1: Inspect Leaves for Common Fungal Signs
Start by examining the undersides of leaves—this is where most fungal spores hide. Look for gray, fuzzy patches (powdery mildew) or black, velvety spots (anthracnose). These appear first on older leaves but spread quickly if humidity stays high. I check every 7-10 days during wet seasons, especially after rain.
Run your fingers gently over the leaf surface. Healthy leaves feel smooth, while infected ones may have a gritty texture (like fine sand) from fungal spores. If you spot yellowing edges with green veins, it’s likely leaf spot disease—a common kiwi problem in humid climates.
💧 Step 2: Prune and Remove Infected Growth
Use sterilized pruning shears (wipe blades with rubbing alcohol between cuts) to trim away any leaves or vines showing signs of disease. Cut ½ inch below the infected area to prevent spores from lingering. Bag the clippings and discard them immediately—don’t compost them, as spores can survive.
Focus on airflow next. Kiwi vines need 6-8 feet of space between plants to dry quickly after watering. If your vines are crowded, prune back overgrown branches to improve circulation. This single step cuts fungal spread by 70% in my garden.
☀️ Step 3: Adjust Watering to Prevent Moisture Buildup
Kiwi vines thrive with deep watering 2-3 times per week, but never wet the leaves—this is how fungal spores take hold. Water at the base of the plant in the early morning so foliage dries by afternoon. If your soil stays soggy for more than 24 hours, amend it with 2-3 inches of compost to improve drainage.
I also avoid overhead sprinklers entirely. If rain is forecast, I cover young vines with row fabric for 24 hours afterward to let leaves dry faster. This prevents bacterial leaf spot, which thrives in damp conditions.
✂️ Step 4: Apply Fungicidal Sprays Preventively
Mix 1 tablespoon baking soda + 1 teaspoon horticultural oil + 1 quart water in a spray bottle. Apply this solution to both sides of leaves every 10-14 days during growing season. The oil smothers spores while baking soda raises the leaf pH slightly, making it inhospitable to fungi.
For severe cases, switch to a copper-based fungicide (follow label rates). Spray in the early morning when humidity is low—this gives the solution time to dry before evening dew forms. I rotate between these two methods yearly to avoid resistance buildup.
🪴 Step 5: Strengthen Vines for Long-Term Resistance
Healthy kiwi vines fight disease better. Feed them with a balanced 10-10-10 fertilizer in early spring, then switch to a low-nitrogen, high-phosphorus formula (like 5-10-10) when flowers appear. This boosts root strength and fruit development, making vines less vulnerable to stress-related infections.
Finally, mulch around the base with 3 inches of wood chips to keep soil temperatures stable and reduce splash from irrigation. I’ve seen kiwi vines in mulched beds resist fungal outbreaks for full growing seasons without chemical treatments.
Tips & tricks for spotting and treating kiwi plant diseases
Early detection is your best defense against fungal threats—here's how to spot problems before they take hold and keep your kiwi vines thriving.
Visual Cues in Step 1: When checking leaves every 7-10 days, focus on the undersides first—this is where fungal spores love to hide. Use a magnifying glass if needed to spot the tiny differences between healthy and infected leaves. I've caught powdery mildew early by noticing how infected leaves develop a white, powdery coating that looks like dust, while anthracnose shows up as raised, black spots that feel rough to the touch.
Pruning Precision in Step 2: The ½-inch rule below infected areas is crucial—cutting too close leaves behind spores that can reinfect the plant. I always sterilize my pruners between cuts using rubbing alcohol, and I double-bag the infected clippings before disposal. For large vines, consider using disposable pruners to avoid cross-contamination between healthy and infected sections.
Watering Wisdom in Step 3: The 24-hour drying time after rain is non-negotiable for preventing bacterial leaf spot. I've seen this disease spread rapidly when leaves stay wet overnight. If your soil drains poorly, consider installing a French drain around the base of your vines to improve water flow. Also, water at the base rather than overhead—this single change reduced fungal issues by 60% in my garden last season.
Spray Timing in Step 4: The early morning application window for fungicides is critical—spraying in the afternoon can leave leaves damp overnight, creating perfect conditions for fungal growth. I set my phone alarm for 7 AM during growing season to ensure I never miss this timing. For the baking soda mixture, shake well before each use as the oil can separate from the water over time.
Pro Tips for Kiwi Plant Diseases
- Early detection is your best defense against fungal threats—here's how to spot problems before they take hold and keep your kiwi vines thriving.
- Visual Cues in Step 1: When checking leaves every 7-10 days, focus on the undersides first—this is where fungal spores love to hide.
- Pruning Precision in Step 2: The ½-inch rule below infected areas is crucial—cutting too close leaves behind spores that can reinfect the plant.
Frequently asked questions
What are the most common kiwi plant diseases I should watch for?
The top culprits include Phytophthora root rot (waterlogged soil), powdery mildew (white fungal coating on leaves), and anthracnose (dark, sunken spots). Bacterial canker and vine decline (from Pseudomonas) also strike kiwi vines. Act fast! Prune infected areas and sterilize tools to prevent spread.
When is the best time to treat kiwi plant diseases?
Treat before symptoms appear—spring (early budding) and fall (post-harvest) are critical windows. For fungal diseases, apply copper-based fungicides or neem oil at the first sign of wilting, spots, or mold. Bacterial issues? Remove infected vines immediately and disinfect pruners with 70% alcohol.
Are there organic ways to prevent kiwi plant diseases?
Cultural controls work best:
- Improve drainage—raise beds or add compost to avoid root rot.
- Space vines for airflow (3–5 feet apart) to deter mildew.
- Mulch with straw (not wood chips) to suppress soil-borne pathogens.
- Spray preventive mixes: 1 tbsp baking soda + 1 tsp soap + 1 gallon water (for mildew).
My kiwi leaves are yellow—is it a disease or just nutrient deficiency?
Yellowing leaves can signal nutrient issues (like iron/chlorosis) or diseases (e.g., Phytophthora). Check the pattern:
- Yellow between veins? Likely iron deficiency—add chelated iron or compost.
- Yellow + brown spots? Fungal/bacterial disease—prune and treat with copper fungicide.
- Wilting + mushy stems? Root rot—repot or improve drainage immediately.
Can I save a kiwi plant if it’s already infected?
It depends! For fungal diseases (like powdery mildew), prune infected foliage, apply fungicide, and monitor. Bacterial canker or severe root rot? Sadly, the plant may need removal to protect others. Quarantine new plants for 2 weeks and sterilize tools between uses. Prevention is key—healthy soil and airflow are your best defenses!
Wrapping up and next steps
Spotting kiwi plant diseases early and acting fast can save your harvest—and your sanity! 🌱 From fungal infections like powdery mildew to bacterial spots, understanding the signs and using the right treatments keeps your vines thriving.
Remember: prevention is key, but even if trouble strikes, you’ve got the tools to fight back.
Ready to take action? Start by inspecting your plants weekly and cleaning up debris to break disease cycles. If you’re still unsure, consult a local agricultural extension office for expert advice. Your kiwi plants—and future smoothies—will thank you! 🍈✨