Plants
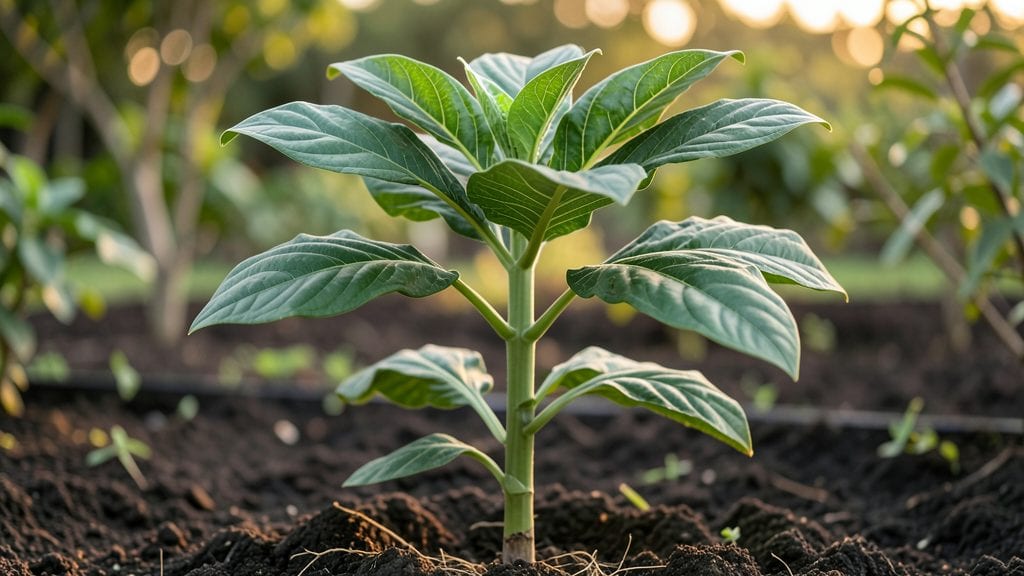
Growing Havana tobacco plants in containers lets you cultivate this sun-loving variety without a full garden bed. 🌿 I’ve grown them in pots for years, and the key is matching their tropical needs to container gardening—something most guides overlook.
The right soil mix, consistent moisture, and afternoon shade in hot climates make all the difference between a thriving plant and a struggling one.
These plants need well-draining soil rich in organic matter, like a mix of peat, perlite, and compost. A 10-12 gallon container with drainage holes prevents root rot, while placing them in partial shade during peak afternoon sun protects the broad leaves from scorching.
Watering should be deep but infrequent—once the top inch of soil feels dry—to avoid soggy roots.
With the right care, Havana tobacco plants grow 3-5 feet tall and develop glossy, deep-green leaves perfect for smoking or crafting. Pruning encourages bushier growth, and harvesting leaves in late summer ensures the best flavor. The curing process transforms fresh leaves into rich, aromatic tobacco ready for use.
Container-grown Havana tobacco adapts well to patios, balconies, or even indoor grow lights, making it ideal for urban gardeners. Just watch for pests like spider mites and keep humidity moderate for the best results. Here’s how to get started without common pitfalls.
📚 In This Guide
- What you need
- Instructions
- Tips and common mistakes
- Wrapping up and next steps
What you need
- ● Havana tobacco seeds – 10–20 seeds (or 1–2 starter plants if propagating from cuttings). Opt for Nicotiana tabacum varieties like "Havana Seed" or "Cuban Seed.
- ● Growing containers – 2–3 large pots (12–18 inches in diameter) with drainage holes. Terracotta or fabric pots work best for airflow.
- ● High-quality potting mix – 5–10 gallons of well-draining, nutrient-rich soil (e.g., Miracle-Gro Potting Mix or a 50/50 blend of peat moss and perlite).
- ● Slow-release fertilizer – 1–2 cups of 10-10-10 NPK granules or organic options like composted worm castings.
- ○ Seed-starting kit (optional) – For germinating seeds indoors: seed trays, seedling heat mat, and a humidity dome.
- ● Hand trowel – For transplanting seedlings.
- ● Spray bottle – To keep soil moist during germination.
- ● Pruning shears – For trimming leggy growth or harvesting leaves.
- ● pH testing kit – To ensure soil pH is between 6.0–7.0 (tobacco thrives in slightly acidic to neutral soil).
- ○ Grow lights (optional) – LED or fluorescent lights (12–16 hours/day) if growing indoors or in low-light conditions.
- ○ Mulch (optional) – Straw or wood chips to retain moisture and regulate soil temperature.
- ● Sunny location – At least 6–8 hours of direct sunlight daily (south-facing windows or outdoor spots work best).
- ● Warmth – Ideal germination temperature: 70–80°F (21–27°C).
- ● Patience – Havana tobacco takes 60–90 days to mature from seed.
- ● Ventilation – Good airflow to prevent fungal diseases (especially in humid climates).
Step-by-step instructions for growing Havana tobacco in containers
Here’s how to coax these sun-loving beauties into thriving, aromatic plants—even in limited space.
🪴 Step 1: Select the Right Containers and Drainage
Havana tobacco demands 5-gallon containers minimum—these plants develop deep root systems and need room to sprawl. I use fabric grow bags with built-in drainage because they prevent root circling while allowing excess moisture to escape. If repurposing pots, ensure they’re at least 12 inches deep and have multiple drainage holes—root rot is the silent killer of container-grown tobacco.
Line the bottom with 2 inches of perlite to boost aeration. This isn’t optional: compacted soil suffocates roots and stunts growth. Place a mesh screen over the drainage holes to keep perlite in place while letting water flow freely. Here’s the thing—Havana tobacco hates soggy feet, so drainage isn’t just helpful, it’s essential.
🌱 Step 2: Prepare the Soil Mix for Optimal Growth
Fill your containers with a custom blend of 40% premium potting mix, 30% coco coir, and 30% perlite. This lightweight mix prevents compaction while retaining enough moisture for tobacco’s thirsty roots. I avoid garden soil—it’s too dense and often carries pathogens that throttle young plants.
Moisten the mix until it feels like a wrung-out sponge: damp but not dripping. Stick your finger 2 inches deep—if it comes out dry, water again. The goal is to mimic the airy, nutrient-rich soil Havana tobacco thrives in. Pro tip: Add 1 tablespoon of balanced fertilizer (10-10-10) per container and mix it in. This jumpstarts growth without burning tender roots.
☀️ Step 3: Plant Seeds at the Right Depth and Spacing
Sow 3-4 seeds per container at a depth of ¼ inch—any deeper and they’ll struggle to surface. I use a toothpick to create small holes, place seeds inside, then cover lightly with a sprinkle of mix. Press gently to ensure good seed-to-soil contact, but don’t compact the surface.
Keep containers in a warm, humid environment (75-80°F) until germination, which takes 7-14 days. A seedling heat mat speeds this up dramatically. Once sprouts appear, thin to one strongest seedling per container—crowding leads to weak, disease-prone plants. Watch for first true leaves (the second set after cotyledons) before transplanting.
💧 Step 4: Master Watering and Sunlight for Sun-Resistant Growth
Havana tobacco loves full sun (6+ hours daily), but containers dry out fast. Water deeply when the top 2 inches of soil feel dry—this encourages roots to grow downward. I use a drip irrigation system to deliver moisture slowly at the base, preventing leaf burn from overhead watering. Avoid wetting foliage, especially in the evening—this invites fungal diseases like powdery mildew.
After 4-6 weeks, when plants hit 6 inches tall, switch to liquid fertilizer (20-20-20) every 2 weeks. You’ll see it in the leaves: vibrant green color and rapid growth. Here’s the catch—too much nitrogen makes plants lush but weak. Balance is key: feed when you see new growth slowing but don’t overdo it.
✂️ Step 5: Prune and Support for Maximum Yield
When plants reach 12-18 inches, start pinching the tips of the main stems to encourage bushier growth. This isn’t optional—it’s how you get those thick, aromatic leaves Havana tobacco is famous for. Use clean, sharp pruning shears to avoid tearing tissue, and remove lower leaves that touch the soil to prevent rot.
As plants mature, they’ll need stakes or a trellis—Havana tobacco can grow 3-4 feet tall in ideal conditions. I use bamboo stakes tied with soft twine to support the weight without damaging stems. Harvest lower leaves first, leaving the top 6-8 inches to keep the plant producing. You’ll know it’s time when leaves reach 4-6 inches long and smell intensely aromatic.
Tips & tricks for perfect Havana tobacco growth in containers
These game-changing strategies will transform your container-grown Havana tobacco from struggling seedlings into robust, aromatic powerhouses—even in limited space!
Container Size and Drainage: Never skimp on container size—those 5-gallon fabric grow bags are non-negotiable for Havana tobacco's deep roots. I've seen growers use smaller pots and end up with stunted plants. The 2-inch perlite layer at the bottom isn't just recommended—it's essential for preventing that dreaded root rot. Pro tip: If repurposing pots, drill extra drainage holes if they don't already have them. Think of it as creating a mini swamp-proof ecosystem for your plants!
Germination Secrets: That 75-80°F temperature range for germination isn't just ideal—it's critical. I learned this the hard way when my first batch took 21 days to sprout in a cooler room. Use that seedling heat mat if your space runs chilly! Once you see those first true leaves (not the initial cotyledons), you're golden—this is your cue to thin to the strongest seedling. Remember, crowded seedlings compete for resources and become weak, just like siblings fighting over the last slice of pizza.
Soil Science: The 40-30-30 soil blend (potting mix, coco coir, perlite) creates the perfect airy environment Havana tobacco craves. Here's what nobody tells you—the coco coir holds moisture while the perlite prevents compaction. When checking moisture with your finger at 2 inches deep, aim for that wrung-out sponge texture. Too dry? Water. Too wet? Wait. This balance is what separates thriving plants from sad, wilty ones.
Pruning Precision: Pinching those main stems at 12-18 inches isn't just about bushiness—it's about triggering lateral growth where those thick, aromatic leaves form. Use clean pruning shears and make your cuts just above a leaf node. I've found that removing lower leaves that touch soil prevents rot and keeps energy flowing upward. Think of it as giving your plant a spa day—removing dead weight so it can focus on growing those premium leaves!
Pro Tips for Havana Tobacco Plant
- These game-changing strategies will transform your container-grown Havana tobacco from struggling seedlings into robust, aromatic powerhouses—even in limited space!
- Container Size and Drainage: Never skimp on container size—those 5-gallon fabric grow bags are non-negotiable for Havana tobacco's deep roots.
- Germination Secrets: That 75-80°F temperature range for germination isn't just ideal—it's critical.
Frequently asked questions
Got questions about growing your own Havana tobacco plant?
You’re not alone—this sun-loving beauty has a few quirks! Here are answers to the most common queries to help you cultivate a thriving plant with confidence.
How long does it take for Havana tobacco seeds to germinate?
Havana tobacco seeds typically germinate in 7–14 days when kept in warm (70–80°F), moist soil. For faster results, soak seeds in warm water for 24 hours before planting. Patience is key—some stubborn seeds may take up to 3 weeks! Pro tip: Use a heat mat if your home runs cool.
Can I grow Havana tobacco in a small container or do I need a garden?
Havana tobacco thrives in containers as small as 12–18 inches deep, as long as they have drainage holes. Just ensure the pot gets full sun (6+ hours daily) and use a well-draining potting mix. Bonus: Dwarf varieties like ‘Cuban Queen’ are perfect for balconies or patios!
Why are my Havana tobacco leaves turning yellow or brown?
Yellowing leaves often signal overwatering or poor drainage, while brown edges can mean underwatering or salt buildup from tap water. Let the top inch of soil dry out between waterings, and flush the pot with distilled or rainwater monthly. Check: Yellow veins? It might be a nutrient deficiency—try a balanced fertilizer.
Is Havana tobacco toxic to pets or kids?
While not highly toxic, Havana tobacco contains nicotine, which can cause mild stomach upset if ingested in large amounts. Keep plants out of reach of pets and children, and wash hands after handling. Safe swap: Opt for pet-friendly herbs like basil or mint if you’re worried!
How do I protect my Havana tobacco from harsh sun or heatwaves?
Though sun-resistant, extreme heat (above 90°F) can stress plants. Provide afternoon shade during heatwaves and mulch the soil to retain moisture. Mist leaves lightly in the morning to cool them down. Hydration hack: Water deeply at the base—never overhead—to prevent leaf scorch.
Wrapping up and next steps
Growing a Havana tobacco plant in containers is not only rewarding but also a fantastic way to enjoy its striking foliage and fragrant blooms—even in sunny, urban spaces!
With the right mix of well-draining soil, bright light, and consistent care, you’ll be harvesting lush, sun-resistant plants in no time. 🌿
Now that you’re armed with the know-how, why not take the next step? Start small with a single container, experiment with varieties, or even share your green thumb with fellow plant lovers. Your Havana tobacco garden awaits—get growing! ✨