Fertilization
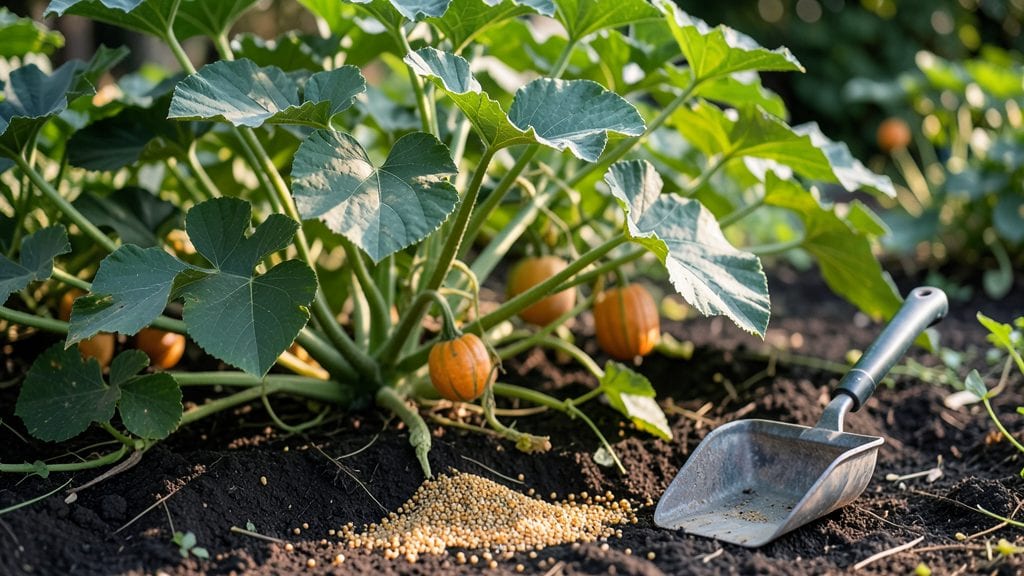
Fertilizing pumpkin plants correctly is the secret to strong vines and heavy fruit—but most gardeners overdo it with nitrogen or skip potassium entirely.
Picture this: your 🎃 vines sprawl across the garden, but the flowers drop before setting fruit, or the pumpkins stay small and watery. That’s not bad luck—it’s a nutrient mismatch.
Too much nitrogen makes leaves grow like crazy while starving your fruit, while potassium shortages leave vines floppy and disease-prone. The fix isn’t complicated, but it is precise.
In Zone 6, timing matters just as much as the blend. A light feed at planting kickstarts growth, but by mid-summer, you’ll want a high-potassium boost to support those expanding gourds.
I’ll walk you through the exact ratios, organic swaps, and warning signs so you avoid the most common mistakes.
By the end, you’ll know when to feed, what to feed, and how to spot trouble before it cuts your harvest short.
Optimal nitrogen-potassium ratios for pumpkin growth stages
Pumpkins need different nutrient ratios at each growth stage to avoid stunted fruit or weak vines. Too much nitrogen early on will produce lush leaves but no pumpkins, while potassium shortages later cause poor fruit development.
The key is balancing these nutrients precisely—starting with low nitrogen at planting and shifting to higher potassium as flowers appear.
Most gardeners overdo nitrogen because it greens up foliage quickly, but pumpkins prioritize fruit production over leafy growth. A soil test before planting reveals your starting nutrient levels, letting you adjust synthetic or organic blends.
For example, if your soil tests high in nitrogen, cut back and add potassium-rich amendments like wood ash or banana peels.
Here’s the science-backed breakdown: seedlings need 10-5-10 NPK (low potassium to prevent salt burn), vines thrive on 5-10-15 NPK (moderate nitrogen), and fruiting stages demand 2-5-10 NPK (prioritizing potassium for disease resistance and fruit filling).
⚠️ Warning: Never use high-nitrogen fertilizers (like 10-0-0) after flowering—this diverts energy to leaves instead of fruit. I’ve seen pumpkin patches with foot-long vines but no pumpkins because of this mistake.
For organic gardeners, compost tea (1-0-0.5 NPK) works for seedlings, while greensand (0-0-8) boosts potassium during fruiting. Synthetic fertilizers like 5-10-10 are faster but require careful watering to avoid root burn.
🌱 Pro Tip: Split your fertilizer applications into 3 phases—seedling, vine, and fruit—to match the plant’s needs. Overloading at one stage throws off the entire season.
Below is a growth-stage guide with exact ratios, DIY blend recipes, and soil test thresholds to follow for a bountiful harvest.
⚠️ Critical: If your soil test shows potassium levels below 150 ppm, amend with potassium sulfate or wood ash before planting. Low potassium leads to blossom-end rot and weak stems.
Now let’s dive into the stage-by-stage ratios and DIY recipes tailored to your pumpkin’s needs.
🌿 Key Insight: The N:K ratio should shift from 2:1 (seedlings) to 1:3 (fruiting) for optimal fruit set and size.
✅ Ready to adjust? Grab your soil test results and compare them to the table below to create a custom fertilizer plan for your pumpkins.
Use this table as your fertilizer roadmap. For example, if your soil tests show low potassium (below 150 ppm), focus on the vine growth and fruiting stages with potassium-heavy blends like greensand or banana peel tea.
💡 Science Note
Signs of over-fertilization vs. deficiencies in pumpkin plants
Pumpkin plants show dramatic symptoms when their nutrient balance is off. Over-fertilizing with nitrogen causes leaf burn, while deficiencies trigger yellowing or stunted growth. Learning these visual cues helps you correct imbalances before they ruin your harvest.
I’ve seen nitrogen burn turn leaves crispy brown overnight—it’s a heartbreaking sight for any gardener!
Start by checking your leaf color and vine health. Dark green leaves with slow fruit development often mean potassium deficiency, while pale yellow leaves signal nitrogen starvation.
Micronutrient issues like magnesium deficiency cause interveinal yellowing, similar to calcium issues. Each problem requires a different fix, so let’s break it down.
⚠️ PROS-CONS BOX: Fertilizing Pumpkin Plants
Use a soil test kit (ideal pH: 6.0–7.0). Adjust with lime or sulfur if needed.
Excess nitrogen (N) causes leaf burn and stunts fruit growth.
Start with 10-10-10 NPK at planting, then switch to 5-10-10 during fruiting.
Lack of magnesium or calcium causes yellowing or blossom-end rot.
Always water deeply to prevent root burn from concentrated fertilizer.
Stop feeding 4–6 weeks before harvest to avoid bitter-tasting fruit.
If your pumpkin leaves develop brown crispy edges with yellow centers, you’re dealing with nitrogen burn. This happens when excess nitrogen builds up in the soil. Flush the soil with water and switch to a low-nitrogen fertilizer like 5-10-10.
For potassium deficiency, look for weak vines with yellow leaf edges—apply potassium sulfate or wood ash.
Micronutrient deficiencies are trickier. Magnesium deficiency (yellow patches between veins) responds to Epsom salt (1 tbsp per gallon of water), while calcium issues (blossom-end rot) need crushed eggshells or calcium nitrate. Always water thoroughly after applying these amendments to avoid root damage.
For quick troubleshooting, use this visual flowchart:
- Dark green leaves + small fruit → Potassium deficiency (feed with potassium-rich fertilizer).
- Yellow leaves + weak stems → Nitrogen deficiency (apply balanced fertilizer).
- Brown leaf edges → Nitrogen burn (flush soil and reduce fertilizer).
- Yellow veins + weak growth → Micronutrient deficiency (use chelated micronutrients).
Remember, pumpkins thrive on consistency. Over-correcting can cause new problems, so monitor your plants weekly and adjust gradually. With the right balance, you’ll grow vines strong enough to support monster-sized pumpkins—just like the pros! 🎃