Propagation
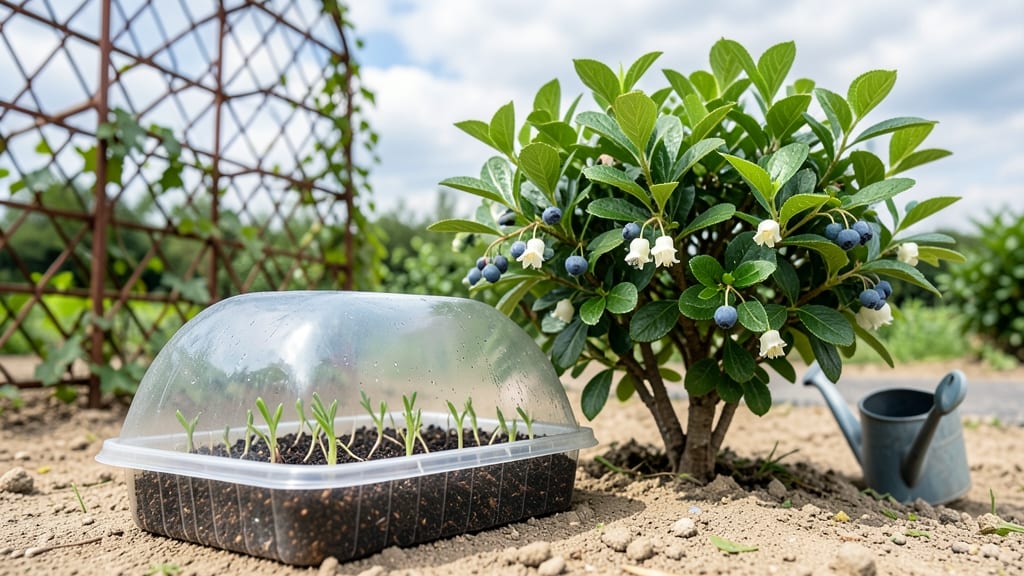
Blueberry plant propagation through layering is how I doubled my bushes without digging up a single root. The trick works best in late spring or early summer when new growth is vigorous but not yet woody—this is when blueberries are most eager to put down roots on their own.
All you need is a sharp pair of pruners, some rooting hormone (optional but helpful), and a few minutes to bend a low-growing branch to the ground. No fancy setups, no transplant shock—just a branch that eventually becomes its own plant.
This method works for both wild and cultivated varieties, though southern highbush types respond fastest.
By late summer, you’ll spot tiny roots forming where the branch touches the soil. Once they’re an inch long, cut the connection to the parent plant and transplant.
The new bush takes about a year to bear fruit, but the payoff is worth the patience—thicker canes and more berries than store-bought plants.
Best part? You can propagate multiple plants from one mature bush, turning a single plant into a small grove over time. Just avoid overwatering during root development, and keep the soil slightly acidic—blueberries won’t tolerate anything alkaline.
📚 In This Guide
- What you need
- Instructions
- Tips and common mistakes
- Wrapping up and next steps
What you need
- ● Mature blueberry plant: Choose a healthy, established plant (at least 2–3 years old) with flexible, semi-woody stems.
- ● Sharp pruning shears or bypass pruners: Sterilized to prevent disease (rubbing alcohol works!).
- ○ Rooting hormone (optional but recommended): A powder or gel to boost root growth (e.g., Rootone or Dip’N Grow).
- ● Plastic or metal plant ties: 1–2 per layer, or substitute with bent wire or twist ties.
- ● Moisture-retentive medium: Option 1: Sphagnum moss (pre-moistened, 1–2 inches thick).
- ● Option 2: Peat moss + perlite mix (50/50 ratio).
- ○ Plastic wrap or clear plastic bag: To create a humidity dome (optional but helpful for faster rooting).
- ● Watering can or spray bottle: For gentle hydration (avoid soaking).
- ● Permanent marker: To label layers by date (e.g., “June 2024”).
- ● Timing: Propagate in early spring (before new growth) or late summer (after fruiting).
- ● Weather: Mild, 60–75°F (15–24°C) temps with consistent moisture.
- ● Location: Partial shade (e.g., dappled sunlight) for the layered stems.
- ○ pH Test Kit (optional): Ensure your soil is acidic (4.5–5.5 pH)—blueberries love it!
Step-by-Step instructions for blueberry plant propagation using layering
This layering technique lets you grow new blueberry plants without digging up existing ones—ideal for busy gardeners.
Select Healthy Blueberry Branches for Layering
Choose flexible, 1-year-old branches that are 6-12 inches long and ½-inch thick—they should bend easily without snapping. Look for branches with multiple buds along their length, as these will develop into new stems. Avoid branches that are too woody or show signs of disease, like discolored bark or spots.
I like to work in early spring when new growth is just starting but before the plant flowers. This gives the new roots time to establish before summer heat sets in. Gently bend the selected branch downward until it touches the soil—you’ll hear a slight crack as the branch bends, which is normal and helps stimulate root growth.
Prepare the Branch and Soil for Layering
Make a small nick or scratch about ½-inch deep along the underside of the branch where it will touch the soil. This tiny wound encourages root formation by breaking the branch’s protective layer. Don’t cut all the way through—just enough to expose a little of the inner wood.
Loosen the soil around the base of the parent plant with your fingers or a small hand trowel. You want the soil to be light and crumbly, not compacted. If your soil is heavy clay, mix in a handful of compost or peat moss to improve drainage and aeration. This step is critical—roots need air and moisture to grow, and compacted soil smothers them.
Bury the Branch and Secure It in Place
Gently press the nicked section of the branch into the soil, covering it with about 2-3 inches of dirt. Use a small rock or bent wire to hold the branch in place without crushing it. The goal is to keep the branch buried just enough to encourage roots but not so deep that it cuts off airflow to the wound.
Water the area thoroughly until the soil is moist 2-3 inches deep. You’ll know it’s right when water runs out of the holes in your pot or when the soil feels damp but not soggy. Mulch the area with 1-2 inches of straw or wood chips to retain moisture and protect the new roots from drying out. Check the soil weekly—it should stay consistently moist but never waterlogged.
Monitor and Encourage Root Growth
In 6-8 weeks, roots should begin forming at the nicked section. You’ll notice the branch feels stiffer when you gently tug on it—this is your signal that roots are taking hold. If the branch still bends easily, give it another 2-4 weeks of patience. Avoid disturbing the area too much, as even a small bump can break the delicate new roots.
Once roots are established, cut the branch below the new roots to separate it from the parent plant. Dig carefully around the base of the new plant to avoid damaging the roots. Transplant it to its own pot or garden spot, making sure to water it deeply after moving. The first few weeks after transplanting are critical—keep the soil moist and provide partial shade to reduce stress on the young plant.
Care for Your New Blueberry Plant
Your new blueberry plant will need consistent moisture and acidic soil (pH 4.5-5.5) to thrive. If you’re growing in a pot, use a balanced fertilizer every 4-6 weeks during the growing season. In the garden, mulch around the base with pine needles or peat moss to maintain acidity and retain moisture.
Blueberries are sun-loving plants, so place your new layering in full sun (at least 6-8 hours daily). In the first year, focus on root and stem development rather than fruit production. You’ll see the first berries in 2-3 years, but the wait is worth it for a healthy, homegrown plant. Prune any weak or crossing branches in late winter to encourage a strong, open shape.
Tips & tricks for perfect blueberry plant propagation using layering
These simple but game-changing tips will help you maximize your success rate with blueberry plant propagation, ensuring healthy root growth without the hassle of digging.
Branch Selection is Everything: In Step 1, when choosing branches, prioritize those with multiple buds—each bud has the potential to grow into a new stem. I've found that branches with at least three buds along the 6-12 inch length give the best results. Avoid branches that are too woody or show any signs of disease, as these won't develop strong roots. The slight crack you hear when bending the branch is actually a good sign—it indicates the branch is flexible enough to form new roots.
The Soil Preparation Secret: During Step 2, don't underestimate the importance of that light, crumbly soil texture. If you're working with heavy clay soil, mixing in compost or peat moss is absolutely critical. I've seen propagation attempts fail completely when roots couldn't penetrate compacted soil. For best results, aim for soil that feels like a well-worn sponge—moist but not soggy, and with plenty of air pockets for root development.
Watering Wisdom: When you water thoroughly in Step 3, you're not just keeping the soil moist—you're creating the perfect environment for root formation. The key is maintaining that consistent moisture level at 2-3 inches deep. I've learned the hard way that letting the soil dry out completely between waterings can stall root development. Use your finger to check moisture weekly—it should feel damp like a wrung-out sponge, not dry or waterlogged.
Root Development Timeline: In Step 4, remember that the 6-8 week window is just a guideline. Some branches may take up to 12 weeks to develop strong roots, especially in cooler climates. The stiffness test is your best indicator—if the branch still bends easily after 8 weeks, give it another 2-4 weeks before checking again. Patience here pays off in stronger, more established plants that'll thrive when transplanted.
Pro Tips for Blueberry Plant Propagation
- These simple but game-changing tips will help you maximize your success rate with blueberry plant propagation, ensuri...
- Branch Selection is Everything: In Step 1, when choosing branches, prioritize those with multiple buds—each bud has t...
- The Soil Preparation Secret: During Step 2, don't underestimate the importance of that light, crumbly soil texture. I...
Frequently asked questions
Got questions about propagating blueberries?
You’re not alone! Here are answers to the most common queries to help you grow thriving plants with confidence.
When is the best time to start layering blueberry plants?
The ideal time is late spring to early summer (May–June in most climates). This gives roots enough time to establish before winter. Avoid layering in extreme heat or drought—soil moisture is key! For cooler regions, early fall can work too, but protect layers from frost.
How long does it take for layers to root?
Root formation typically takes 4–8 weeks, depending on warmth, moisture, and humidity. You’ll know it’s working when you see new growth on the layered stem or gentle resistance when tugging it. Patience pays off—don’t rush to separate too soon!
What if my layers aren’t rooting? Troubleshooting tips?
Check these fixes:
- Moisture: Keep soil consistently damp (not soggy). Use a plastic bag or clear container to trap humidity.
- Light: Partial shade helps—direct sun can dry out layers.
- Hormone: Dip cut ends in rooting hormone for a boost.
- Patience: Some varieties (like rabbiteye) root slower—wait until fall to check.
Can I propagate blueberries from store-bought plants?
Probably not! Most grocery-store blueberries are grafted (rootstock + scion) or grown from cuttings, so their roots won’t produce true-to-type plants. Stick to nursery-grown or wild-harvested plants for reliable propagation. Pro tip: Look for dormant canes in late winter for best results!
What’s the difference between layering and cutting propagation?
| Layering | Cuttings |
|---|---|
| Grows roots while still attached to the parent plant; lower stress. | Requires severing stems and rooting in soil/mist; higher failure risk. |
| Best for established bushes (e.g., tip or mound layering). | Works for softwood/hardwood cuttings from young growth. |
| Faster, easier for beginners. | Better for large-scale propagation or limited parent plants. |
Layering wins for blueberries—it’s gentler and more reliable!
Wrapping up and next steps
Mastering the art of blueberry plant propagation through layering is a rewarding way to expand your garden without digging up a sweat! Whether you’re a beginner or a seasoned gardener, this method opens the door to healthy, thriving bushes with minimal effort.
Now that you’ve got the know-how, it’s time to roll up your sleeves and give it a try—your future blueberry harvests will thank you!
🌱 Next step: Pick a sunny spot, gather your supplies, and start layering! Watch your blueberry plants grow roots and multiply—nature’s way of saying, “You’ve got this!” 💙