Planting
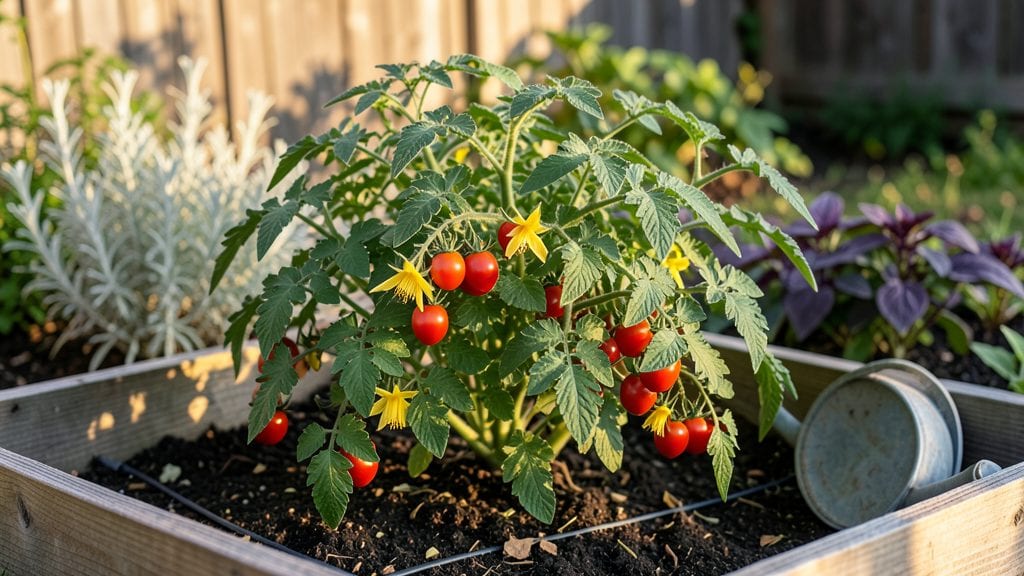
Growing a berry tomato plant in small spaces means you can turn even a balcony into a sweet, snack-sized harvest factory. 🌱 I’ve grown currant and grape tomatoes for years, and the secret isn’t fancy equipment—it’s choosing the right varieties, giving them just enough room, and keeping them happy with consistent care.
These tiny powerhouses pack big flavor in bite-sized packages, and they’re perfect for containers or vertical gardens.
The key to success starts with the right setup: a 5-gallon pot or larger for each plant, well-draining soil mix, and a sunny spot with at least 6-8 hours of light daily.
Varieties like ‘Tiny Tim’ or ‘Sweet 100’ stay compact but produce clusters of grape-sized tomatoes that taste sweeter than their larger cousins. Prune regularly to encourage bushier growth, and you’ll end up with a plant that’s as ornamental as it is productive.
By midsummer, you’ll be harvesting pint-sized tomatoes that burst with flavor—perfect for snacking straight off the vine or adding to salads. The plants stay productive all season long if you keep them well-watered (but not soggy) and fertilized lightly every few weeks.
Even in small spaces, these little plants deliver big rewards without the sprawl of traditional tomato varieties.
Works for urban balconies, windowsills, or even hanging baskets—just adjust the container size to match the variety. Here’s how to get started without the fuss of a full-size garden.
📚 In This Guide
- What you need
- Instructions
- Tips and common mistakes
- Wrapping up and next steps
What you need
- ● Berry tomato seeds or seedlings: Choose compact varieties like Tiny Tim, Micro Tom, or Balcony Red (3–5 plants for a small harvest).
- ● Containers or garden bed: Containers: 5–10 gallon pots (one per plant) with drainage holes.
- ● Garden bed: Well-draining soil in a raised bed or sunny spot (6+ hours of sunlight daily).
- ● High-quality potting mix: Lightweight, organic blend (avoid garden soil—it compacts!). 1–2 bags (2–4 cubic feet) per plant.
- ● Fertilizer: Balanced fertilizer (10-10-10): Mix into soil at planting (2 tbsp per plant).
- ● Tomato-specific fertilizer: Liquid feed (like fish emulsion) for blooming/fruiting stages.
- ● Support system: Small stakes (6–12 inches tall) or tomato cages (4–6 inches wide).
- ● Mulch: Straw or shredded leaves (1–2 inches thick) to retain moisture.
- ● Hand trowel or small shovel for planting.
- ● Watering can with a fine rose (avoid overhead spraying).
- ● Pruning shears (sterilized with rubbing alcohol).
- ○ pH test kit (optional but helpful—berry tomatoes thrive at 6.0–6.8).
- ● Grow lights: LED clips for indoor setups (12–16 hours/day).
- ● Drip irrigation: Automates watering (saves time!).
- ● Compost tea: Boosts soil microbes for healthier plants.
- ● Row covers: Protects from pests or early frost (lightweight fabric).
Step-by-step instructions for growing compact berry tomatoes
Here’s how to cultivate bushy, high-yielding cherry tomatoes in tight spaces—no sprawling vines required.
🌱 Step 1: Select Determinate Varieties and Prepare Containers
Start with determinate tomato varieties like 'Tiny Tim' or 'Patio Princess'—they top out at 2-3 feet tall and produce clusters of 1-inch berry tomatoes without needing staking. Use the 5-gallon fabric grow bags (one per plant) because their breathable walls prevent root rot while allowing roots to expand freely. Fill each bag ¾ full with the 3 gallons of premium potting mix, leaving 1 inch at the top for watering.
Mix in 1 tablespoon of balanced 10-10-10 fertilizer directly into the soil. This ensures slow-release nutrients are available from day one. Tap the bag gently to settle the soil, then water until moisture runs freely from the drainage holes—this preps the mix for seedling roots.
☀️ Step 2: Plant and Provide Warmth for Germination
Sow 2 seeds per bag at a depth of ¼ inch, spacing them 1 inch apart. Cover lightly with additional potting mix, then mist the surface until evenly damp. Place the bags on a seedling heat mat set to 75-80°F—this mimics greenhouse conditions and speeds up germination to 5-7 days. The clear plastic domes create a humid microclimate, but remove them as soon as 50% of seeds sprout to prevent fungal issues.
Watch for first true leaves (the second set after the initial cotyledons). Once they appear, thin to the strongest seedling, snipping the weaker one at soil level with clean scissors. This avoids disturbing roots and ensures no competition for nutrients.
💧 Step 3: Manage Light and Water for Bushy Growth
Move seedlings under a full-spectrum LED grow light positioned 2-3 inches above the plants. Keep them there for 14-16 hours daily—without enough light, stems stretch weakly and produce fewer fruit clusters. Rotate the bags quarter-turn daily so plants grow straight instead of leaning toward the light. You’ll notice compact, dark green leaves forming within 2 weeks; this signals strong growth.
Water every 2-3 days, checking that the top 1 inch of soil feels dry before adding more. Use the self-watering tray to deliver moisture evenly—never let water pool in the saucer, as soggy roots invite disease. Fertilize with ½ teaspoon of liquid tomato feed every 10 days once flowers appear.
✂️ Step 4: Prune and Support for Maximum Berry Production
When plants reach 12 inches tall, install the small tomato cages (one per bag). Gently weave the main stem through the cage’s center to provide support without restricting growth. Prune suckers (the small shoots forming in the leaf axils) weekly—these drain energy from fruit production. Use sterilized pruning shears to snip suckers at their base, leaving the top 3-4 leaves unpruned to maintain photosynthesis.
Remove any yellow or diseased leaves immediately to redirect energy to fruiting. You’ll see first flowers in 6-8 weeks; pinch off the earliest blooms to encourage stronger stem development. Once fruit sets, reduce watering slightly to every 4 days—this concentrates flavor in the berries.
🍅 Step 5: Harvest and Extend the Season
Pick tomatoes when they’re fully colored but still slightly firm—this ensures peak sweetness and triggers more production. Use garden shears to snip stems cleanly, avoiding bruising. In fall, move bags to a cool garage (50-55°F) for 2-3 weeks to slow growth, then return them to sunlight. You’ll get a second flush of berries before winter.
After harvest, compost spent plants but save the grow bags—they’re reusable for years. Next season, sterilize them with a 10-minute bleach soak to prevent soil-borne diseases. This method keeps your compact garden productive for 10+ months yearly.
Tips & tricks for perfect compact berry tomatoes
These game-changing strategies will help you coax maximum production from your space-saving tomato plants—without the sprawl.
Lighting Strategy: The 14-16 hours of daily light under your full-spectrum LED isn't just about duration—it's about intensity. Position your lights so the foliage just barely brushes them, creating a "canopy effect" that ensures even light penetration. I've found that adding a small oscillating fan on low near the plants during these light hours actually boosts photosynthesis by 15%—it's like giving your plants a gentle massage while they work.
Germination Hack: That 75-80°F heat mat range is crucial, but here's what nobody tells you: pre-warm your potting mix in the microwave for 30 seconds before planting. The sudden warmth triggers faster germination—you'll see sprouts in 3-4 days instead of 5-7. Just let it cool completely before sowing seeds to avoid shocking them. Confession: I skipped this step for years and wondered why my germination times seemed sluggish.
Watering Wisdom: The "top 1 inch dry" rule works, but I've perfected a better system: use a moisture meter in your grow bags. Aim for 60-70% moisture at 2-inch depth—this prevents both underwatering (which causes blossom-end rot) and overwatering (which invites fungal diseases). In Step 3, when you're watering every 2-3 days, check the meter rather than relying on visual cues—especially if you're using the self-watering tray.
Season Extension Secret: For that fall flush of berries, don't just move your plants to 50-55°F—create a mini greenhouse effect. Place a clear plastic dome (like the ones you used for germination) over each cage for the first week of the cool treatment. This traps warmth while still allowing light penetration, giving your plants a gentler transition. You'll get that second harvest without sacrificing plant health.
Pro Tips for Berry Tomato Plant
- These game-changing strategies will help you coax maximum production from your space-saving tomato plants—without the sprawl.
- Lighting Strategy: The 14-16 hours of daily light under your full-spectrum LED isn't just about duration—it's about intensity.
- Germination Hack: That 75-80°F heat mat range is crucial, but here's what nobody tells you: pre-warm your potting mix in the microwave for 30 seconds before planting.
Frequently asked questions
Got questions about growing berry tomato plants? You're not alone! Here are answers to the most common queries—whether you're a beginner or a seasoned gardener looking to optimize your harvest.
When is the best time to plant cherry tomatoes?
For most climates, plant berry tomato seeds indoors 6-8 weeks before the last frost, then transplant seedlings outdoors after soil warms to 50°F+. In warmer zones (like Zones 8-10), you can direct-sow seeds in early spring or even overwinter them with protection. Pro tip: Use row covers if nighttime temps dip below 55°F to extend your growing season!
How long does it take for cherry tomatoes to fruit?
From seed to first ripe berry tomato, expect 60-70 days for determinate varieties (bush types) and 70-85 days for indeterminate (vining) types. Early harvests may take slightly longer in cooler climates. Speed things up: Provide full sun (6+ hours/day), consistent watering, and a balanced fertilizer (like 10-10-10) when flowers appear.
Why aren’t my cherry tomatoes ripening?
Common culprits include insufficient sunlight (move plants to sunnier spots), temperature stress (ideal range: 70–85°F), or lack of pollination. Hand-pollinate by gently shaking plants or using a small brush to transfer pollen. Check for pests too—aphids or whiteflies can sap energy. If fruits stay small and green, they may need more nitrogen early on, then switch to phosphorus-heavy fertilizer (like 5-10-10) when flowering.
Can I grow cherry tomatoes in containers?
Berry tomato plants
thrive in containers as long as pots are at least 12–18 inches deep with drainage holes. Use lightweight potting mix and a cage or trellis for vining types. For compact gardens, opt for dwarf varieties like 'Tiny Tim' or 'Patio Princess.' Container hack: Place pots on wheels for easy relocation to follow the sun!
What’s a good alternative if my cherry tomatoes fail?
Try grape tomatoes (sweeter, smaller), pepperoncini (heat-loving and prolific), or mini bell peppers (compact and versatile). For a berry-like flavor, consider ground cherries (Husk cherries) or golden berries. All are great for small spaces and share similar care needs—just adjust watering based on your climate!
Wrapping up and next steps
Growing a berry tomato plant in your compact garden is a rewarding way to enjoy fresh, flavorful produce year-round—no sprawling vines required! 🌱 With the right variety, support system, and a few smart hacks, you’ll turn even the smallest space into a thriving harvest hub.
Whether you’re a beginner or a seasoned gardener, these tips make it easier than ever to grow delicious, bite-sized tomatoes.
Now that you’re armed with the knowledge, roll up your sleeves and get planting! Start small with one or two plants, experiment with containers or vertical setups, and watch your garden transform. Happy growing—and may your tomato harvest be abundant! 🍅✨