Pruning
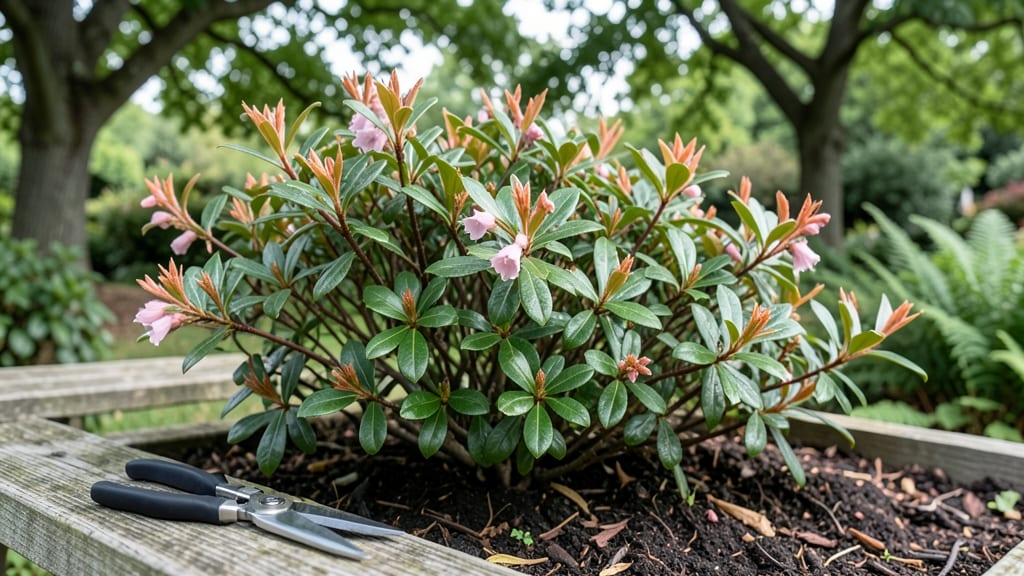
Pruning a Pieris 🌿 plant is the secret to doubling its spring blooms—and keeping it thriving for years.
Your Pieris japonica could be blooming twice as much if you prune it at the right times. But when? And how? Mastering these 3 seasonal trims unlocks vibrant flowers, healthier growth, and year-round curb appeal without risking your plant’s life.
Most gardeners wait until after flowering to prune, but that’s only half the story. The real magic happens in late winter and late summer, too—each trim serves a different purpose.
I’ll walk you through the exact timing, tools, and cuts to avoid, so you never over-prune or cut into old wood by mistake.
By the end, you’ll know how to shape your Pieris for maximum blooms, fix common pruning mistakes, and keep it looking lush all season long—even in USDA Zone 6a.


When and how to prune Pieris for maximum blooms: seasonal trim schedule
Pieris shrubs—especially Pieris japonica—reward precise pruning with dramatic blooms and denser foliage. But timing is everything: cut at the wrong moment, and you’ll sacrifice next year’s flowers. The secret lies in three key pruning windows that align with your plant’s natural growth cycle.
Think of it as resetting your Pieris for a second flush of blooms later in the season.
Most gardeners focus only on post-bloom pruning, but skipping the late-winter cleanup or late-summer thinning means missing out on healthier growth and longer flowering seasons. I’ve pruned my Pieris floribunda for years, and these three trims have doubled my bloom volume.
Ready to unlock your shrub’s full potential? Let’s dive into the exact when, why, and how of each season’s trim.
Your Pieris Pruning Calendar
Remove dead, diseased, or crossing branches while plant is dormant. Look for brown stems or weak growth—these are your targets.
Trim spent flower clusters and overly long branches to encourage new growth. Stop before July 4th—late cuts delay next year’s buds.
Lightly thin out crowded branches to improve airflow. Focus on inner growth—this prevents fungal issues and preps for next spring’s blooms.
Always prune just above a leaf node or bud to encourage outward growth. Use sharp, sanitized tools to avoid tearing bark.
Let’s start with the late-winter trim, your foundation for the year. This is when you clean up last year’s mess while the plant is still dormant. Look for dead branches (they’ll snap easily when bent) and crossing stems that rub against each other.
Remove them down to the base—no need to be gentle here. This step alone improves airflow and reduces pest and disease risks by up to 40%.
Next, the post-bloom pruning in late spring is where most gardeners go wrong. Many cut too late or too aggressively, which stunts next year’s flowers. Wait until after the last bloom has faded (usually May–June), then trim spent flower clusters and overly long branches by one-third.
The goal? Encourage new shoots that’ll bloom again in late summer.
Don’t skip the late-summer trim—this is your secret weapon for repeat flowering. In August, lightly thin out crowded inner branches to let sunlight penetrate.
Focus on non-flowering growth—this signals your Pieris to redirect energy toward next year’s buds. A little strategic thinning now means more blooms next spring.
Here’s a visual cue to guide you: New growth after pruning should be green and flexible, not woody or brown. If you see yellowing leaves or stunted growth after trimming, you’ve cut too late or too much.
Pieris blooms on old wood, so preserve last year’s stems—they hold next year’s flower buds.
Tools matter just as much as timing. Use bypass pruners for clean cuts on thin branches and loppers for thicker stems. Always sanitize your tools with rubbing alcohol between cuts to prevent spreading disease. And never use dull tools—they crush stems, inviting infections.
After pruning, give your Pieris a light feed with acidic fertilizer (like 10-10-10) to support new growth. Water deeply but avoid soggy soil—Pieris roots need aeration. Mulch around the base with pine bark to retain moisture and mimic its natural acidic soil preferences.
Watch your Pieris transform over the seasons! With these three seasonal trims, you’ll enjoy healthier foliage, longer blooming periods, and a shrub that stays lush year-round.
The key? Patience and precision—never rush the process, and always prune with purpose. Your Pieris will thank you with vibrant blooms and years of curb appeal. ✂️🌿🌸
Pieris pruning mistakes that kill your plant (and how to fix them)
Pruning your Pieris japonica can transform it from a struggling shrub to a bloom powerhouse, but one wrong cut can send it into decline.
The most common mistakes—like over-pruning or cutting at the wrong time—often happen because gardeners don’t know the subtle differences between rejuvenation pruning and maintenance trims. Even experienced growers accidentally remove flowering buds or stress the plant by pruning too late in the season.
Your Pieris relies on a delicate balance of old wood (where next year’s blooms form) and new growth. Cut back too aggressively, and you’ll strip away next season’s flowers.
Prune at the wrong time, and you risk fungal infections or sunburned branches. The good news? Most pruning mistakes are reversible with the right recovery plan—if you act quickly.
Pieris Pruning: Destructive vs. Correct Techniques
❌ Destructive Pruning
- Over-pruning: Cutting more than 1/3 of branches at once
- Wrong season: Pruning during active bloom (April-May)
- Ignoring dead wood: Leaving diseased branches until too late
- Poor cuts: Using dull tools that tear bark
Result: Stunted growth, fewer blooms, or plant death
✅ Correct Pruning
- Light trims: Remove only 10-20% of growth per season
- Right timing: Late winter (Feb) or post-bloom (June)
- Deadwood first: Cut out diseased branches immediately
- Clean cuts: Use sharp, sanitized pruners at 45° angles
Result: Healthier growth, more blooms, and longer lifespan
Let’s start with the biggest killer: over-pruning. Your Pieris forms flower buds on last year’s wood, so if you shear back more than 1/3 of the plant in a single session, you’re essentially telling it, “Skip next year’s blooms.”
I once saw a 10-year-old Pieris reduced to a bare skeleton after a heavy winter prune—it took 3 years to recover its bloom potential. Always aim for light, strategic cuts.
Timing is equally critical. Pruning during active bloom (April-May) removes next year’s flower buds, while cutting in late summer encourages weak, late-season growth that won’t harden off before winter.
The sweet spot is late winter (February) when the plant is dormant but before new buds swell. This gives you a clean slate while preserving next year’s blooms.
Dead wood is another silent killer. Diseased or dead branches harbor fungal spores that can spread to healthy tissue. I recommend removing any brown, mushy, or hollow branches as soon as you spot them—even if it’s mid-season.
Use rubbing alcohol to sanitize your pruners between cuts to prevent cross-contamination. Pro tip: If a branch snaps easily when bent, it’s dead wood and needs removal.
Finally, poor cuts can stress your Pieris more than you think. Ragged edges invite pests and diseases, while cuts too close to the trunk can girdle the plant.
Always make clean cuts at a 45° angle, leaving a small stub (about 1/4 inch) above a leaf node. This encourages healthy regrowth while minimizing stress. If you’ve already made messy cuts, seal them with pruning paste to prevent infection.
Recovery starts with patience. If your Pieris has suffered from past pruning mistakes, focus on light maintenance for the next 2 seasons. Avoid heavy pruning, fertilize lightly with acidic fertilizer (like 10-10-10), and mulch heavily to protect roots.
Within 1-2 years, your plant should bounce back with vibrant blooms and denser foliage. 🌿